A residential roof that takes storm damage shows it visibly — missing shingles, lifted ridge caps, damaged flashings. A commercial flat roof keeps its damage mostly hidden. Membrane tears, displaced seams, blocked drains, and wet insulation beneath an intact surface layer look identical to an undamaged roof from the ground — until the interior starts showing water.
After any named storm that affects Jacksonville, commercial building owners and facility managers should conduct a systematic roof inspection within 24-48 hours. Here's the protocol JK Prestige follows on post-storm commercial roof inspections, and what you're looking for at each stage.
Why Commercial Flat Roofs Fail Differently Than Residential Roofs
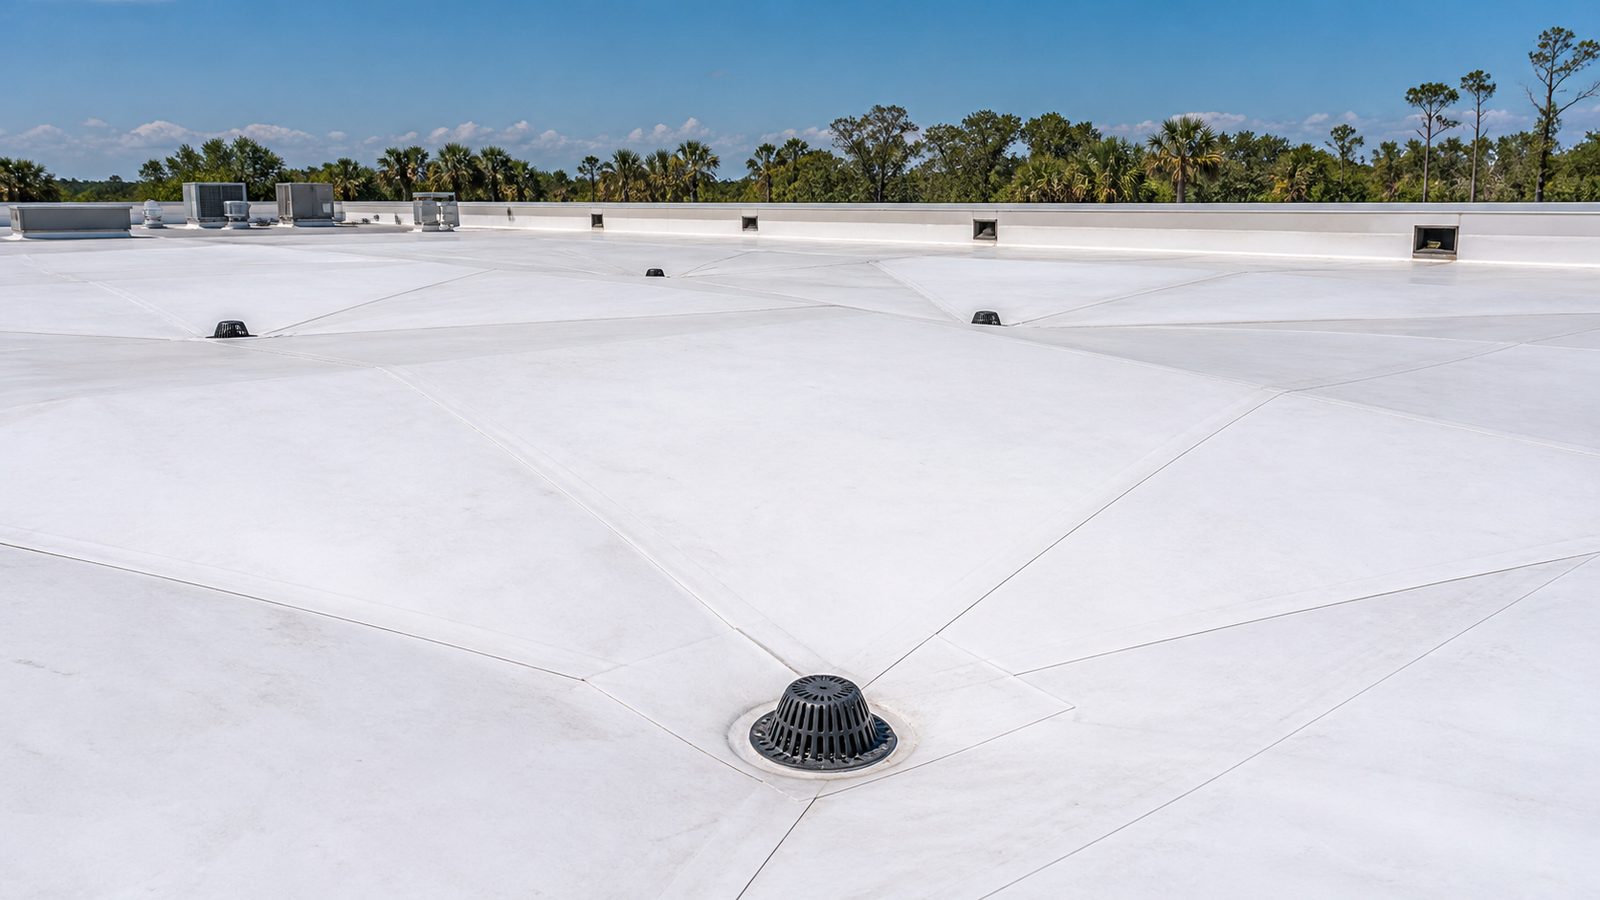
Commercial flat roofs — whether thermoplastic polyolefin (TPO), ethylene propylene diene monomer (EPDM), modified bitumen, or polyvinyl chloride (PVC) — have fundamentally different failure modes than sloped shingle roofs.
Drainage is the primary concern. A sloped shingle roof sheds water by gravity — wind can lift shingles, but water movement works for you. A flat commercial roof depends entirely on interior drains, scuppers, or gutters to remove water. If those are blocked by storm debris, water ponds on the membrane surface. Most commercial membranes are not designed for indefinite ponding — 48+ hours of standing water damages seams, accelerates membrane degradation, and adds structural load (water weighs 5.2 pounds per square foot per inch of depth).
Seams and penetrations concentrate risk. The weakest points in any membrane roofing system are the seams (where sheets of membrane are heat-welded or adhered together) and the penetrations (where pipes, HVAC curbs, drains, and skylights pass through the membrane). Wind loads pull at seams from below; penetration flashings are subjected to uplift and lateral forces that the field membrane is not.
Damage is not visible from the ground. A building owner who drives past their commercial property after a storm and sees no obvious debris or missing roof sections may assume the roof is intact. That assumption is wrong until proven by a roof-level inspection.
Stage 1: Ground-Level Visual Inspection
Before anyone goes on the roof, conduct a systematic ground-level visual inspection. This establishes what is visible without roof access and provides context for the roof-level findings.
What to look for from the ground:
- Lifted membrane or seams at the roof perimeter: On low-slope buildings, membrane edges that have separated from the parapet are sometimes visible from the parking lot or adjacent grade. This is a significant failure indicator.
- Displaced ballast: On ballasted EPDM systems (where the membrane is held in place by smooth river stone rather than mechanical fasteners), storm winds can displace ballast, exposing membrane sections to direct wind uplift. Visible ballast on the parking lot is a clear indicator.
- Obvious membrane tears or punctures: Large debris impacts (fallen tree limbs, equipment dislodged from the roof by wind) may create visible punctures in the membrane at the roof surface.
- Parapet coping displacement: Metal coping caps on top of the parapet wall can be lifted or displaced by wind. Look for coping sections that appear lifted, gapped, or entirely off the wall.
- HVAC equipment displacement: Rooftop HVAC units should be sitting level on their curbs. A unit that appears tilted or shifted has likely compromised its curb flashing.
Stage 2: Drainage System Check — Critical Within 24 Hours
Before or immediately upon accessing the roof, locate and inspect every drainage point. This is the highest-priority item in the first 24 hours.
What to check:
- Interior drains: These are typically 4-8 inch diameter drains with a strainer or dome. After a storm, strainers are commonly clogged with leaves, debris, and roofing materials from damaged sections of the same roof or adjacent buildings. Clear every strainer manually — do not leave this to a re-inspection.
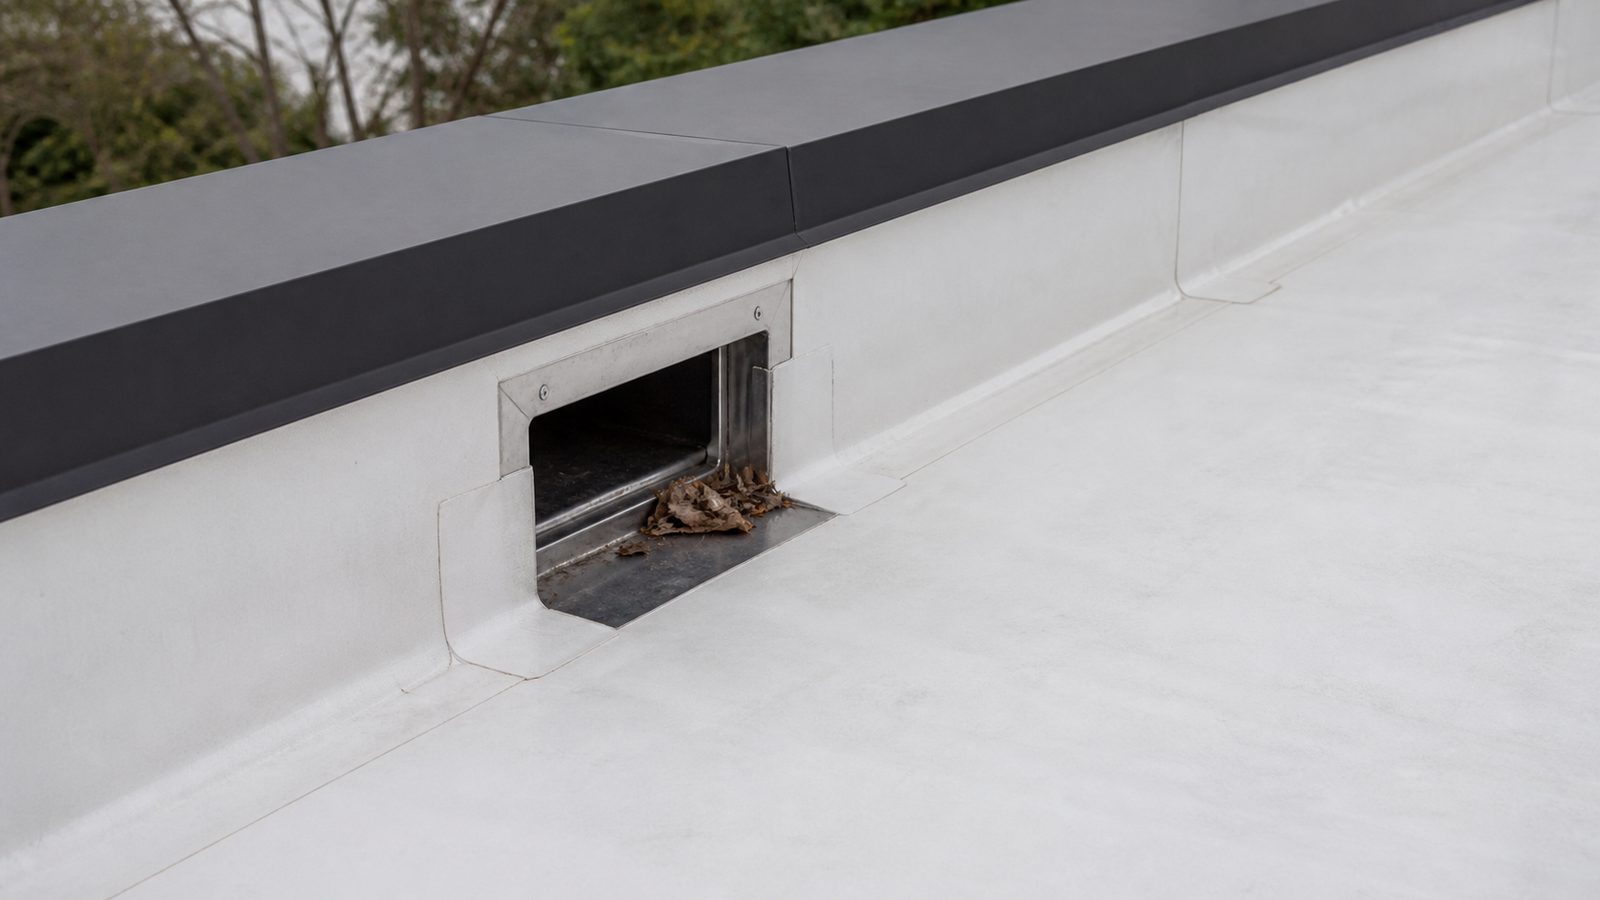
- Scuppers: Scuppers are openings through the parapet wall that allow water to drain off the roof surface. Storm debris commonly blocks scuppers, particularly on buildings near mature trees. Check every scupper opening and clear any debris.
- Emergency overflow drains: Most commercial roofs in Florida are required to have emergency overflow drains (set 2 inches above the primary drain level) to prevent structural overloading if primary drains are blocked. Verify that emergency overflows are also clear.
- Standing water already present: If you are inspecting within 12-24 hours of the storm and there is already standing water on the roof, document the depth with a measuring stick or ruler at multiple locations. This establishes the drainage failure for the insurance claim.
Why this cannot wait: Standing water on a commercial membrane adds significant dead load. A 100,000 sqft flat roof with 2 inches of standing water across even 20% of its surface has approximately 200,000 pounds of additional load — 100 tons. Most commercial roof structures are designed for a defined live load that includes a small ponding allowance, but not sustained standing water at depth.
Stage 3: Roof-Level Membrane and Seam Inspection
With the drainage situation addressed, conduct a systematic inspection of the membrane surface and seams.
What to assess:
- Field membrane condition: Walk the entire accessible roof surface and look for tears, punctures, blistering, or bubbling in the membrane. Small punctures are easily missed — look for disruptions in the membrane surface texture.
- Seam integrity: At each factory seam (where sheets of TPO or EPDM overlap and are bonded) and at each field seam (made during installation), check whether the seam has separated. TPO seams are heat-welded; a separated weld is visible as a lifted or gaping seam edge. EPDM seams are typically adhesive-bonded; separation shows as a gap or lifted edge.
- Penetration flashings: At every roof penetration — HVAC curb, pipe, drain, vent stack, skylight — check the flashing. Post-storm, look for lifted flashing boots, separated clamping rings, and torn or pulled membrane at the transition from the field to the penetration.
- Termination bars and perimeter edge metal: Membrane termination at the parapet is typically secured with termination bars — metal strips that clamp the membrane to the wall and are covered with caulk. Post-storm, look for lifted termination bars, gaps in the caulk, and membrane that has pulled away from the wall.
Stage 4: Infrared Moisture Scanning When Intrusion Is Suspected
Visual inspection identifies surface conditions. It does not identify moisture that has migrated beneath the membrane into the insulation layer. Wet insulation is a slow-moving problem — it adds load, accelerates membrane degradation from below, promotes mold in the insulation and deck, and dramatically reduces the insulation's thermal performance.
An infrared (IR) thermographic scan of the roof surface detects wet insulation by identifying areas where the thermal mass of wet insulation causes the surface temperature to be higher than surrounding dry areas after sunset (when the roof is cooling). IR scanning is:
- Non-destructive
- Highly accurate for locating the boundaries of wet insulation
- Required by most commercial roofing manufacturers before warranty repairs are performed (to confirm the scope of moisture-affected area)
For any commercial building that experienced active interior water intrusion after the storm, or for any building where visual inspection identified seam failures or significant penetration damage, an IR scan should be completed before repair estimates are finalized. Repairing the surface over wet insulation without removing and replacing the wet insulation accelerates future failure.
JK Prestige coordinates IR scanning through our commercial roofing process. See our roofing division capabilities for commercial properties and how we document damage for insurance claims at The JK Way.
Stage 5: Parapet and Coping Check — The Point Water Enters Most Often
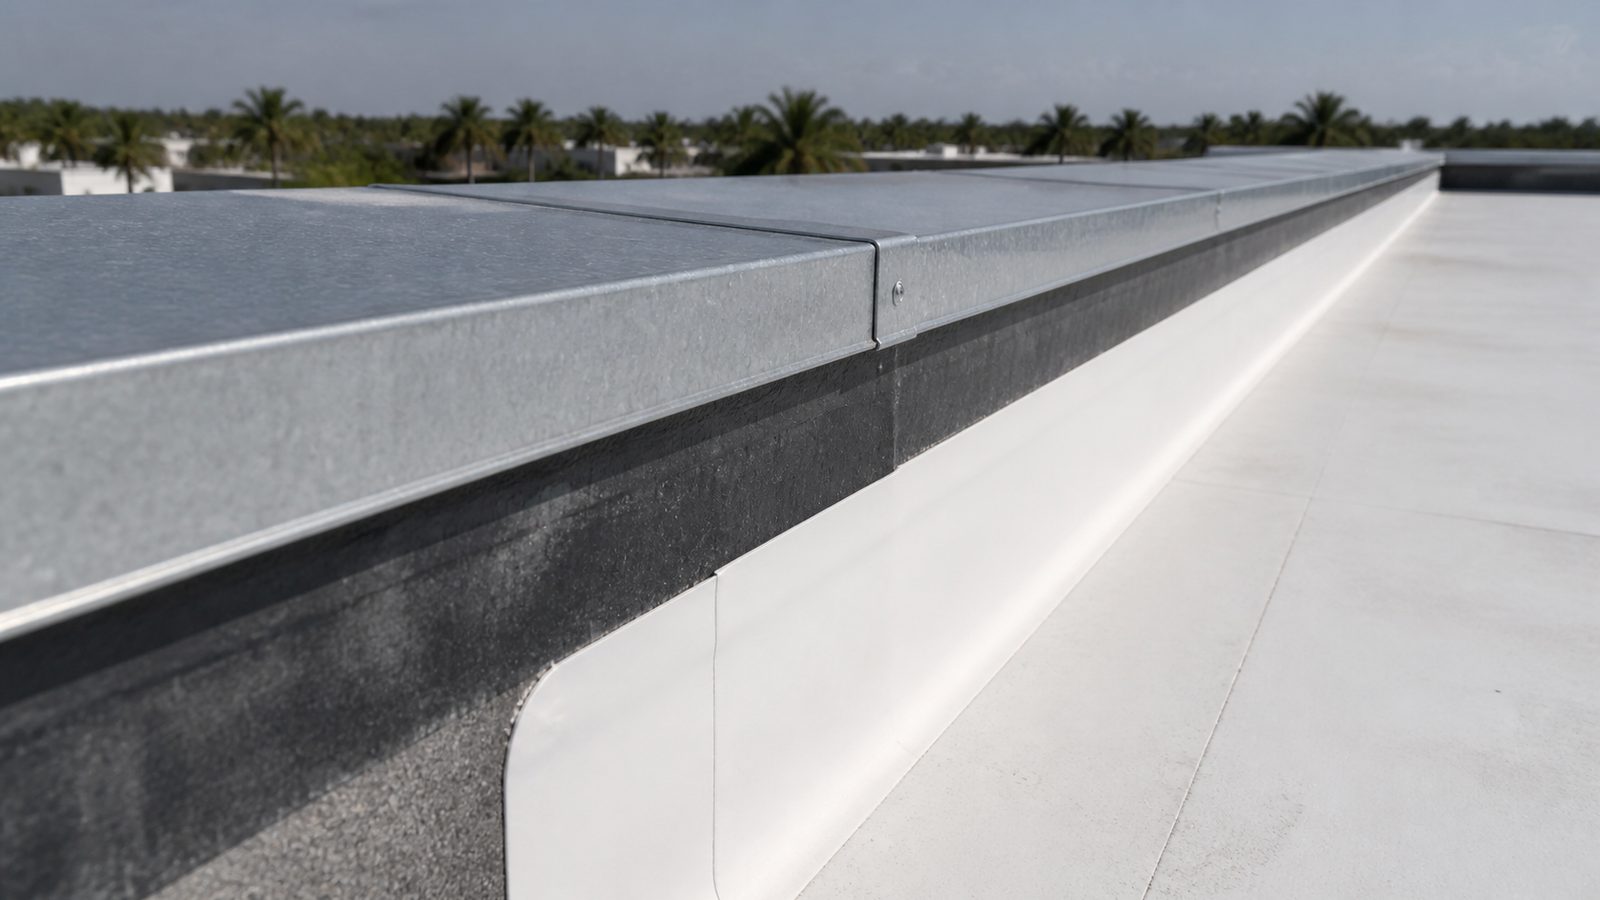
The parapet wall (the short wall around the roof perimeter) and its coping (the metal cap on top) are primary wind damage points on commercial buildings. Coping sections are long metal pieces that are lapped and sealed at the seams — wind loads can peel them back from the ends, separate the lapped joints, or lift the entire section.
What failed coping creates: When the coping is displaced or its sealant is blown out, water enters the parapet wall — not the roof membrane directly. Water that enters the parapet migrates down through the wall cavity, appearing as interior water damage at the wall-ceiling interface. This is often mistaken for a roof membrane leak.
Check every coping section for:
- End-to-end gap at coping sections (should be sealed with coping sealant)
- Coping that has shifted out of position
- Coping cleat or anchor clips that have pulled from the parapet wall
- Flashing at the inside face of the parapet (counter-flashing) that has separated from the wall
Book your free post-storm commercial roof inspection — contact the JK Prestige team. Call (904) 944-0278. A principal answers.
No call center. No coordinator. A JK principal reviews every inquiry and replies with a real number, not a range, not a follow-up form.
Request Free Estimate →