Concrete is unforgiving. Unlike framing, which can be modified after the fact, or drywall, which can be removed and reinstalled, concrete work that's done wrong stays wrong — or costs a significant amount of money to fix. Getting the sequence right from the beginning is the difference between a building that performs for 50 years and one that has chronic problems from year one.
On a ground-up commercial or industrial project in Florida, concrete work follows a defined sequence. This post walks through each stage, explains the decisions and inspection hold points that protect quality, and covers what can go wrong — and how to prevent it.
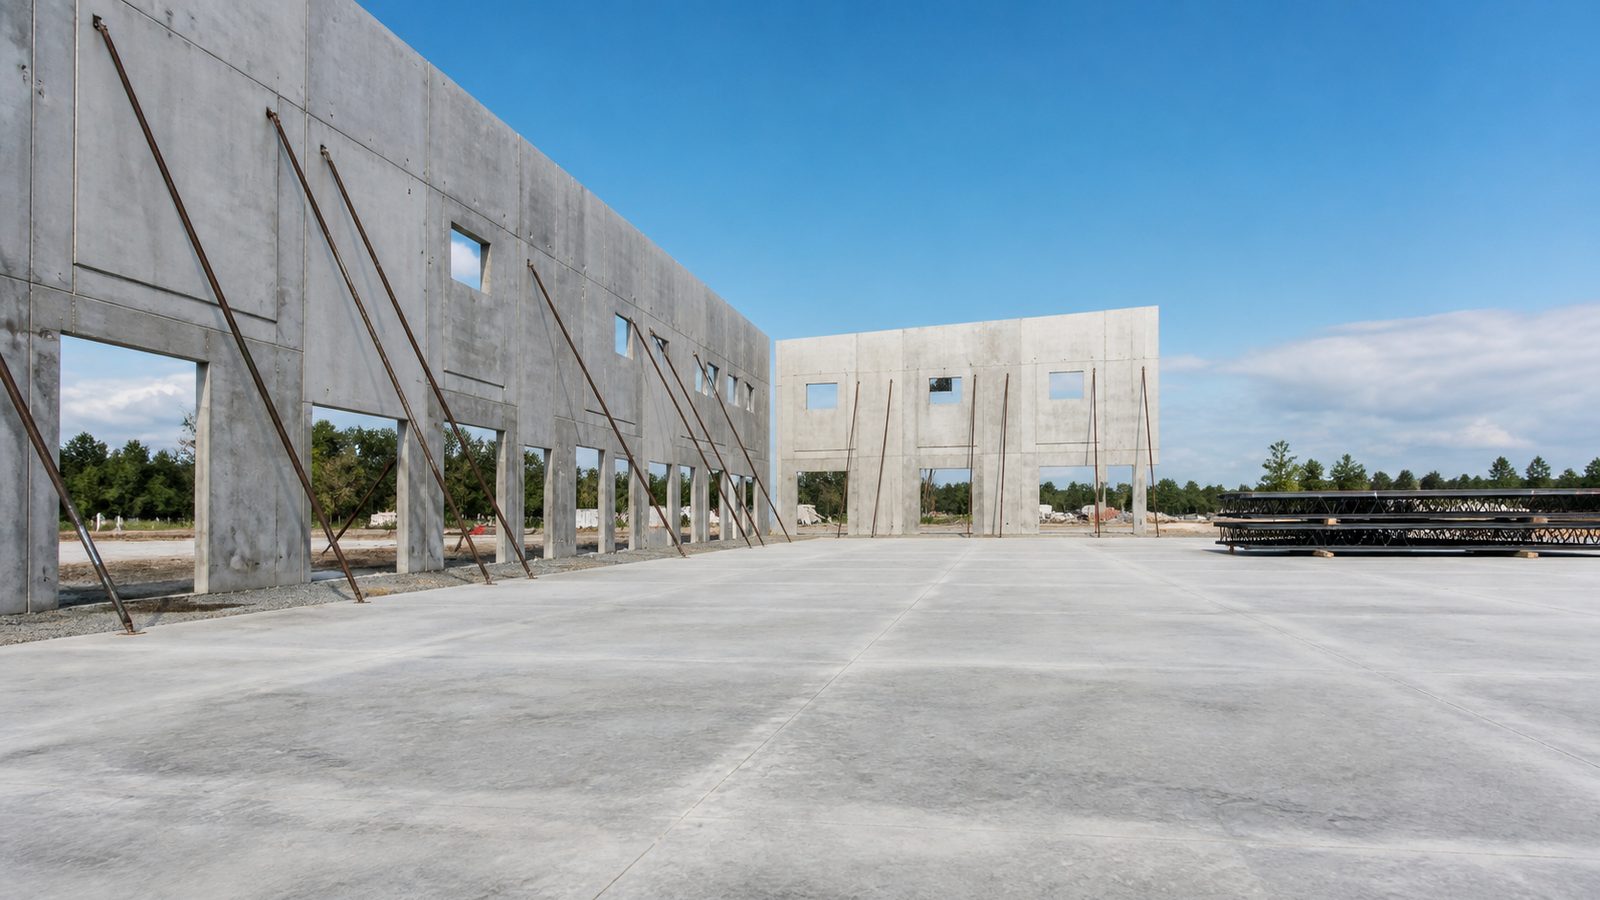
Stage 1: Footings and Foundations
Every building sits on a foundation, and the foundation's design depends on what the soil investigation found under the site.
Foundation Types in Florida Ground-Up Construction
Spread footings are the most common foundation type for commercial buildings on competent soils. A spread footing is a wide, shallow concrete pad that distributes the column load over a large enough area that the soil doesn't fail. For a warehouse column carrying 80,000 pounds, the spread footing might be 8 feet square and 18 inches deep.
Grade beams are horizontal concrete elements that connect footings and support walls. They are common at building perimeters and at interior bearing walls.
Mat slabs (also called raft foundations) are large, continuous reinforced concrete slabs that cover the entire building footprint. They're used when soils are weak and a single unified foundation is more efficient than dozens of individual footings.
Deep foundations — piles or piers — are driven or drilled to a deeper, more competent soil layer or to bedrock. They're required when shallow soils can't support the structural loads, which happens more frequently in coastal Florida than inland, and in areas with organic or compressible soils.
What Can Go Wrong at Footings
The most common problem is placing concrete on soil that doesn't meet the geotechnical report's bearing capacity requirements. If the excavation hits organics, loose fill, or groundwater that wasn't anticipated, the footing must be redesigned before concrete is poured.
This is why inspection hold points exist at footings: the geotechnical engineer's special inspector reviews the excavated soil before any concrete is placed. If the soil doesn't meet spec, work stops. The owner may incur additional cost — this is the "unforeseen conditions" contingency at work — but pouring concrete on bad soil is far more expensive to fix than stopping and addressing the problem.
At JK Prestige Constructor, our own crews self-perform concrete work. When the inspector flags a problem at footing excavation, the principal is called immediately — not a subcontractor coordinator who may take 24 hours to respond. The decision gets made fast, and the schedule impact is minimized.
Stage 2: Underground Utilities
Before the slab is poured, everything that goes through the slab or under it must be roughed in. This is one of the most coordination-intensive phases of ground-up construction, and it's where the MEP (Mechanical, Electrical, and Plumbing) coordination done during preconstruction pays off.
What Gets Installed Before the Slab
Plumbing drain lines and sanitary sewer: Floor drains, floor sinks, restroom rough-in, utility sink connections, and any cleanouts must be at the correct location and elevation before the slab is poured. Getting the elevation wrong means the drain either won't flow or will be too high to connect to floor fixtures.
Electrical conduit stubbed through the slab: Panel feeders, equipment circuit conduits, and any conduit that transitions from below-grade to above must be positioned and stubbed up at the correct location before the slab pour. Cutting conduit penetrations through a poured slab is expensive and weakens the slab around the penetration.
Plumbing supply sleeves: Hot and cold water supply penetrations through the slab must be sleeved before the pour.
Underground grease interceptors and tanks (for restaurants and food service): These are large precast concrete or fiberglass units that must be set and connected before the slab is poured around them.
Why This Phase Is a Coordination Challenge
The underground utility phase involves multiple trades working in the same trench in a specific sequence — typically sewer first (deepest and requiring the most precise slope), then water supply, then electrical conduit. All of them need to be complete and inspected before the slab crew can set up.
If the plumbing contractor is late finishing their rough-in, the slab pour is delayed. If the electrical conduit is in the wrong location, it gets discovered when the panel is installed above-grade and the conduit stub-out is six inches off. Fixing it means cutting the slab.
This is where the BIM coordination JK runs during preconstruction saves real money. MEP clash detection confirms that all below-slab utility routing is coordinated before the first trench is dug.
Stage 3: Slab-on-Grade
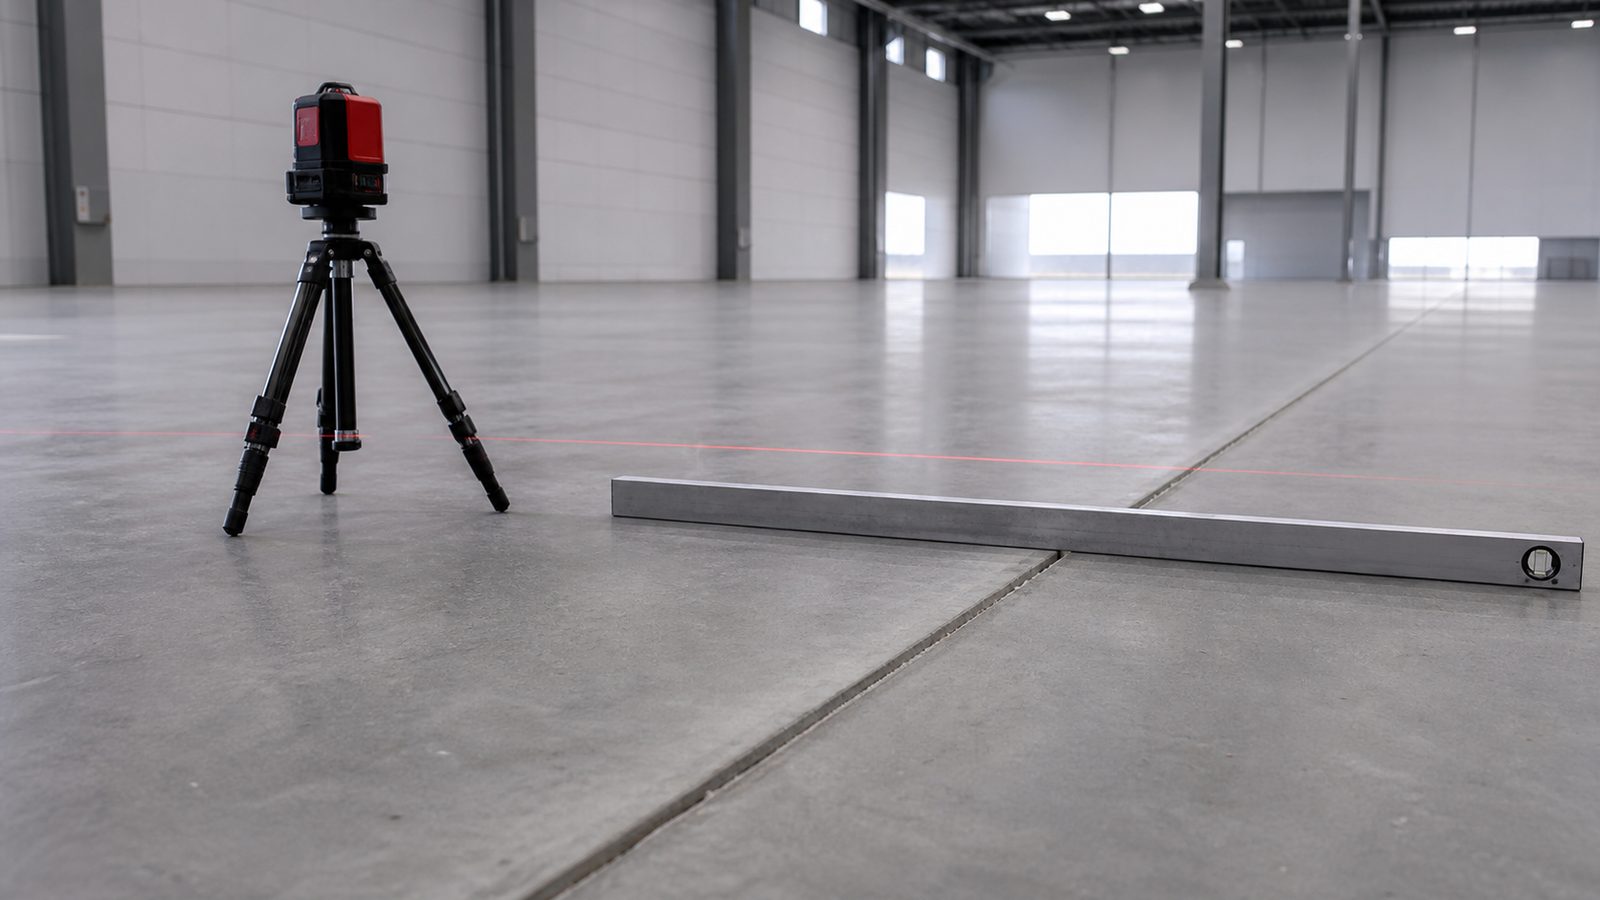
The slab is the finished floor — in a warehouse, it is often the primary working surface that will support forklifts, racking systems, and heavy equipment for decades. Getting it right is not optional.
Slab Components and Specification
Vapor barrier: A polyethylene vapor barrier (minimum 10 mil, often 15 mil on warehouse slabs) is laid over prepared subgrade before concrete is placed. In Florida's humid climate, vapor drive through an unsealed slab causes flooring failures, equipment corrosion, and indoor air quality problems.
Reinforcing: Wire mesh or rebar in a grid pattern controls cracking. The reinforcing specification is in the structural drawings and must be installed per plan — correct gauge, correct spacing, correct placement height within the slab.
Control joints: Saw-cut control joints limit the size of individual slab panels and direct cracking to the joints rather than randomly through the field. Joint spacing is specified by the structural engineer. Missing joints or joints cut at the wrong time (too late after the pour) produce uncontrolled random cracking.
Flatness specification: Warehouse slabs are specified by F-numbers — FF (floor flatness) and FL (floor levelness). A high-racking warehouse may require FF50/FL35 or higher. The slab crew places and screeds the concrete to meet the flatness spec, which is verified with electronic survey equipment after the slab cures.
What Can Go Wrong
Adding water to concrete on site to make it easier to work is the most common and damaging field practice. Water added beyond the design water-cement ratio reduces compressive strength and increases shrinkage cracking. JK crews do not add water to concrete after it leaves the truck.
A flatness spec failure on a warehouse slab is expensive — grinding costs money, and some areas may require overlay. The right approach is to get the flatness right on the pour, which requires an experienced slab crew, the right equipment, and sufficient crew size to keep pace with the pour rate.
Stage 4: Tilt-Up Panel Casting and Erection
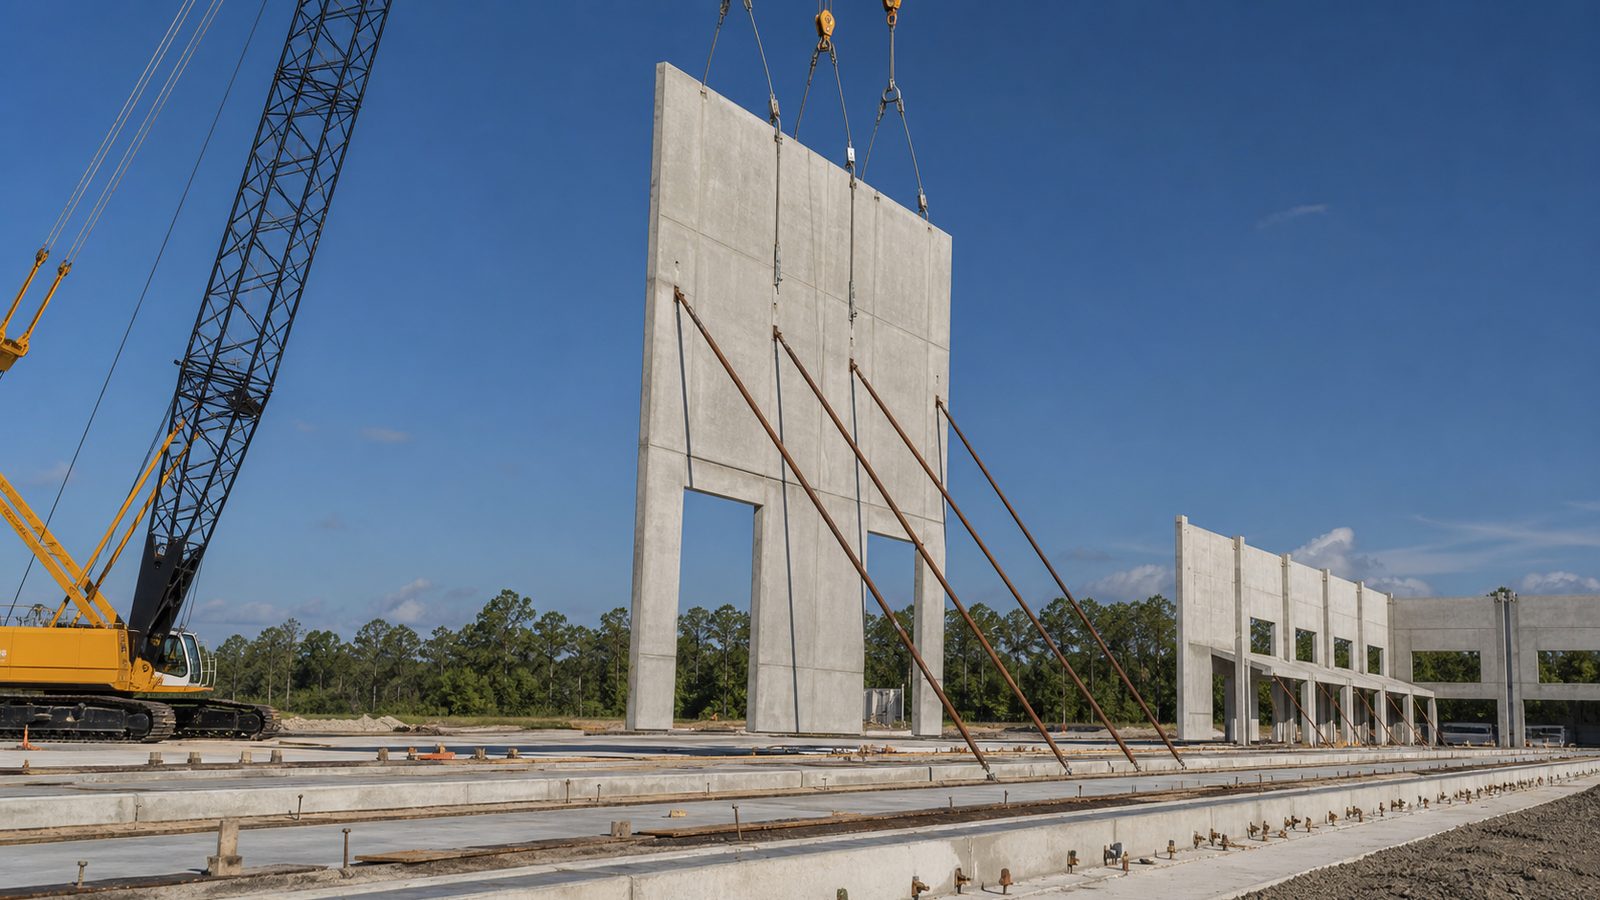
For large warehouse and industrial buildings, tilt-up concrete construction is the most efficient structural system in Florida. Panels are cast flat on the cured slab, then tilted up by crane into their final vertical position.
Panel Casting
After the slab is cured (typically 28 days for full design strength, though tilt-up operations typically begin after 3,000 PSI test breaks at 7 days), the panel casting sequence begins. Bond breaker is applied to the slab surface so the panels don't adhere to it. Edge forms define the panel geometry. Reinforcing steel is placed per the panel shop drawings. Embeds — steel plates, anchor inserts, hardware for windows and doors — are set at their design locations.
Concrete is placed in lifts and consolidated with vibrators to eliminate voids. The panel surface that faces down during casting will be the finished exterior face; it must be formed and finished correctly before the pour.
Panel Tilting
After the panels reach their design strength, the crane sequence begins. A mobile crane — on large warehouses, this is a 250- to 500-ton lattice boom crane — picks each panel at the design lift points, tilts it to vertical, and sets it in its final position where it's braced temporarily while connections are made.
The sequence of panel picks is planned in advance: the crane swings radius, the brace locations, and the panel staging sequence all have to work together without conflicts. A 4D simulation of this phase — which JK runs on tilt-up projects — identifies pick sequence conflicts before the crane arrives on site.
After all panels are set and braced, the steel roof structure is erected, connecting the tops of the panels and completing the building shell.
JK Prestige Self-Performs Concrete
JK Prestige Constructor self-performs concrete work — from footing excavation through slab finish and tilt-up panel casting. Our own crews, not subcontracted concrete subs, place and finish the slabs on JK projects.
This matters at every stage of the concrete sequence: when the geotechnical inspector flags a problem at footings, we respond in hours, not days. When the underground utility coordination requires a last-minute adjustment, the crew is on site and accountable. When the slab flatness spec requires tight sequencing, our crew has done this before and isn't improvising.
See the full range of JK Prestige warehouse projects and how we deliver ground-up industrial construction in Florida. The complete project delivery model is documented in The JK Way.
If you're planning a ground-up warehouse, industrial facility, or commercial building in Florida, contact JK Prestige Constructor for a free preconstruction consultation. Call (904) 944-0278. A principal answers.
No call center. No coordinator. A JK principal reviews every inquiry and replies with a real number, not a range, not a follow-up form.
Request Free Estimate →