Geothermal heating and cooling and solar photovoltaic (PV) systems can both be integrated into a Florida custom home from the ground up. Integrated from the start, they are cost-efficient and construction-elegant. Retrofitted into an existing home, both systems are substantially more expensive, more disruptive, and in some cases structurally constrained.
The construction sequencing question — when does each system install, and what has to be in place before it does — is the thing that most homeowners do not know to ask about when they are in the early planning stages. A GC who is integrating geothermal and solar as part of a ground-up custom home build needs to have these sequences planned before permit submittal, because they affect site work, foundation design, MEP rough-in, and electrical panel sizing. Getting any of them wrong costs real money to correct.
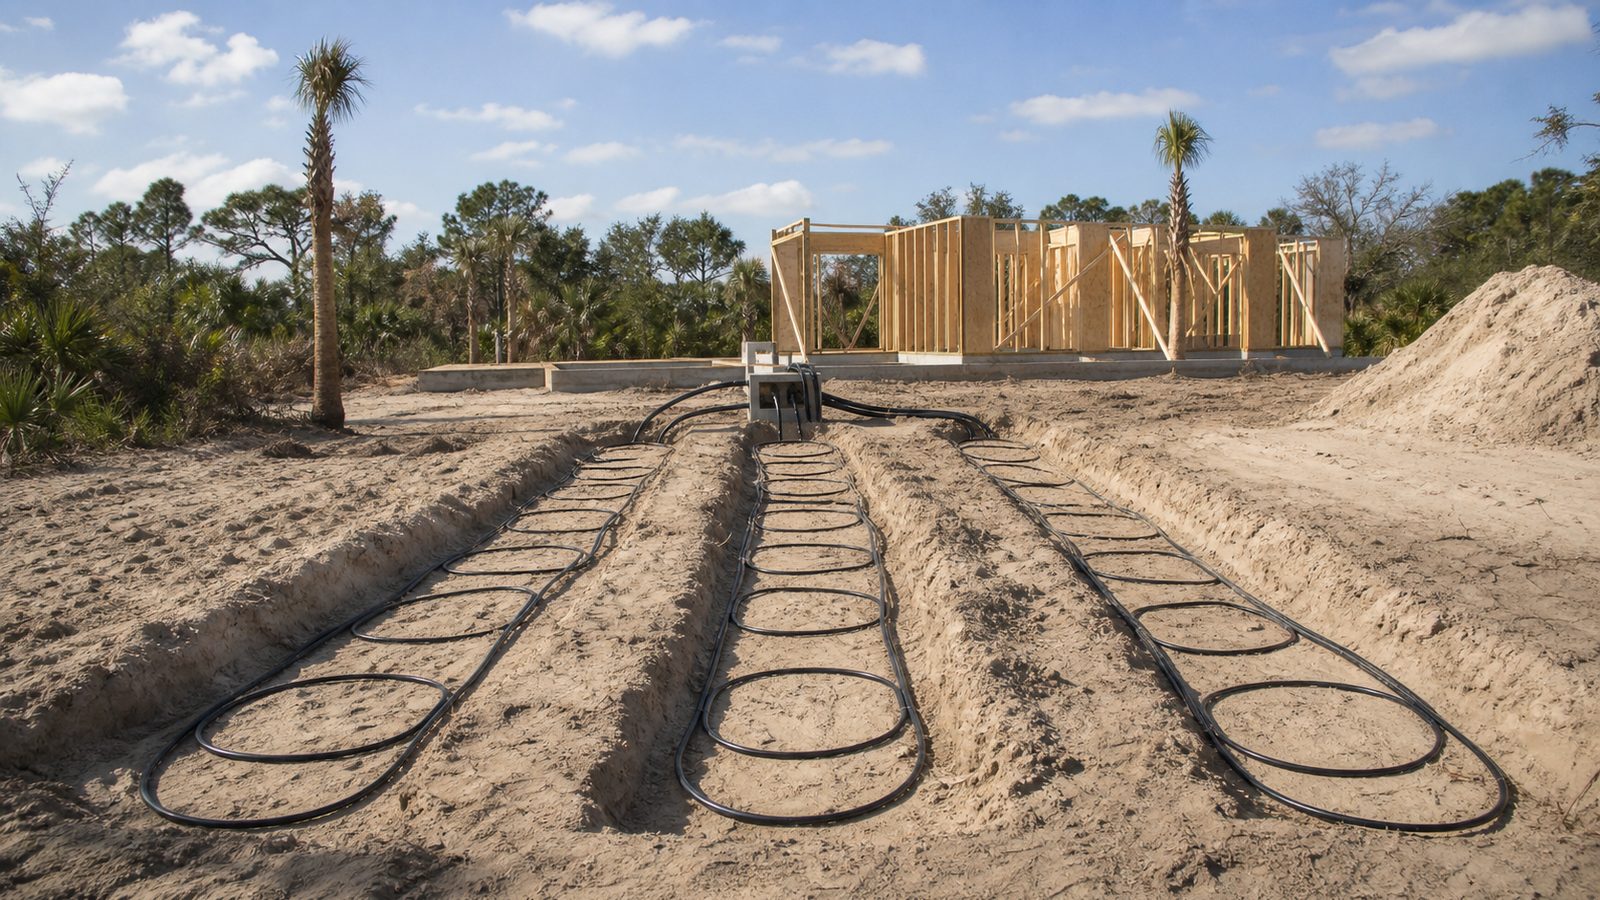
Geothermal Systems in Florida: Horizontal vs. Vertical Loop Fields
A geothermal heat pump system uses the stable temperature of the earth — typically 60–70°F at depth in Florida — as a heat exchange medium. In summer, the system rejects heat from the home into the earth rather than into the outdoor air. In winter, it extracts heat from the earth rather than from outdoor air. This makes it significantly more efficient than a conventional air-source heat pump system in Florida's climate, where outdoor air temperatures in summer make air-source systems work hard.
The two primary loop field configurations are horizontal and vertical.
Horizontal loops are buried in trenches at a depth of 4–6 feet. They require more land area — typically 1,000–1,500 linear feet of trench for a 2,500–3,500 sqft Florida home — but are less expensive to install because drilling is not required. Horizontal loops are appropriate when the lot has sufficient undeveloped area outside the building footprint and landscaping zones. In Jacksonville and surrounding Northeast Florida, many custom home lots on larger acreage can accommodate horizontal loops.
Vertical loops use boreholes drilled to depths of 150–300 feet. They require much less surface area — a borehole footprint of roughly 10 feet of surface area per 100 feet of depth — making them appropriate for narrower lots, urban infill sites, or properties where landscaping and hardscape limit the available horizontal field area. Vertical loops are more expensive per ton of system capacity than horizontal loops, with drilling costs adding $8,000–$18,000 to the loop field installation versus an equivalent horizontal system.
Florida Soil Considerations for Loop Sizing
Florida's soils are not uniform. The thermal conductivity of the soil — how efficiently it exchanges heat with the loop field — varies by soil type and moisture content. Clay soils have higher thermal conductivity than dry sand; saturated sandy soils perform better than dry ones. In Northeast Florida, where sandy coastal plain soils with a relatively shallow water table are common, geothermal loop performance is generally acceptable but requires accurate loop sizing.
Loop sizing is performed by the geothermal system designer using the building's Manual J heat load calculation, the soil thermal conductivity from a field test (or from a conservative assumption if field testing is not warranted by project scale), and the groundwater depth at the site. Under-sizing the loop field degrades system efficiency and can cause the system to enter "lock-out" mode during peak summer demand. Over-sizing adds unnecessary cost. The loop sizing calculation should be reviewed by the GC before site work is contracted.
Construction Sequence: When Geothermal Installs
The geothermal loop field is the first system to install — before the building slab is poured, before foundation work is complete, and before landscaping is designed. The sequence:
Step 1 — Site work and clearing (pre-foundation): The loop field area is cleared of any trees, roots, or subsurface debris that would interfere with trenching or drilling. If a horizontal loop is planned, the loop field area should be staked and protected from heavy equipment traffic that would compact the soil before trenching. If a vertical loop is planned, the drilling contractor mobilizes before foundation excavation begins, because the drill rig requires clear access to the borehole locations and cannot navigate around a partially constructed foundation.
Step 2 — Loop installation: Horizontal loop trenches are excavated, HDPE (high-density polyethylene) loop pipe is laid and connected in a header configuration, and trenches are backfilled. Vertical boreholes are drilled, loop pipes are inserted and grouted, and the header manifold is installed in a below-grade vault near the building entry point. Both systems are pressure-tested before backfill is complete.
Step 3 — Building penetration: The loop supply and return lines are stubbed through the foundation before the slab is poured. This penetration sleeve — typically a 2- or 3-inch PVC sleeve — must be located to coordinate with the mechanical room layout inside the home, because moving it after the slab is poured requires coring and re-grouting.
Step 4 — HVAC rough-in coordination: The geothermal heat pump unit installs inside the mechanical room. Its supply and return ductwork, electrical connections, and condensate drain are roughed in during MEP rough-in along with the rest of the home's mechanical systems. The geothermal unit itself is delivered and set during equipment installation, which occurs after the structure is dried in.
See how JK Prestige coordinates smart home and mechanical integration on custom builds
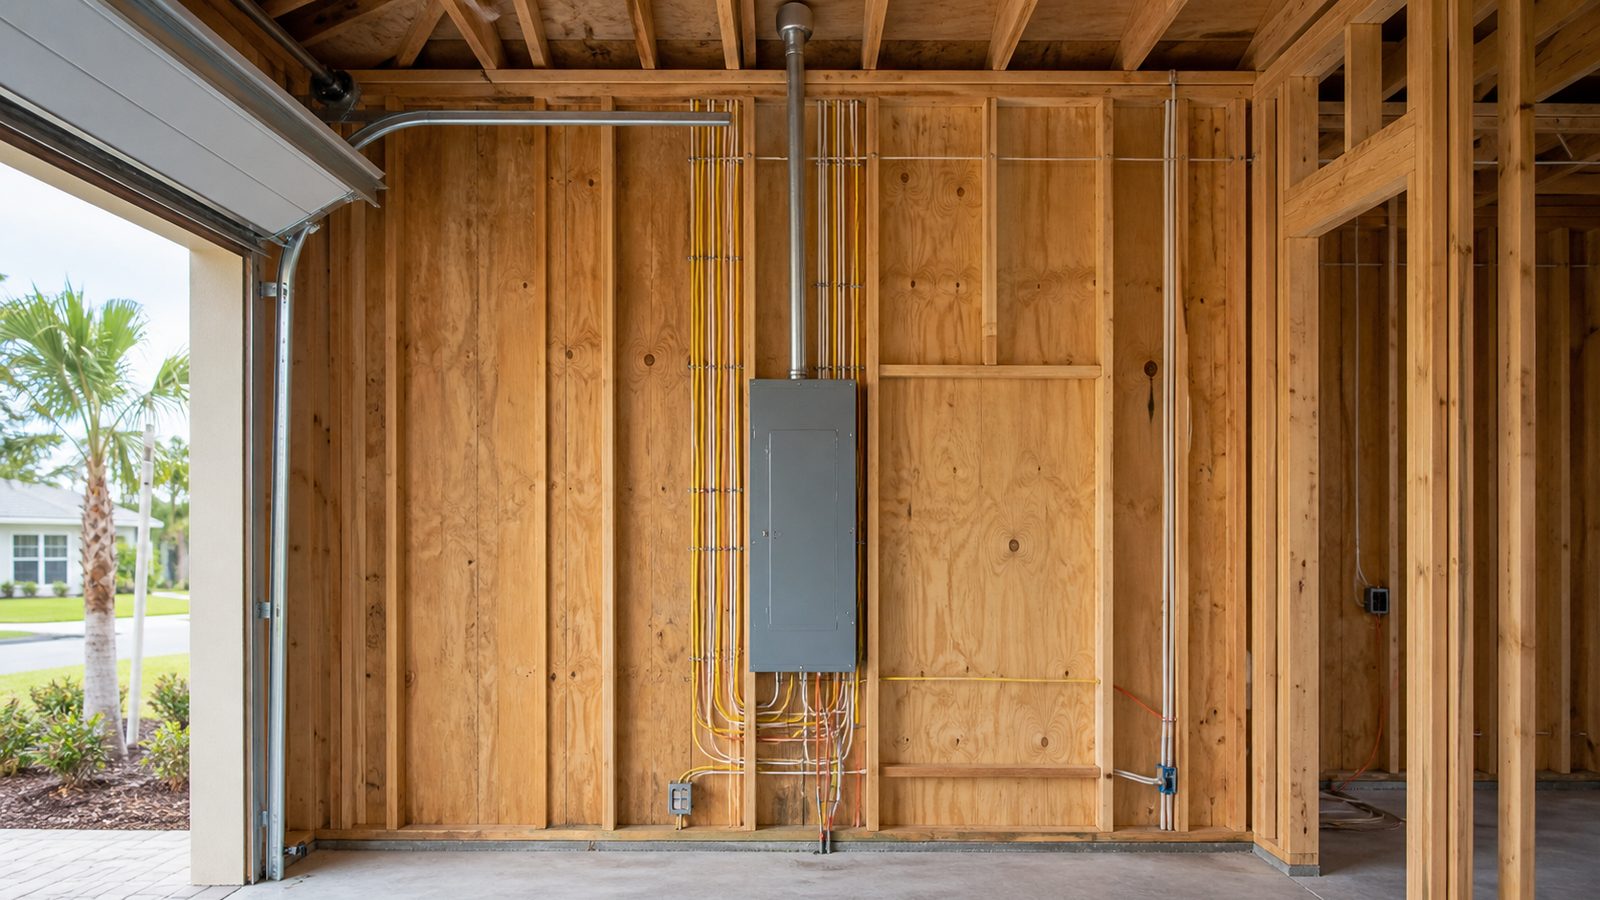
Solar Integration: What "Solar-Ready" Means in Construction Terms
A solar photovoltaic system can be installed at construction completion or sized into the home as a "solar-ready" infrastructure investment during construction, with the panels installed later. The construction-phase investment in solar-ready infrastructure is a fraction of the total system cost, but must be planned in pre-construction to avoid conduit runs through finished spaces.
What solar-ready construction includes:
Conduit runs from roof to electrical panel: Rigid conduit (minimum 1-inch electrical metallic tubing) is run from the anticipated inverter location — typically the mechanical room or garage wall — to the electrical panel location, and a separate conduit is run to the attic space for future panel wiring. These conduit runs are installed during electrical rough-in, while walls are open. Retrofitting conduit through finished walls costs 3–5 times more than installing it during rough-in.
Electrical panel sizing for solar: A home with solar will have a Enphase, SolarEdge, or similar grid-tied inverter connecting to the main electrical panel. Panel sizing must account for the solar backfeed current. In Florida, a 200-amp panel is the minimum for a solar-equipped custom home; a 400-amp panel (or a 200-amp main panel with a solar-ready sub-panel) is appropriate for homes over 3,500 sqft with significant HVAC and EV (electric vehicle) charging loads.
Roof structural capacity: A photovoltaic array adds approximately 3–4 pounds per sqft of dead load to the roof. Most residential roof structures designed to Florida Building Code load requirements have adequate reserve capacity for a standard solar array. For homes with complex rooflines, steep pitches, or non-standard framing, the structural engineer should confirm panel load capacity during design — not during permitting for the solar installation two years after the home is built.
When Solar Panels Install in the Construction Sequence
Solar panel installation occurs after the roof is complete and watertight — typically 4–6 weeks before certificate of occupancy (CO), during the finish-out phase. The inverter is mounted, connected to the pre-installed conduit, and interconnected with the electrical panel. The utility interconnection agreement — in Jacksonville, through JEA (Jacksonville Electric Authority) — must be applied for before the CO walkthrough.
JEA's solar interconnection process requires a submitted application and approval before the system can export power to the grid. The application can be submitted before installation is complete, but the system cannot be energized until JEA approves the interconnection. For a 10kW residential system, JEA interconnection approval currently runs 4–8 weeks. Planning the solar installation 8 weeks before the anticipated CO date provides enough buffer.
Cost Delta: Integrated vs. Retrofit Installation
The financial case for integrating geothermal and solar during initial construction — rather than retrofitting both systems later — is substantial.
Geothermal:
- Loop field installation during initial site work (horizontal, 4-ton system): $12,000–$22,000
- Loop field installation as a retrofit after landscaping is complete (same system): $22,000–$38,000 due to landscaping removal, restoration, and restricted equipment access
- Net premium for retrofit: $10,000–$16,000, plus landscaping restoration
Solar:
- Pre-installed conduit during electrical rough-in: $400–$800 in materials and labor
- Conduit installed as a retrofit through finished walls and ceiling: $2,500–$5,000 depending on run length and wall construction
- Panel structural analysis during design (if flagged): $500–$1,500 engineering fee
- Panel structural analysis as a retrofit: same cost, but if the roof structure needs modification, the remediation is significantly more expensive
Florida utility incentives: Florida's net metering rules allow residential solar customers to receive credit for excess power exported to the grid. As of 2025, JEA's net metering program credits excess solar generation at the retail electricity rate, which improves the payback period for solar investment. Florida does not currently have a state income tax credit for geothermal or solar, but the federal Investment Tax Credit (ITC) — currently 30% of the system cost — applies to both geothermal heat pumps and solar PV installations on new construction.
Read about JK Prestige's approach to technology-forward custom home construction
View completed custom home projects with smart home and mechanical integration
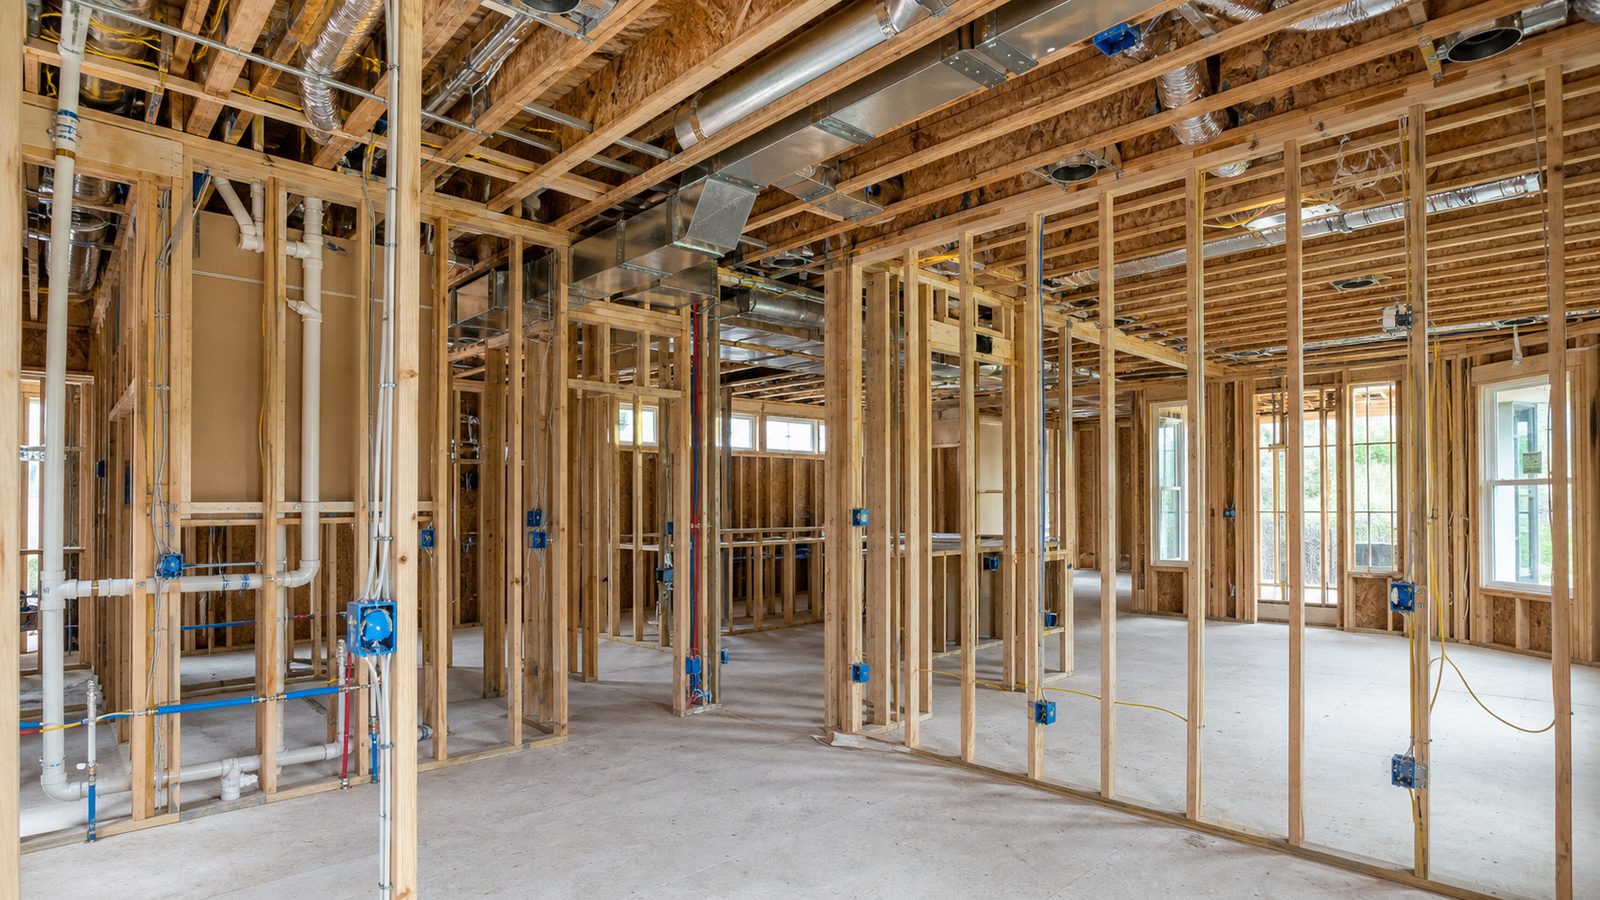
Planning Geothermal and Solar Into Your JK Prestige Custom Home
JK Prestige coordinates geothermal and solar integration as part of the pre-construction phase. The loop field layout is designed in coordination with the site survey and landscape plan. The solar conduit and panel sizing are incorporated into the electrical drawings before permit submittal. The construction sequence is planned in the baseline schedule before ground breaks.
This is the difference between integrating these systems as a construction sequence problem — which it is — versus as an afterthought installed by a specialty contractor who shows up after CO and works around whatever the GC left them.
Get a free written estimate in 48 hours. contact JK Prestige Constructor. Call (904) 944-0278. A principal answers.
No call center. No coordinator. A JK principal reviews every inquiry and replies with a real number, not a range, not a follow-up form.
Request Free Estimate →