If you have added attic insulation and still feel a draft at the ceiling, insulation was never the problem. It slows heat transfer, but does nothing to stop air moving through gaps around top plates, wiring holes, plumbing stacks, and recessed lights. In a Jacksonville attic, those gaps pull in hot, humid outdoor air all summer and let conditioned air escape all winter, and no amount of extra fiberglass or cellulose fixes that. Here is how to find and seal the actual air leaks before insulation goes down or gets topped off.
When You Need a Permit in Jacksonville
Air sealing itself, caulking top plates, foaming wire and pipe penetrations, and closing chase openings, is routine maintenance in Duval County and does not normally require a building permit. You are closing existing gaps, not altering structure, electrical, or mechanical systems.
That changes once the work crosses into something else. Replacing or relocating recessed lights, running new wiring, or bundling the sealing into a larger energy retrofit tied to an HVAC change out can each trigger permitting. If your project touches any of those, check with the City of Jacksonville building department first.
Safety matters as much as paperwork. Older recessed can lights that are not IC-rated need clearance from insulation and spray foam to avoid a fire hazard, so identify your fixture type before sealing around it. Keep foam and insulation away from flues and B-vents serving gas water heaters or furnaces, since blocking combustion venting clearance is a real safety issue. Never seal or bury a soffit vent, since that can trap moisture and shorten your roof's life. Just outside Duval, Nassau, Clay, and St. Johns counties each run their own permit offices, so confirm requirements locally.
Tools and Materials
- Headlamp and a second work light on a cord
- Attic-rated N95 respirator, safety glasses, long sleeves, gloves
- Fire-rated caulk (acoustic sealant) and caulk gun for wood-to-drywall gaps
- Low-expansion polyurethane spray foam for wire and pipe penetrations
- High-yield spray foam kit for larger chase openings
- Backer rod for gaps wider than about half an inch before foaming
- High-temperature caulk or foil tape for use near flues, never regular foam near a B-vent
- Rigid foam board or sheet metal and HVAC tape for closing large chases
- Plywood or OSB scraps for a walking platform between joists
- Tape measure, utility knife, and marker for tracking sealed areas
Step-by-Step
- Work early morning before attic temperatures climb, and bring plenty of water.
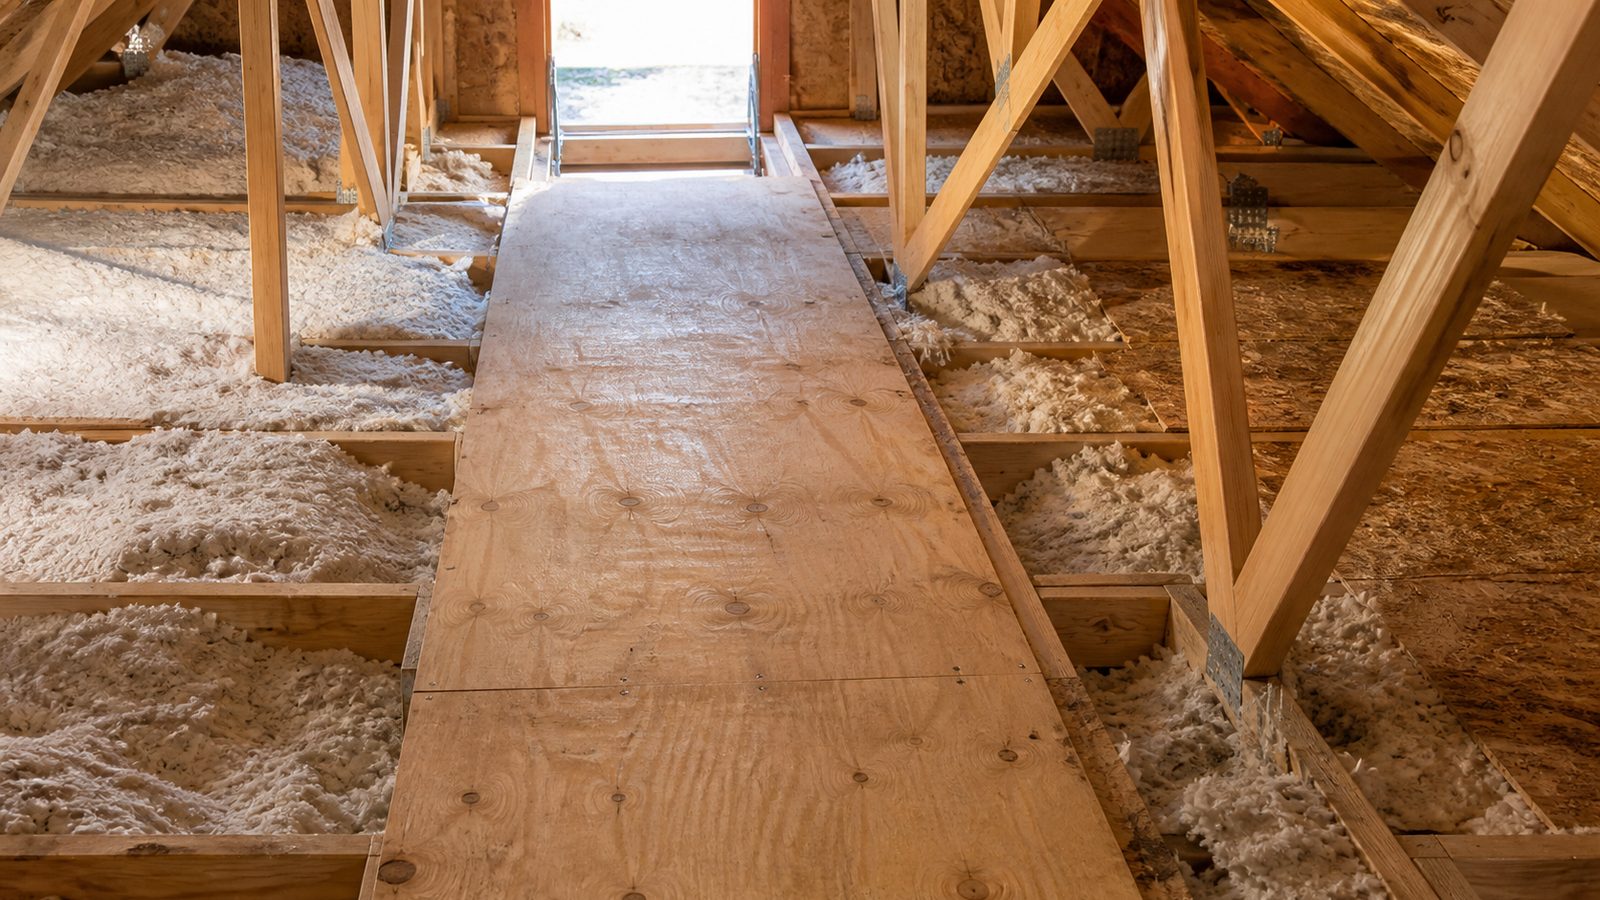
- Lay plywood across the joists for safe footing, since attic floors are only ceiling drywall.
- Sweep the attic by hand and eye, feeling for airflow at the top plates.
- Brush loose insulation off areas you plan to seal so caulk and foam bond to solid material.
- Caulk every top plate gap, interior and exterior walls alike.
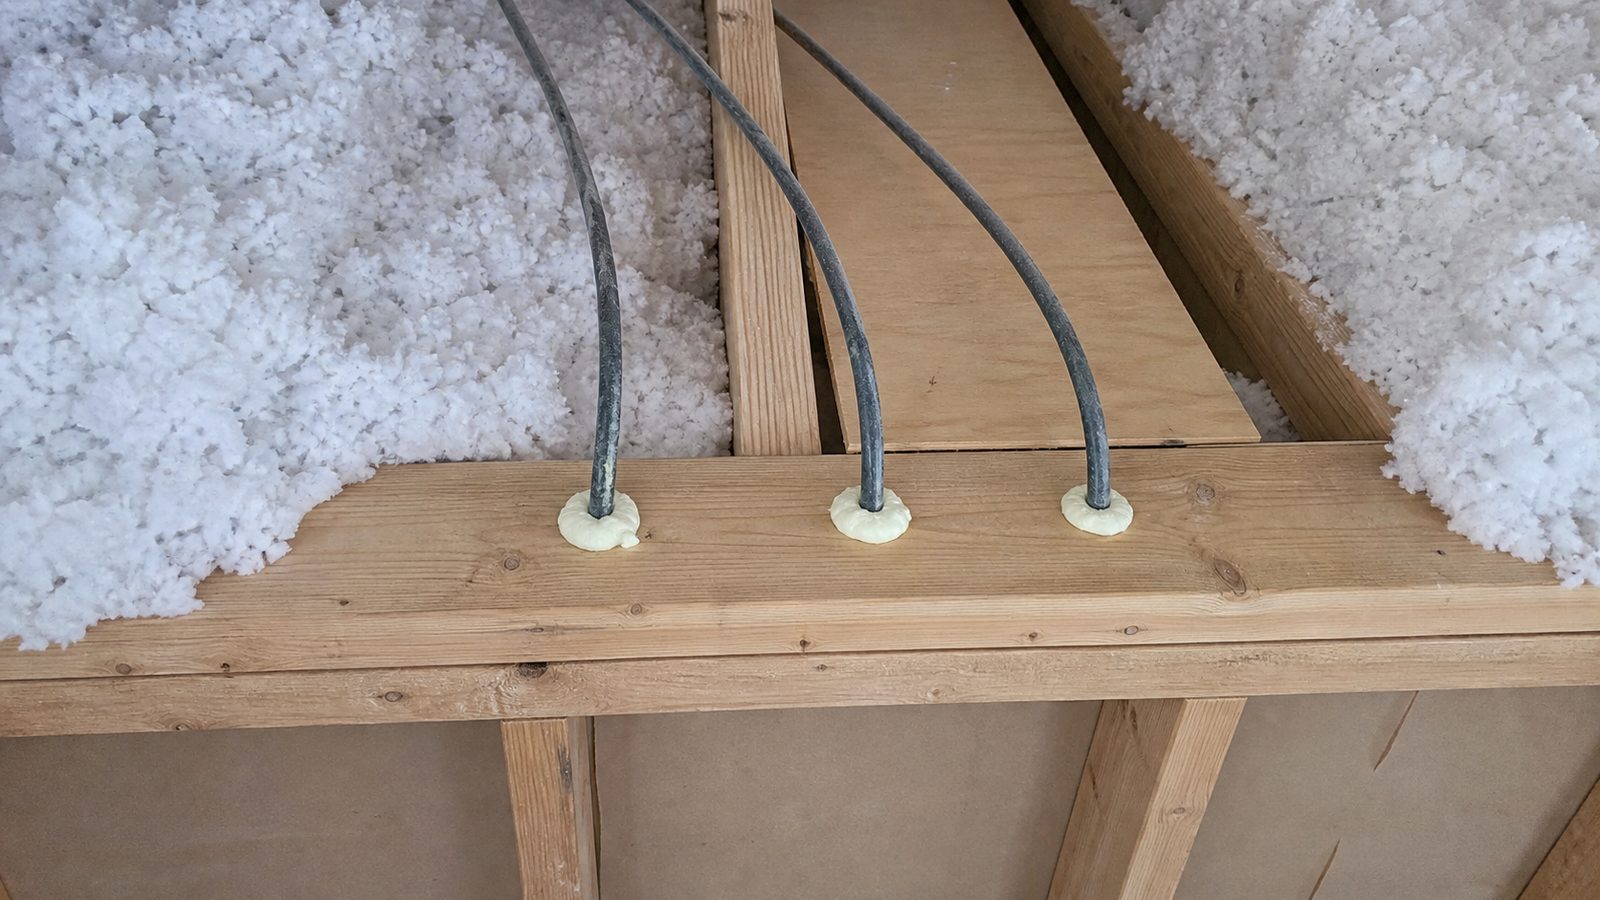
- Foam or caulk each wire penetration through the top plate or subfloor, using low-expansion foam to avoid bowing the drywall below.
- Seal plumbing stack penetrations with foam or high-temperature caulk, matched to the pipe's temperature.
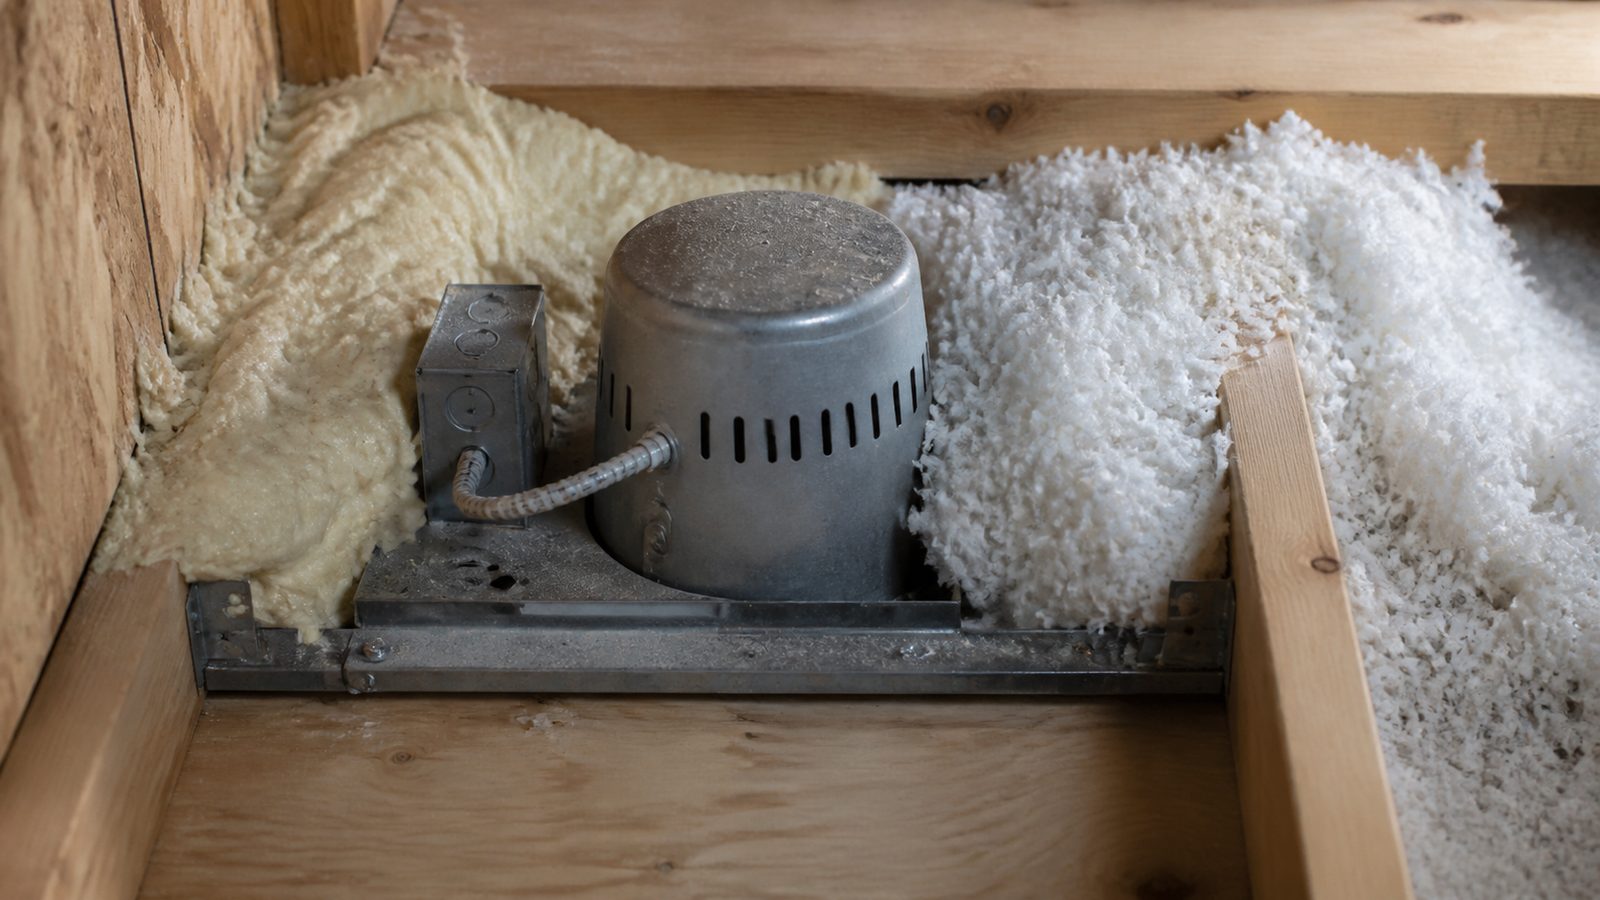
- Confirm whether each recessed can is IC-rated. For non-IC cans, seal the housing-to-drywall gap with fire-rated caulk only, keeping insulation the manufacturer's required distance away.
- Install an insulated cover box over non-IC cans if your plan calls for full insulation coverage nearby.
- Close large chase openings, the shafts running through the attic for plumbing, ductwork, or a flue, with rigid material sealed at the edges.
- Seal bath fan and kitchen exhaust duct penetrations, and confirm the duct vents outside, not into the attic.
- Seal around the attic access hatch framing where it meets the ceiling, separate from the hatch panel itself.
- Check dropped soffits and interior chases built for cabinets or bulkheads, a commonly missed leak path.
- Walk the attic once more with a low-angled flashlight to catch missed gaps, then photograph sealed areas before insulation goes back down.
Common Mistakes to Avoid
- Foaming directly against a non-IC recessed can housing, creating a fire hazard instead of solving the draft
- Accidentally sealing a soffit vent while working around the eaves, cutting off roof airflow
- Using ordinary spray foam near a flue or B-vent instead of high-temperature material
- Skipping the top plates because they are hard to reach, when they are usually the largest leak source
- Overfilling wire penetrations with foam, bowing or cracking the drywall below
- Skipping the final walk-through, when most missed gaps get caught
Jacksonville Climate Considerations
Northeast Florida attics regularly reach very high temperatures on summer afternoons, so plan attic work for early morning and take real heat-stress precautions. That heat is exactly why air sealing pays off here. Every unsealed gap pulls hot, moisture-laden outdoor air into the conditioned space, raising indoor humidity and forcing your air conditioner to work harder to cool and dehumidify the house. Sealed penetrations reduce that load directly.
Humidity also raises the stakes on how you seal. A gap that lets warm, moist attic air meet a cooler surface below can contribute to condensation and mold risk over time, so a tight seal at the ceiling plane matters more here than in a drier climate. If timing this for late summer or fall, watch the tropical weather outlook and avoid attic work during an active storm threat, finishing well ahead of hurricane season's peak.
What It Costs in Jacksonville (DIY vs. Hiring a Pro)
| Scope | DIY Cost | Professional Cost |
|---|---|---|
| Materials only (caulk, foam, backer rod) | $80 to $200 | Included in labor quote |
| Basic air sealing (top plates, wire and pipe penetrations) | $100 to $250 in materials | $400 to $900 |
| Full air seal including can lights and chase openings | $200 to $400 in materials | $800 to $1,800 |
| Blower-door-guided professional air sealing | Not practical without equipment | $600 to $1,500, often bundled with an audit |
Professional pricing varies with attic size and how many penetrations and chases the house has. A blower-door test, measuring whole-house air leakage before and after the work, is the most reliable way to confirm the sealing worked, and it is hard to replicate as a DIY project.
When to Call JK Prestige
If your attic has non-IC recessed cans near living space, a flue or B-vent close to insulation, or large chase openings needing proper closure rather than a can of foam, that is worth a second set of eyes. JK Prestige can evaluate the attic, handle work overlapping with electrical or venting clearances, and make sure the sealing will not create a bigger problem later.
No call center. No coordinator. A JK principal reviews every inquiry and replies with a real number, not a range, not a follow-up form.
Request Free Estimate →