Removing an interior wall without knowing what it holds up and what runs through it is the leading cause of structural failures in residential renovations. It is not an exaggeration. Every year, homeowners and unlicensed contractors remove walls that support floor beams, carrying loads that cracked foundations, buckled floors, and in the worst cases, partial collapses.
The second problem is hidden mechanicals. A wall that looks like it is just 2x4 studs and drywall may contain an electrical circuit, a supply line, a drain stack, or an HVAC duct that serves the second floor. Cut through the wrong one and you have water damage, a code violation, or a fire hazard.
This guide covers the full process, in sequence. Do not skip steps.
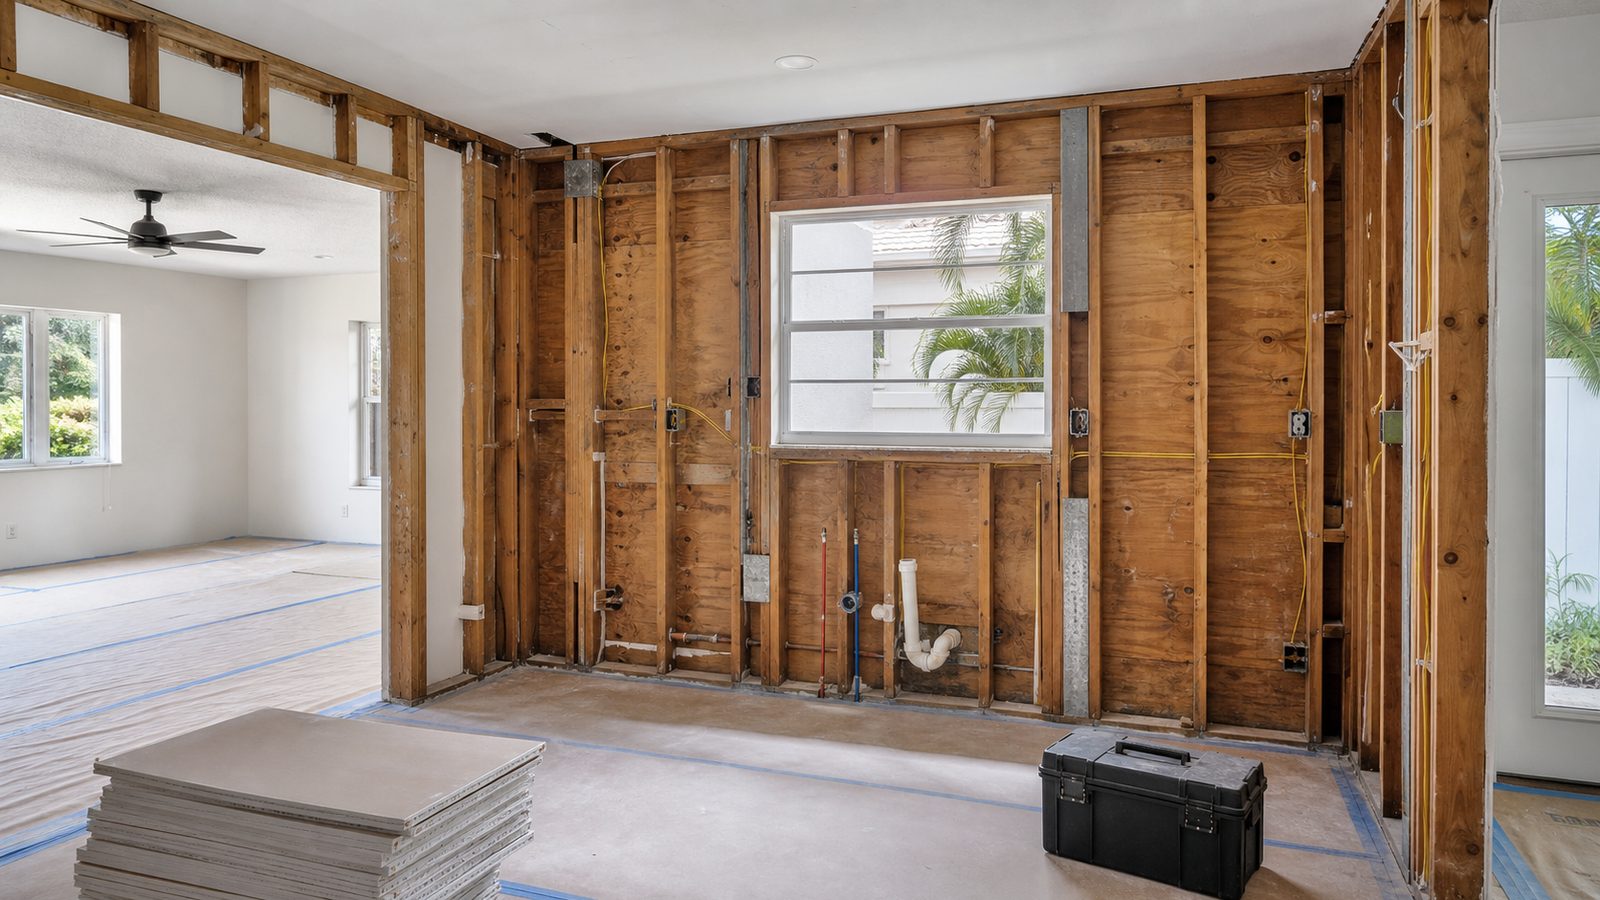
Step 1: Identify Load-Bearing vs. Non-Load-Bearing Walls
Load-bearing walls transfer the structural weight of the building from the roof and upper floors down to the foundation. Non-load-bearing (partition) walls simply divide space. Removing a partition wall is a different project from removing a load-bearing wall — the latter requires an engineer and a proper header or beam before anything comes down.
The field clues for identifying load-bearing walls:
- Perpendicular to joists: Walls that run perpendicular to the floor joists above them are more likely to be load-bearing. Walls that run parallel to joists usually are not. You can often check joist direction from an unfinished basement, attic, or garage ceiling.
- Above a beam or post: If there is a beam, column, or stacked post directly below a wall, that wall is almost certainly carrying load.
- At the center of the house: Center-bearing walls support both sides of a roof structure. Common in ranch-style homes. Very common in Jacksonville's mid-century residential construction.
- Corner walls: Corners are almost always structural.
- Walls on the exterior: All exterior walls are load-bearing.
When in doubt, hire a structural engineer for a single-visit assessment. This costs $300–$600 in Jacksonville and is far cheaper than the alternative.
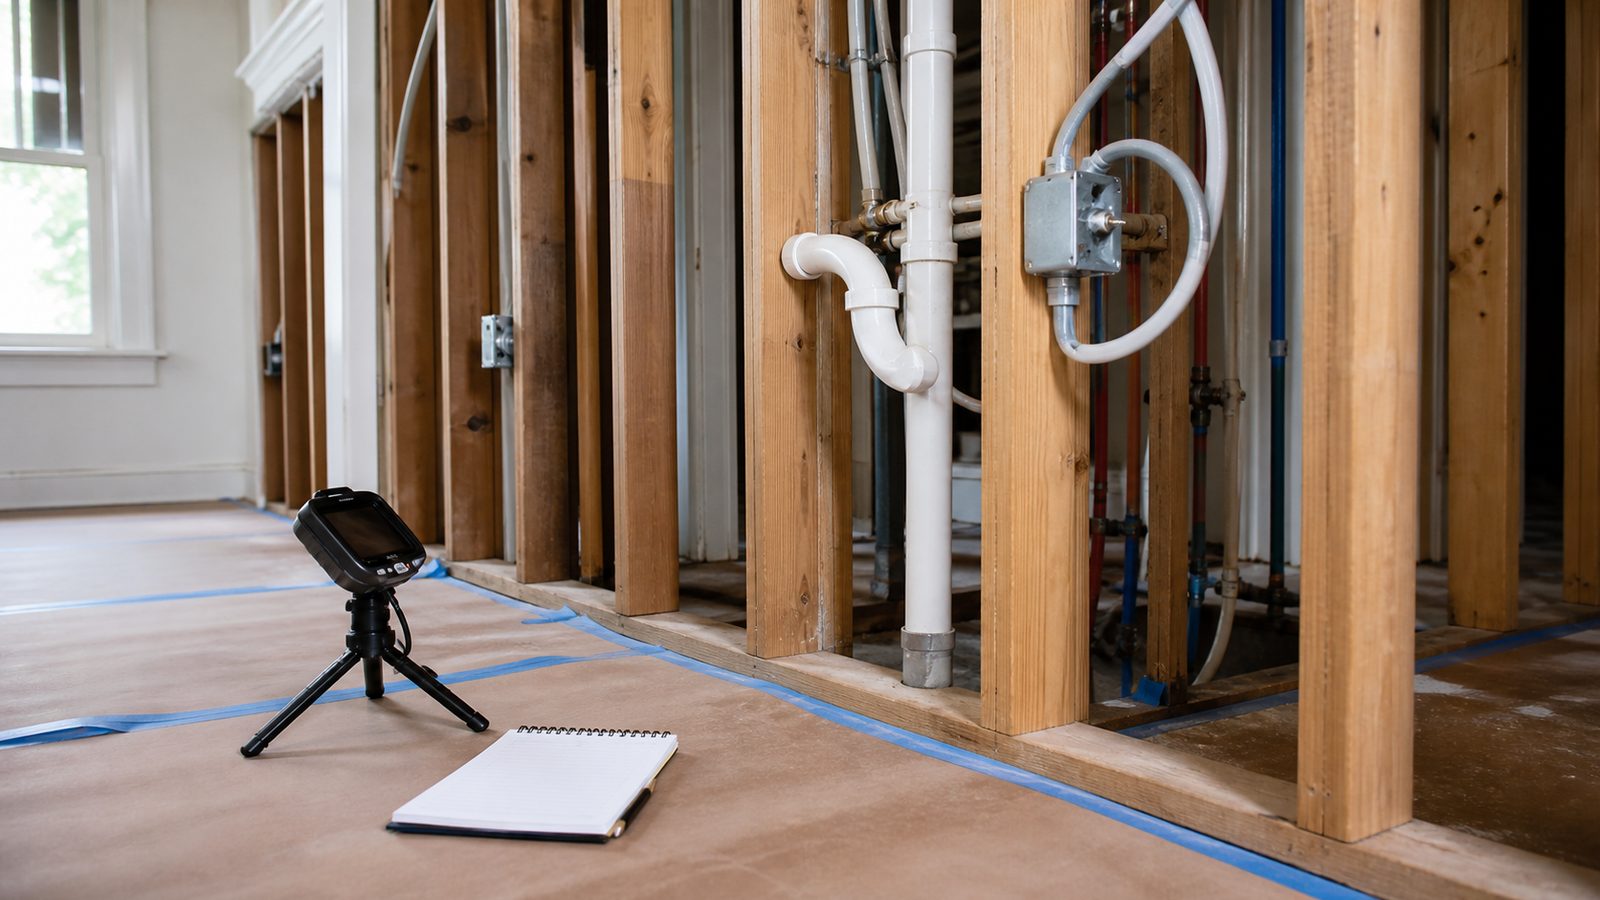
Step 2: Check for MEP Inside the Wall — Electrical, Plumbing, HVAC
Even a non-load-bearing wall can contain live electrical circuits, supply lines, drain pipes, or HVAC duct runs. Opening a wall without checking is how kitchens flood and how electrical fires start.
Methods to check before opening:
- Non-contact voltage tester: Run it along the drywall surface near outlets and switches. Active circuits register immediately.
- Stud finder with AC detection: Modern stud finders include live-wire detection. Not foolproof, but a useful first screen.
- Thermal camera: Rent one or hire a home inspector. Heat signatures from electrical and plumbing are visible through drywall.
- Visual trace: Follow pipes and ducts from the mechanical room, attic, or basement. Draw out where they logically run before assuming the wall is clear.
- Small inspection opening: Cut a 4-inch by 4-inch inspection hole between studs with a drywall saw. Look inside with a flashlight. Patch it if the wall turns out to be clear.
In Jacksonville's older housing stock — pre-1960 construction in Riverside, Avondale, and Springfield — expect knob-and-tube wiring in walls that appear unoccupied on inspection. Have a licensed electrician evaluate before any demo in pre-1970 homes.
Step 3: Get a Permit If Relocating Any MEP
In Duval County, any work that relocates or extends plumbing, electrical wiring, or HVAC ducts requires a building permit. This applies even if the plumbing or electrical is minimal. A single outlet relocated 3 feet to accommodate a new wall opening requires a permit and inspection.
Permits for wall removal that includes MEP relocation in Duval County typically run $500–$1,500 for the permit fees, plus inspection scheduling (usually 1–3 business days for residential). Do not demo before permits are posted.
Unpermitted plumbing or electrical work in Florida creates disclosure obligations at resale. Many title companies now require proof of permits for work visible in listing photos. More immediately, unpermitted work can result in a stop-work order and a mandatory deconstruction order — meaning you pay to open it back up.
Step 4: Get a Structural Engineer Assessment for Load-Bearing Walls
If any evidence from Step 1 suggests the wall may be load-bearing, stop. Do not proceed with demo until you have a signed engineering assessment that either confirms the wall is non-load-bearing, or specifies the header size, post sizing, and beam design required to safely transfer the load after removal.
A structural engineer's assessment in Jacksonville typically costs $300–$600 for a residential wall evaluation. The engineer will specify the required beam (often a laminated veneer lumber beam, or LVL) and the post and footing requirements to carry the transferred load to the foundation.
Do not substitute a contractor's opinion for an engineering assessment on a load-bearing wall. Even an experienced framing contractor is not a licensed structural engineer. The consequence of getting this wrong — a sagging floor, a cracked foundation, a structural failure — costs orders of magnitude more to fix than the engineering assessment cost to prevent it.
Load-bearing wall removal without engineer approval is the number one cause of structural failures in residential do-it-yourself (DIY) renovations nationwide.
Step 5: Mark and Shut Off Utilities at Panel and Shutoff Valves
Before any drywall is cut, mark the circuits on your electrical panel that serve the wall being removed, and switch them off. Verify the circuit is dead with a non-contact voltage tester before any cutting.
Locate and shut off the nearest supply valve for any plumbing in the wall. If there is no isolation valve close to the work area (common in older Jacksonville homes), you may need to shut off the main supply. Drain the line after shutoff.
HVAC ducts do not carry hazardous material but they do distribute conditioned air. If you cut a supply or return duct, seal the open end with rigid foam or sheet metal temporarily. Leaving it open allows construction dust to enter the duct system and contaminate the air handler — a real problem in Jacksonville's humid summers.
Pro tip: Take photos and video of the open wall before and after shutoff. Document what you found and where it runs. This documentation matters for permits, inspections, and future work.
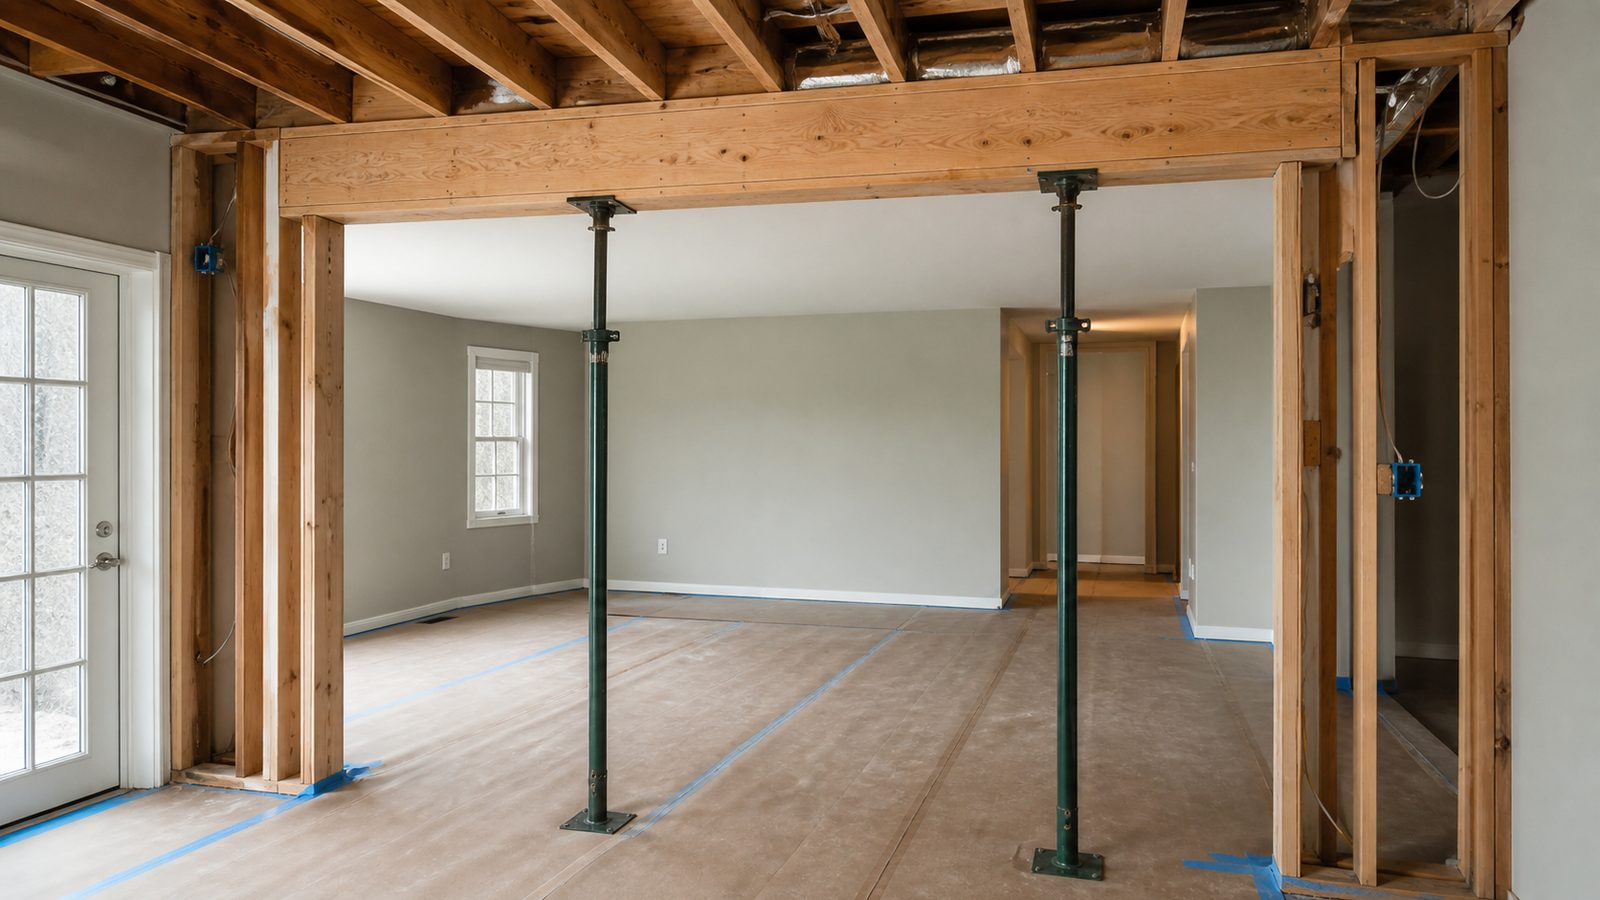
Step 6: Execute Demo from Top Down
Wall demolition runs from ceiling to floor, not the other way. Remove the baseboard and any trim at the base first, but start the structural opening from the top.
The sequence for drywall removal:
- Score the drywall along the top plate with a utility knife.
- Remove drywall from the ceiling line down using a reciprocating saw set to a shallow cut depth (1.25 inches — just enough to cut drywall without hitting a stud).
- Work down the wall in sections, removing drywall panels to expose the stud cavity.
- Remove insulation (if present) and check for any MEP that was not visible before opening.
- Remove studs after confirming the header above (if load-bearing) is installed and supported.
Never use a full-depth reciprocating saw cut on a closed wall. Cut depth matters — it is how you avoid cutting through a wire or pipe that the stud finder missed.
Step 7: Protect Adjacent Surfaces
The wall you are removing is not the only surface at risk during demo. The ceiling, adjacent walls, and flooring all need protection.
Tape rosin paper or 1/4-inch plywood over hardwood floors in the work path. Drop cloth on carpet is inadequate — drywall dust is fine enough to penetrate carpet fibers and will require professional extraction to remove. If the adjacent room has finished drywall, apply painter's tape along the seam line before any cutting begins.
For ceilings, the junction between the removed wall and the ceiling will require patching regardless of how carefully the demo is done. Budget for drywall patching and skim coat on the ceiling wherever a wall runs up to it.
Dust barriers over doorways — 6-mil polyethylene sheeting with a slit entry — protect the rest of the house. Replace torn barriers immediately. A torn dust barrier in a Jacksonville summer means fine drywall dust in your HVAC return.
See how JK Prestige's renovation process handles dust containment and surface protection on occupied projects.
Step 8: Debris Disposal
Drywall debris is heavy and cannot go in a standard residential trash bin. A full interior wall (8 feet tall, 12 feet wide, both sides of drywall) generates 400–600 pounds of debris. Plan for this before demo day.
Options:
- Dumpster rental: A 10-yard dumpster in Jacksonville runs $350–$550 for a 7-day rental. Adequate for a full room gut.
- Junk hauler: Companies like 1-800-GOT-JUNK operate in the Jacksonville market. Higher cost per load than dumpster, but no placement permit required.
- Contractor disposal: On a full-service project with a licensed GC, debris disposal should be included in the project scope. Confirm this in writing.
Drywall is landfill-eligible in Florida but is not accepted in most curbside recycling. Do not mix drywall debris with hazardous materials (paint, adhesive cans) — those are separate disposal streams.
Get a written estimate in 48 hours. Call (904) 944-0278 or request a consultation.
No call center. No coordinator. A JK principal reviews every inquiry and replies with a real number, not a range, not a follow-up form.
Request Free Estimate →