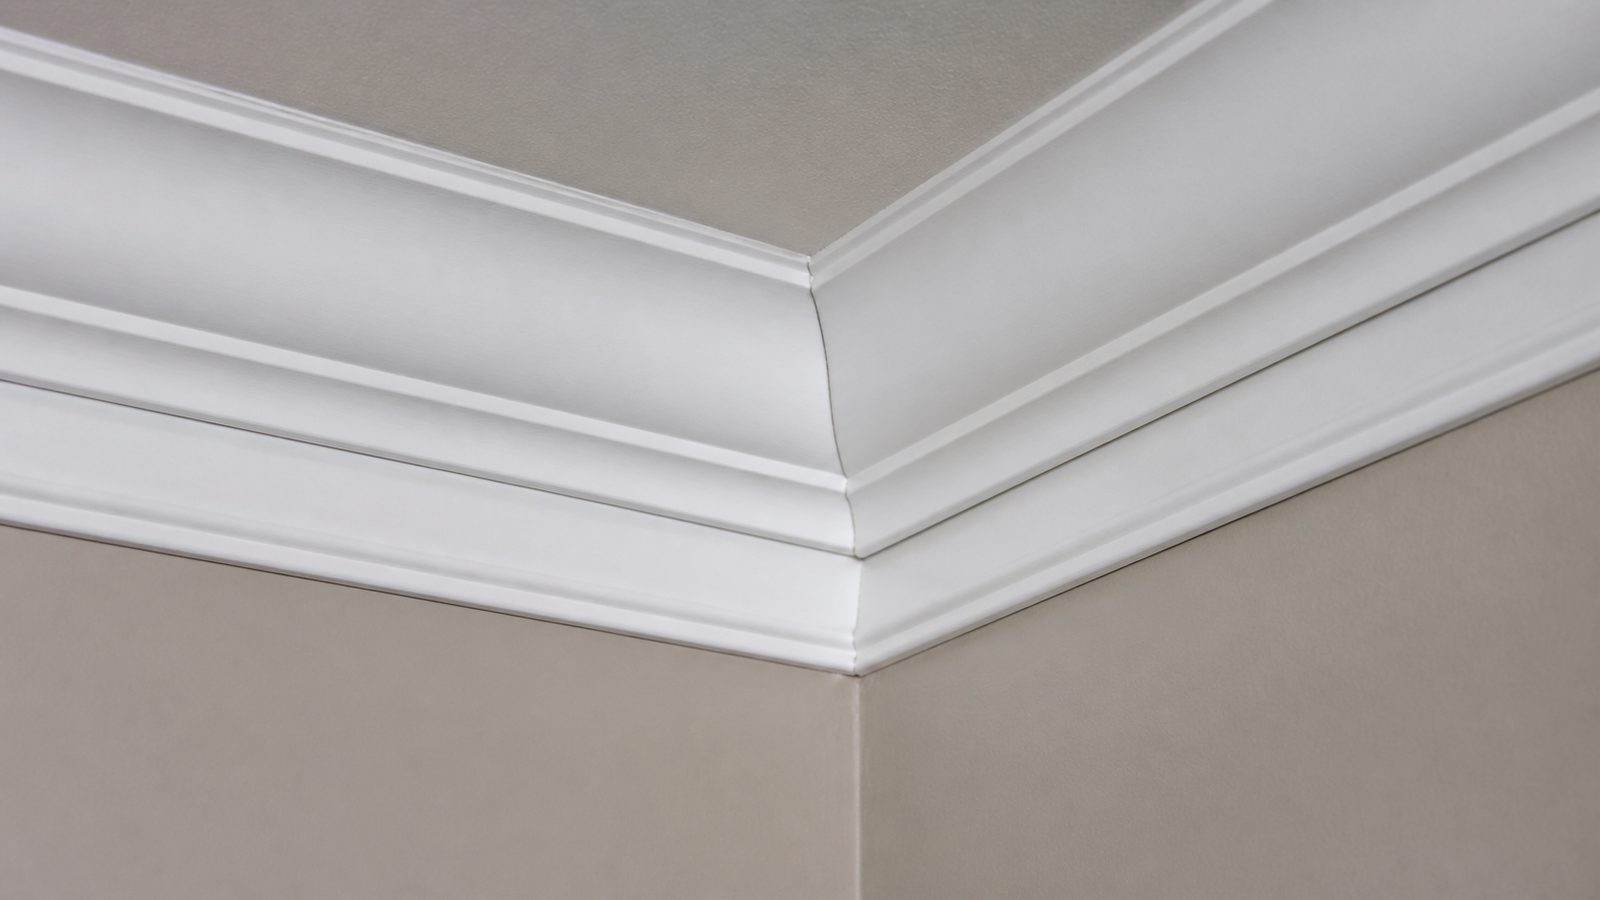
Crown molding is one of those finish details that makes a room look finished and expensive, or cheap and wrong, depending entirely on how well the corners fit. The cuts are the whole game. Get them right and the molding seems to grow out of the wall. Get them wrong and you spend a lot of time with caulk trying to hide gaps that everyone still notices.
This guide covers both coping and mitering because you need to know both. The room decides which one you use where. Difficulty: moderate to high. The measuring and cutting require patience and a willingness to test-fit before nailing. Timeline: one day for a typical room. Total cost range: $100 to $500 in materials for a standard room, depending on molding profile and linear footage.
Tools You Need
- Miter saw (compound miter saw strongly recommended for crown)
- Coping saw
- Jigsaw (optional, as an alternative for coping cuts)
- Round rasp or wood file (for fitting coped joints)
- Tape measure (25-foot)
- Pencil
- Chalk line (for locating wall plates in cathedral or vaulted ceilings if applicable)
- Stud finder
- Pneumatic finish nailer (15-gauge) or hammer and 2.5-inch finish nails
- Air compressor (if using nailer)
- Nail set
- Caulk gun
- Putty knife
- Level
- Combination square
- Safety glasses
Materials You Need
- Crown molding: measure the perimeter of the room in linear feet, add 15 percent for waste. Common profiles run $1.50 to $8 per linear foot for paint-grade stock. $10 to $20 per linear foot for hardwood or custom profiles.
- Paintable caulk (latex siliconized): two to three tubes: $8 to $12 each
- Wood filler or spackling (for nail holes): one small container: $6 to $10
- 2.5-inch finish nails (or appropriate for your nailer gauge): one box: $8 to $15
- Sandpaper (120- and 180-grit): $6 to $10
- Primer and paint (to match existing trim): existing supply often sufficient
- Construction adhesive (optional, for gluing to wall in stud-free areas): $6 to $10 per tube
Step-by-Step Instructions
Phase 1: Understand Crown Molding Geometry
Step 1: Know your spring angle.
Crown molding sits at an angle between the wall and the ceiling — it is not flat against either surface. The angle it makes with the wall is called the spring angle. Most standard residential crown molding has a 38-degree or 45-degree spring angle. This angle determines how you set the molding in your saw when making cuts.
There are two ways to cut crown molding: flat on the saw bed (using the compound angle method) or at the correct spring angle standing upright against the saw fence (the nested method). The nested method is easier to visualize and is what most finish carpenters teach first. Hold the molding upside-down against the fence of the miter saw with the ceiling flat (what will touch the ceiling) against the fence and the wall flat (what will touch the wall) on the bed. Lock this relationship in your head before you make a single cut.
Step 2: Identify your inside and outside corners.
Walk the room and identify every corner type. An inside corner is the standard 90-degree corner formed where two walls meet inward. An outside corner is where a wall end or bump-out creates a convex corner. You will cope inside corners and miter outside corners. This rule applies to most rooms; it is not a preference, it is a best practice.
Phase 2: Coping Inside Corners
Step 3: Understand why you cope inside corners.
A coped joint fits the profile of one piece of molding against the face of another, rather than cutting both pieces at a 45-degree angle and trying to mate them. The reason carpenters cope inside corners is simple: walls are not square, houses settle, and a 90-degree miter gap at an inside corner opens and closes with humidity changes. In Jacksonville, where wood expands and contracts with the seasonal humidity swings, a coped joint stays tight. A mitered inside corner shows a gap within a year.
Step 4: Install the first piece into the inside corner.
The first piece of molding at an inside corner is a butt cut — a square 90-degree cut — that runs into the corner and sits flat against both the ceiling and the wall. Measure the wall length, cut the piece square on both ends (if it runs the full wall) or square on one end and mitered or coped on the other end. Nail it in place with 2.5-inch nails into the wall plates and ceiling joists. The butt-cut piece goes into the corner first.
Step 5: Cut the coped piece.
The piece that meets the butted piece is the coped piece. First, cut a 45-degree inside miter on the end that will meet the corner. This miter exposes the profile of the molding as a pencil line. Then, using a coping saw, cut along that profile line at about a 5-degree back-bevel (cutting back behind the profile face so only the front edge makes contact). The goal is a cut that follows the exact shape of the first piece's profile.
Test-fit the coped piece against the installed piece. It should slide over the face of the first piece and close tight with no gaps. Use a round rasp or wood file to refine the fit. Do not force it. Keep fitting and paring until the joint is tight. This takes patience and practice — your first coped joint will take 20 minutes; your tenth will take five.
Phase 3: Mitering Outside Corners
Step 6: Set up for outside corner miters.
Outside corners require two matching 45-degree miters that come together to form the corner. Both pieces get a 45-degree outside miter on the end that forms the corner. The molding spring angle must be consistent on both pieces or the joint will not align.
Measure carefully. For outside corners, mark the long point of the miter (the outside corner of the building) as your reference point. The long point is the tip of the miter that sticks out furthest.
Step 7: Test-fit before nailing.
Cut both pieces with their outside miters and hold them in place at the corner before nailing either one. Outside corners are rarely exactly 90 degrees, especially in older Jacksonville homes. If your corner is slightly more or slightly less than 90 degrees, adjust your miter saw angle in small increments and test-cut scrap pieces until the joint closes perfectly.
Once the joint fits tight, nail both pieces into the wall framing and to each other through the miter joint face with a single nail.
Phase 4: Long Walls and Scarf Joints
Step 8: Handle long walls with scarf joints.
Standard molding comes in lengths up to 16 feet. If your wall is longer than the stock length, you need a scarf joint — an overlapping joint where two pieces meet in the middle of a wall. Cut both pieces at a 45-degree angle so they overlap, not butt together. The overlap goes in the direction of travel so the seam is less visible. Locate the scarf joint over a ceiling joist so you can nail through it.
Phase 5: Nailing, Filling, and Finishing
Step 9: Nail the molding in place.
Crown molding nails to two surfaces: the wall framing (top plates or studs) and the ceiling joists. Use a stud finder to locate both. Standard crown height places the nailing edge near the top of the wall — the top plate runs continuously and gives you something to nail into. The ceiling side nails into ceiling joists, which run on a set spacing.
Drive nails at a slight angle (15 degrees) toward the framing for better grip. On walls with no backing (stud-free zones between nailers), apply a thin bead of construction adhesive before pressing the molding in place, and tack it with finish nails until the adhesive cures.
Step 10: Fill nail holes, sand, and caulk.
Fill all nail holes with a lightweight wood filler or spackle. Let dry, sand flush with 120-grit, then 180-grit. Caulk all gaps: the ceiling line, the wall line, and any joints that are not perfectly tight. Run a thin bead and tool it smooth with a wet finger. Do not over-caulk a coped joint — a small, tight coped joint needs no caulk. Caulk disguises gaps; it is not a substitute for good cuts.
Step 11: Prime and paint.
Paint-grade molding (MDF, finger-jointed pine, or poplar) requires primer before topcoat. Apply one coat of primer, sand lightly with 180-grit, then apply one to two topcoats of your trim paint. A satin or semi-gloss finish is standard for crown molding. Paint the ceiling line and wall line with a small cut-in brush.
Common Mistakes to Avoid
- Mitering inside corners instead of coping them. In Jacksonville's humidity, mitered inside corners open up within months. Cope them.
- Measuring from the wrong point. On mitered outside corners, always measure to the long point, not the short point. Mix these up and you cut a piece too short.
- Skipping the test-fit on outside corners. Corners in real houses are almost never exactly 90 degrees. Test-fit with scrap before cutting your finish piece.
- Nailing into drywall only with no backing. A finish nail in drywall without framing behind it will pull out over time. Crown molding that sags or pulls away from the ceiling is almost always a missing-nailer problem.
- Caulking wide gaps instead of refitting. A gap larger than 1/16 inch at a coped joint means the cope is wrong. Recut it. Caulk a wide gap and it will crack within a year.
When to Hire a Pro Instead
Call in a finish carpenter or GC when:
- Your room has vaulted or cathedral ceilings. Crown molding on a raked ceiling requires compound miter calculations that change at every point along the slope. This is a skilled task.
- You need more than one room done and your timeline is short. A finish carpenter can work faster than the learning curve allows for a first-timer.
- The molding profile is complex — two-piece built-up crown, egg-and-dart, or custom millwork profiles. Coping a simple cove is one skill; coping a four-piece built-up cornice is another.
- The walls and ceilings are significantly out of plumb or level. An experienced finish carpenter knows how to scribe and fudge in ways that are not obvious from reading instructions.
- The rest of your renovation is already being done by a GC and adding crown molding is a scope addition. Folding it into an existing contract is almost always more cost-effective than a separate mobilization.
Need a Jacksonville GC for this job? Get a 48-hour free fixed-price estimate from JK Prestige Constructor.
No call center. No coordinator. A JK principal reviews every inquiry and replies with a real number, not a range, not a follow-up form.
Request Free Estimate →