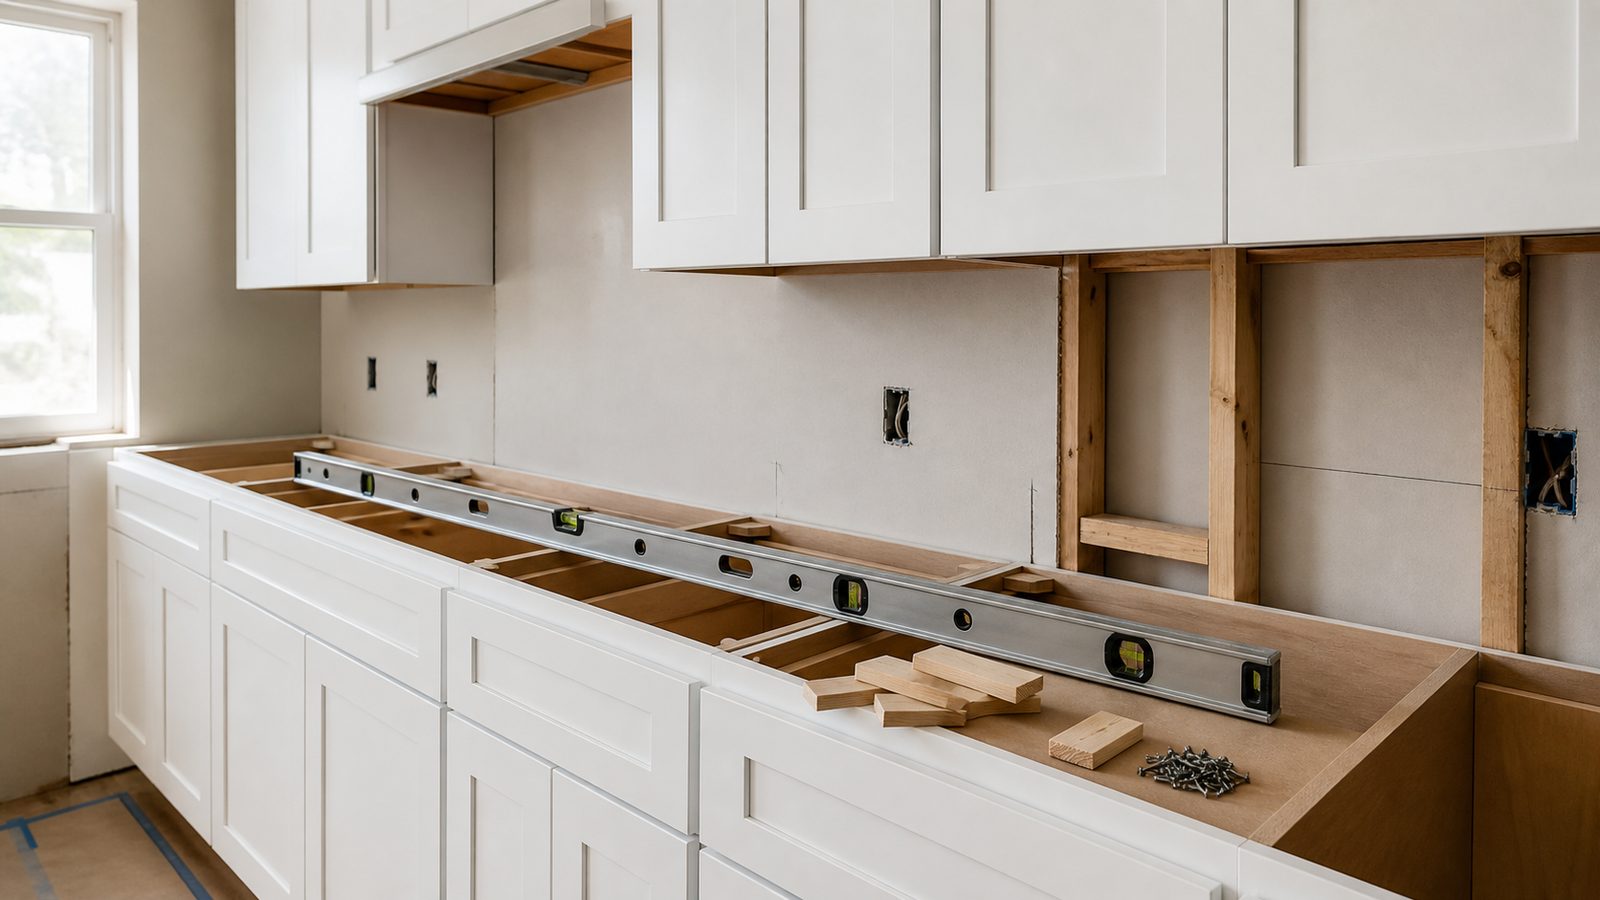
Cabinet installation is the step that sets the tone for everything that follows. The countertop fabricator templates off your base cabinets. The tile setter tiles to your uppers. If your cabinets are out of level or not plumb, everything downstream is fighting that mistake. Do it right and the rest of the kitchen practically installs itself.
This guide is for the homeowner or handyman comfortable with a drill, a level, and basic framing concepts. Difficulty: moderate. You need a helper — you cannot safely hang 40-pound upper cabinets alone. Timeline: one to two days for a typical kitchen. Total cost range: $50 to $200 in tools and fasteners above the cabinet cost itself.
Tools You Need
- Cordless drill and impact driver
- Stud finder (a quality one — not the cheapest)
- Laser level or long 4-foot level
- Chalk line
- Tape measure (25-foot minimum)
- Bar clamps (at least four)
- Drill bits (1/8-inch pilot, 3/8-inch for through holes)
- 3-inch screws (GRK or Spax cabinet screws)
- 2.5-inch cabinet connection screws
- Shims (cedar shims work well)
- Pencil
- Safety glasses
- Stepladder or scaffolding plank (for uppers)
Materials You Need
- Cabinets (measured and ordered per your kitchen layout)
- 1x4 ledger board lumber, 8 feet (for temporary upper cabinet support): $10 to $15
- Cabinet screws (3-inch): one box per 10 linear feet: $15 to $20 per box
- Cabinet connection screws (2.5-inch): one box: $10 to $15
- Cedar shims: two packs: $8 to $12
- Filler strips (if required by your layout): cut from matching cabinet material
- Cabinet feet/legs (base cabinets — most pre-installed): included with cabinets
- Touch-up pen matching cabinet finish: $10 to $20
Step-by-Step Instructions
Phase 1: Layout and Marking
Step 1: Find the high point of the floor and mark your level lines.
The floor in a Jacksonville home is almost never perfectly flat. Set a 4-foot level on the floor along each wall where base cabinets will sit. Identify the highest point — this is where your first base cabinet goes.
From that high point, measure up 34.5 inches (standard base cabinet height before the countertop) and make a pencil mark on the wall. Snap a chalk line at this height across the entire base cabinet run. This line represents the top of all base cabinets. Every base cabinet gets shimmed up to this line.
From that same line, measure up 19.5 inches (standard gap between counter and uppers) and snap another line. This is the bottom of your upper cabinets. A standard upper cabinet is 30 to 42 inches tall. Measure up from the lower line to confirm the tops land where you want them relative to the ceiling.
Step 2: Mark every stud in the wall.
Use the stud finder to locate all studs along the upper and lower cabinet runs. Mark each stud location clearly at two heights: one mark at the upper cabinet mounting rail height, one mark at the base cabinet mounting rail height. Tape over the marks with painter's tape and re-mark with a felt pen so they do not disappear during installation.
Standard stud spacing is 16 inches on center in most Jacksonville homes. If you hit a section that seems random, you may be in a wall that was modified at some point. Probe carefully with a 1/8-inch bit if needed to confirm stud location before driving a 3-inch screw.
Phase 2: Upper Cabinets
Step 3: Install a temporary ledger board.
Screw a straight 1x4 board to the wall with its top edge exactly on your bottom-of-upper-cabinet line. Use 3-inch screws into studs. This board supports the weight of upper cabinets while you fasten them — you cannot hold a 35-pound cabinet in place and drive screws at the same time, even with a helper.
Confirm the ledger is level before installing any cabinet. If it is not level, the entire upper run will be crooked.
Step 4: Hang the first upper cabinet.
Start with a corner cabinet if your layout has one, or with the most prominent upper cabinet in the run — typically the one centered over the sink or range.
Lift the cabinet onto the ledger. Confirm it is plumb front-to-back and side-to-side. Drive two 3-inch cabinet screws through the top mounting rail into the studs behind the wall. Drive two screws through the bottom rail the same way. Do not overtighten — snug is enough at this stage.
Step 5: Hang and connect adjacent upper cabinets.
Set the next cabinet on the ledger board against the first. Align the face frames flush. Use two bar clamps to pull the face frames tight together before drilling. The faces must be flush — if one is proud of the other, add shims behind the set-back cabinet before fastening.
Drill a 1/8-inch pilot hole through the face frame of one cabinet into the edge of the adjacent frame. Drive a 2.5-inch face frame screw. Two screws per joint — one near the top, one near the bottom.
Then fasten to the wall: two screws per stud through the mounting rails. Work your way along the entire upper run in this fashion.
Step 6: Remove the ledger board and fill the holes.
Once all uppers are fastened and confirmed level and plumb, remove the ledger board. Patch the screw holes with lightweight spackle. Sand and paint to match once dry.
Phase 3: Base Cabinets
Step 7: Install base cabinets starting at the high point.
Place the first base cabinet at the high point of the floor. Most base cabinets have adjustable legs inside the cabinet box. Set all legs to their minimum height. If the cabinet sits below your chalk line (rare), shim under the legs until the top of the cabinet box aligns with the line. If the cabinet sits above the line, adjust legs down or add shims to bring it flush.
Use a level to confirm the cabinet is level front-to-back and side-to-side. Then fasten to the wall through the back mounting rail into studs with two 3-inch screws.
Step 8: Set and level the remaining base cabinets.
Work in both directions from your starting point. Each successive cabinet must match the height of the first. Shim under legs as needed. Clamp adjacent face frames together before connecting — same process as uppers. Check level constantly as you go.
For cabinets over uneven floors, the gap between the bottom of the cabinet and the floor will vary. The toe kick cover (a 4-inch tall strip that clips to the legs) hides this gap. If your gap is larger than the standard toe kick height, use a taller filler strip.
Step 9: Connect base cabinets to each other and to the wall.
Clamp face frames together and connect with 2.5-inch screws, same as uppers. Fasten to wall through back mounting rail. Fasten to the floor if your cabinet design includes a base rather than adjustable legs.
Phase 4: Final Checks
Step 10: Install fillers, scribe molding, and doors.
Filler strips are cut pieces of matching cabinet material that fill gaps between a cabinet end and a wall. Measure carefully and cut with a table saw or circular saw. They attach with small screws through the face frame.
Check all door hinges for alignment. Most modern European-style hinges have three-axis adjustment (up/down, left/right, in/out). Adjust until doors are level, evenly gapped, and close without binding. Install drawer slides and test that drawers pull out smoothly.
Step 11: Double-check level and plumb across the full run.
Before the countertop fabricator arrives, lay a 4-foot level across the tops of the base cabinets at multiple points along the run. Any high spot that the countertop cannot bridge may need to be shimmed or planed down. The countertop fabricator will check this at template time, but catching it early saves a reschedule.
Common Mistakes to Avoid
- Hanging uppers before bases. Always hang uppers first. You need access to the wall behind base cabinets for plumbing and electrical anyway, and working without base cabinets in the way is much easier.
- Trusting the floor to be level. It almost never is. Always find the high point and shim everything up to it.
- Not clamping face frames before connecting. Even a 1/16-inch gap between face frames looks sloppy at eye level. Clamp tight and hold before drilling.
- Using drywall screws instead of cabinet screws. Drywall screws are not rated for shear load. Use GRK or Spax cabinet screws with a full thread and a washer head.
- Missing studs on upper cabinets. A wall anchor is not strong enough to hold an upper cabinet loaded with dishes. Every upper cabinet needs at least two screws into studs.
When to Hire a Pro Instead
Bring in a licensed contractor or experienced cabinet installer when:
- Your kitchen has a corner that requires a blind corner or diagonal cabinet and custom filler strips. These require precise measurement and fitting that punishes small errors.
- You are removing a load-bearing wall to open the kitchen layout. This is structural work that requires engineering, permits, and inspected work in Jacksonville.
- Your ceiling is out of level by more than an inch across the run. Crown molding and upper cabinet soffits require careful scribing that takes experience.
- The cabinet manufacturer voids the warranty for non-professional installation. Some semi-custom and custom cabinet lines have this clause. Check your documentation before starting.
- You are on a hard deadline for a countertop template date. A mis-set cabinet that gets caught two days before template day means rescheduling everything downstream.
Need a Jacksonville GC for this job? Get a 48-hour free fixed-price estimate from JK Prestige Constructor.
No call center. No coordinator. A JK principal reviews every inquiry and replies with a real number, not a range, not a follow-up form.
Request Free Estimate →