Most homeowners assume their GC will handle dust and damage control automatically. Some do. Many do not, and the difference between a well-managed renovation site and a poorly managed one shows up in your HVAC filter, your hardwood floors, and every surface in the adjacent rooms three weeks after the work is done.
In Jacksonville, the stakes are higher than most markets. Florida's heat and humidity mean drywall dust does not just settle on surfaces -- it combines with moisture and creates conditions that promote mold growth if HVAC systems are not sealed and if daily cleanup is not rigorous.
This guide covers what you should require, what you should set up before work begins, and what your GC should be doing daily. At JK Prestige Construction, drywall is self-performed -- meaning dust control is the GC's direct responsibility, not a subcontractor's afterthought.
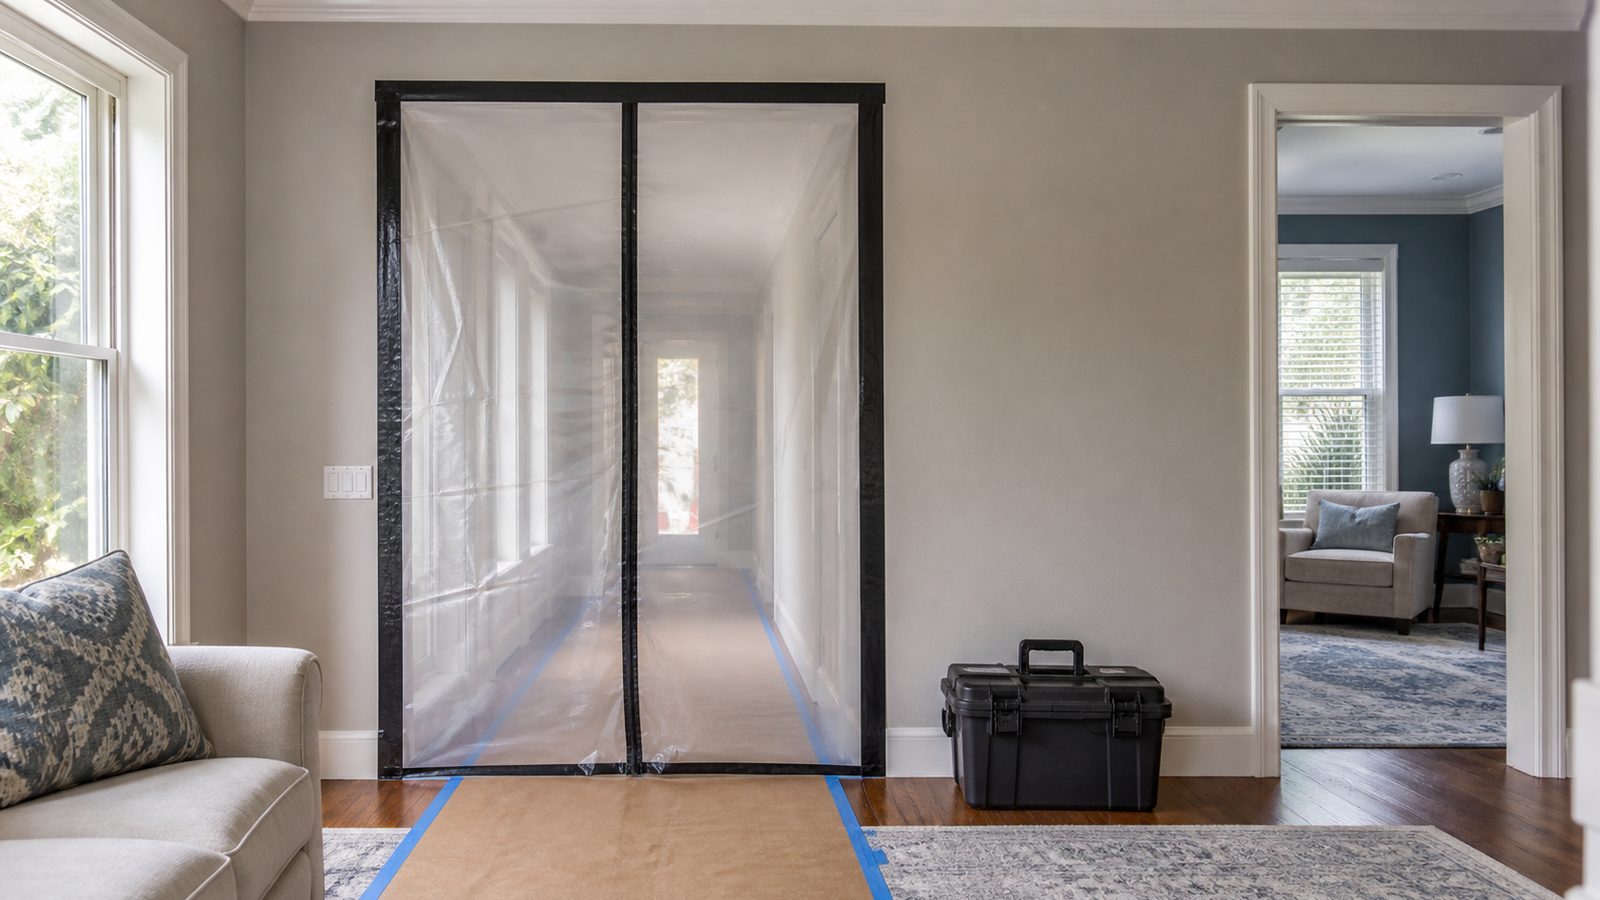
Step 1: Establish a Clean Construction Zone with Poly Barriers and Tape
Before any demolition or drywall work begins, the construction zone must be physically separated from the rest of the house. The standard tool for this is a ZipWall system -- a tensioned pole-and-barrier system that creates a dust-tight partition using poly sheeting and spring-loaded poles.
A proper containment setup:
- Uses 6-mil poly sheeting at a minimum (thinner sheeting tears and lets dust pass)
- Tapes all seams and edges with construction tape -- seams that are loose or un-taped allow significant dust migration
- Includes a zipper entry panel so workers can enter and exit without collapsing the barrier
- Extends floor-to-ceiling, not floor-to-7-feet with a gap
For larger projects where multiple rooms are involved, establish a primary containment boundary at the entry point to the construction zone and a secondary barrier at the outermost edge of work activity.
Pro tip: Ask your GC to show you the containment setup before work starts. Walk around it and look for gaps at ceiling junctions, at floor level (where poly meets baseboard), and at door frames. A gap you can slide your hand through will pass significant amounts of dust during an active drywall day.
Step 2: Protect Hardwood Floors with Ram Board or Equivalent (Never Cardboard)
Hardwood floors in adjacent areas and in the construction zone itself require physical protection from dropped tools, dragged materials, water spills, and abrasion from foot traffic.
In Jacksonville's humidity, the wrong protection material creates its own problem. Cardboard absorbs moisture, holds it against the floor surface, and creates conditions that cup hardwood and promote mold under the protection layer. Cardboard is not acceptable floor protection in a Florida renovation.
The correct product is Ram Board or an equivalent non-absorbent, breathable floor protection panel. Ram Board is a heavy, paperboard-based product that:
- Protects against impact and abrasion
- Breathes enough to allow the floor to acclimate without trapping moisture
- Can be taped at seams to prevent debris from getting underneath
- Is water-resistant (not waterproof -- avoid pooling water underneath)
For hardwood in areas that are actively used during the renovation -- hallways, kitchens, living areas adjacent to the work zone -- keep Ram Board down continuously during the project and do not remove it between work days.
Warning: Even with floor protection in place, check the condition of the protection weekly. If it is torn, saturated, or shifting, replace it. Protection that has failed is worse than no protection because workers assume the floor is covered and apply more force than they would on an exposed surface.
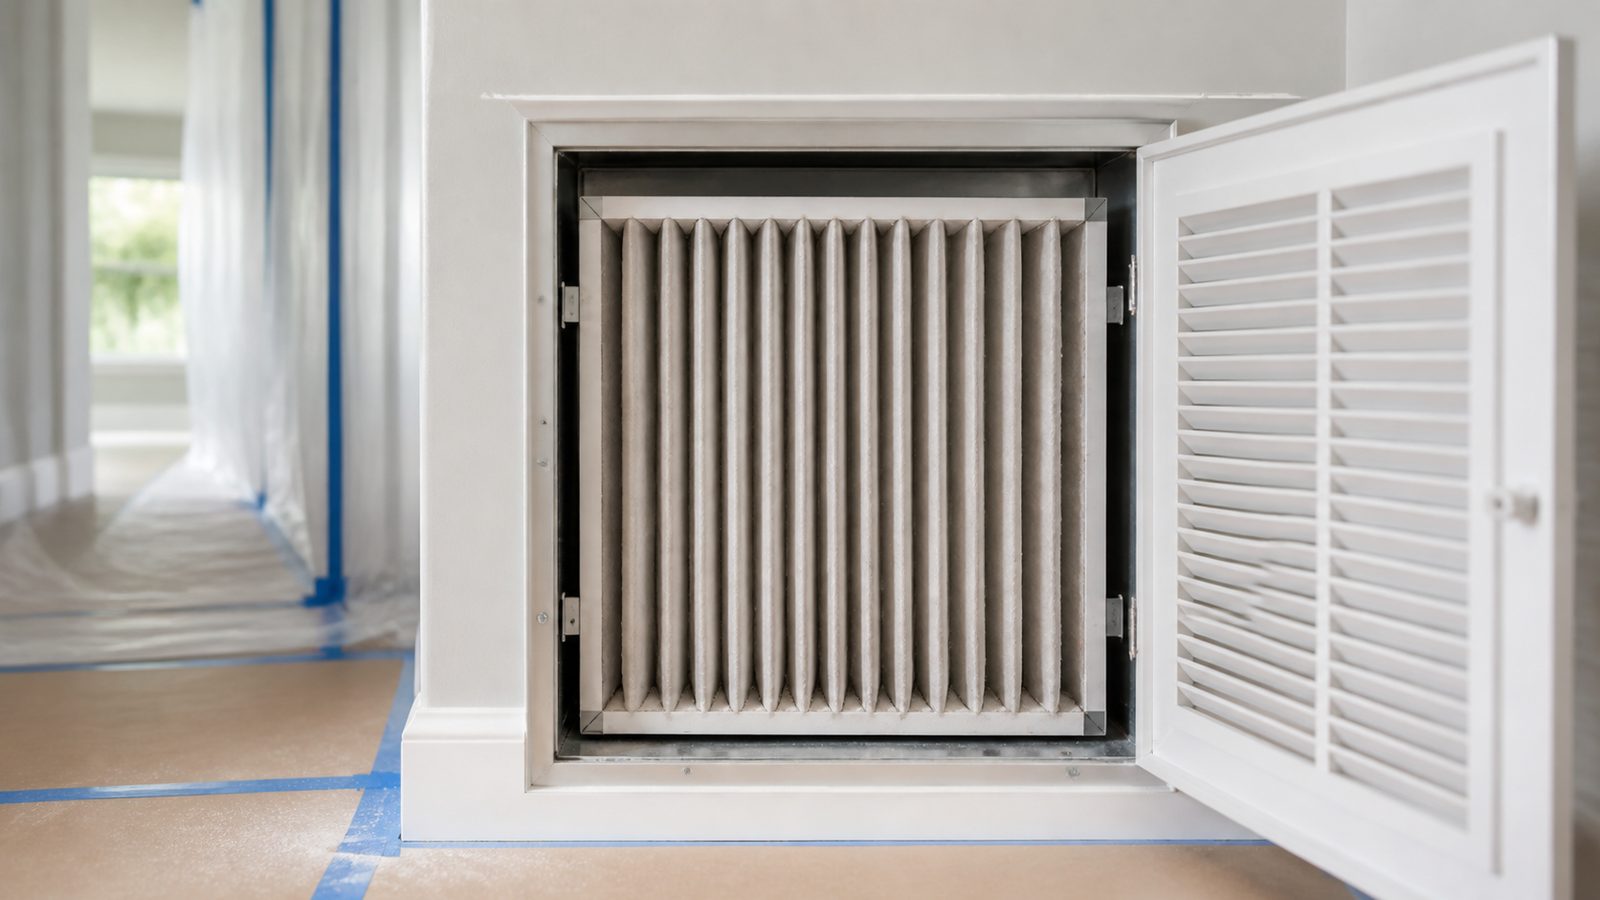
Step 3: Seal HVAC Returns (Drywall Dust in Florida Heat Is Brutal)
The single most neglected dust control measure in occupied home renovations is sealing the HVAC return air registers in and near the construction zone.
Here is the problem: your HVAC system draws air from the house (return air) and pushes conditioned air back out (supply air). When drywall sanding is happening 10 feet from an unsealed return air register, the system actively vacuums fine drywall dust into the ductwork, the air handler, and then distributes that dust throughout the rest of the house.
In Jacksonville's summer heat, the system runs constantly -- which means constant redistribution of construction dust if returns are not sealed.
Before any drywall work begins:
- Seal all return air registers in the construction zone with poly sheeting and tape
- Seal return registers in adjacent rooms that share ductwork with the construction area
- Replace the air handler filter with a high-MERV filter (MERV 11 or higher) before renovation begins and check it weekly
After drywall work is complete and final cleanup is done, remove all register seals, run the system for 24 hours, and replace the filter again before occupying the renovated space.
Pro tip: Ask your GC about negative pressure containment for major drywall work. A box fan exhausting air from the construction zone to the exterior (through a window or exterior door) creates negative pressure in the zone, pulling air in from the rest of the house toward the construction area rather than pushing dust out. This is the same principle used in Infection Control Risk Assessment (ICRA)-rated containment for healthcare renovation, and JK Prestige crews are ICRA-trained.
Step 4: Protect Countertops and Cabinets in Adjacent Spaces
Kitchen and bathroom countertops adjacent to construction zones are vulnerable to both dust accumulation and physical damage from tools and materials being carried through the space.
Cover countertops with Ram Board or heavy-duty cardboard taped at the edges. Remove or cover:
- Appliances on countertops (they collect dust internally and are difficult to clean)
- Cabinet hardware (hardware can be scratched by abrasive dust particles)
- Exposed dish racks, small appliances, and items that would require washing after renovation
For cabinets in or adjacent to the work zone:
- Tape cabinet doors closed with painter's tape to prevent dust infiltration
- Consider removing doors entirely and storing them off-site if the cabinet interiors are near heavy drywall work
- After work is complete, vacuum cabinet interiors before placing items back inside
Warning: Do not cover countertops with poly sheeting alone. Poly sheeting slides, and tools placed on slick poly move unpredictably and can fall off the countertop. Ram Board or a fixed heavy material is safer and more protective.
Step 5: Schedule Plumbing and Electrical Work During Off-Hours in Occupied Areas
For occupied renovations where work must happen in or adjacent to living areas, schedule the most disruptive trades during times when occupants are out of the house.
The most disruptive activities in an occupied home renovation:
- Concrete or tile sawing (extreme dust and noise)
- Demolition of existing finishes
- Drywall texture spray or skimcoat (airborne particles for hours)
- Painting in enclosed spaces (fume exposure)
For plumbing and electrical work that requires access to occupied spaces -- a bathroom with an active shower, a kitchen in use -- schedule those activities in the first hours of the morning when occupants can leave for the day and return when work is complete.
Establish this schedule agreement in writing before construction begins, not as a verbal understanding discovered when the tile saw fires up at 7am next to the bedroom.
Pro tip: Ask your GC for a 3-week look-ahead (see our guide to tracking construction projects) that identifies which days involve high-disruption activities. This gives you time to arrange childcare, pet care, or temporary work-from-home alternatives for those specific days.
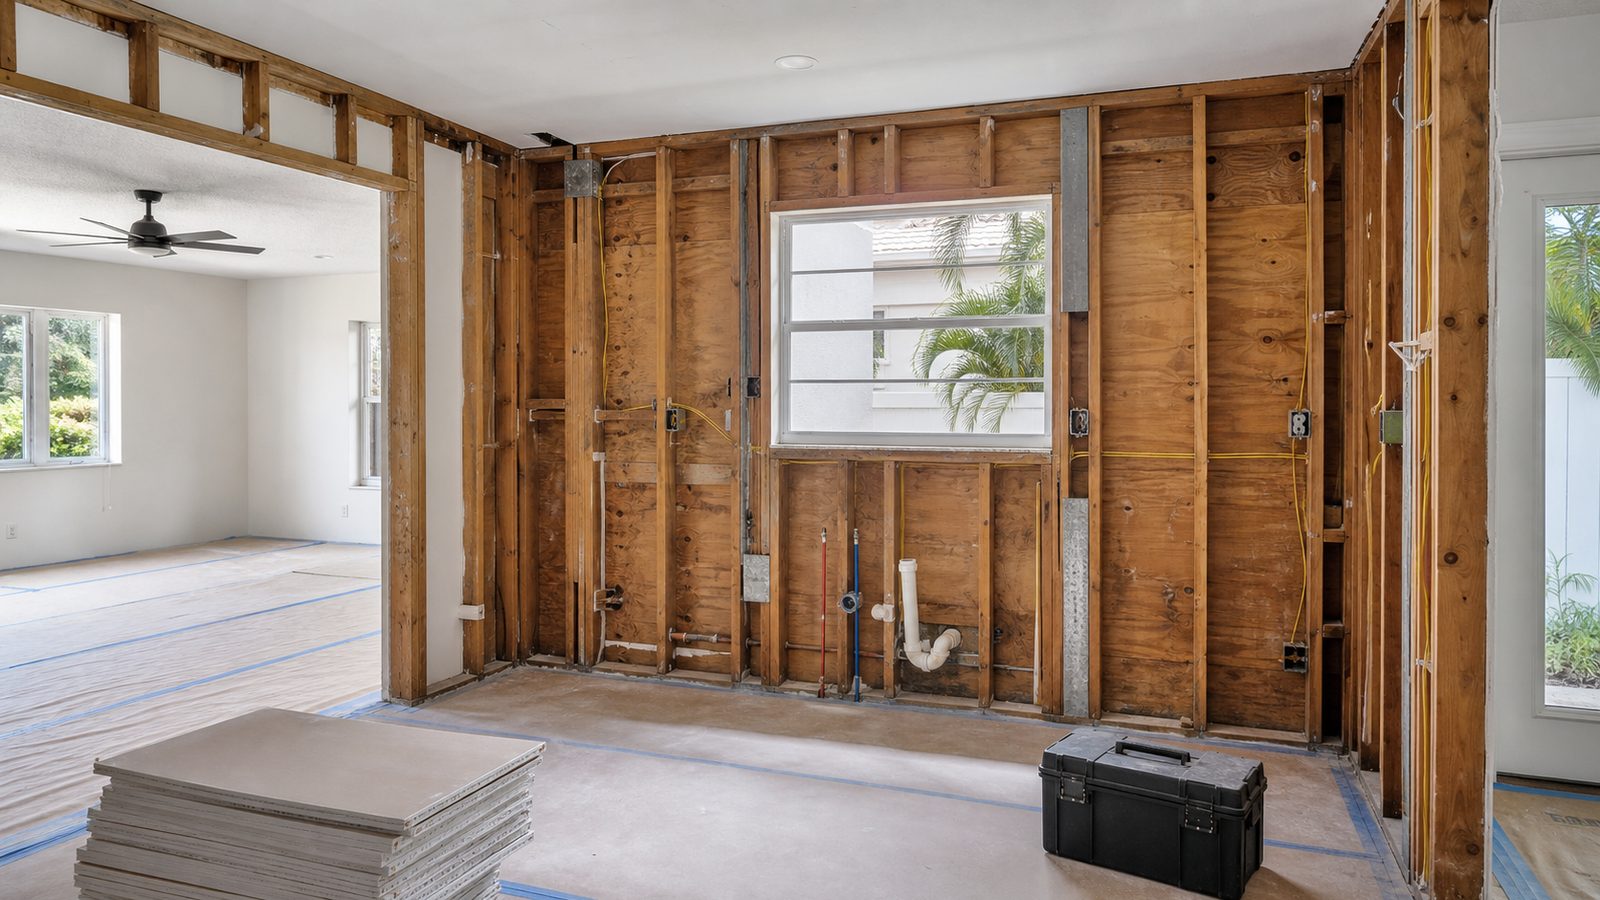
Step 6: Daily End-of-Day Cleanup Standard
A renovation site that is not cleaned daily becomes progressively more hazardous and progressively harder to clean. Fine drywall dust that settles and is then disturbed by the next day's work becomes airborne again and again.
The daily cleanup standard your GC should maintain:
- Vacuum drywall dust from all horizontal surfaces in the construction zone (a shop vac with a HEPA filter, not a standard shop vac that exhausts dust back into the air)
- Sweep or vacuum flooring before walking through the house
- Remove all debris to a designated staging area or dumpster -- no debris accumulation inside the construction zone overnight
- Reseal any containment barriers that were opened during the day
- Confirm that HVAC registers are sealed before leaving
This is not optional -- it is a contractual standard that should be written into the scope of work. Ask your GC specifically: "What is your daily cleanup requirement for your crews?" A vague answer ("we keep a clean site") is not acceptable. A specific answer ("crew leader is responsible for HEPA vacuum of the work area and debris removal before leaving the site each day") is acceptable.
Warning: In Jacksonville's summer heat, accumulated organic debris (wood scraps, paper, food waste from crew lunches) creates conditions for pest activity quickly. A clean site at end of day is not just about dust -- it is about not creating a pest harborage inside your occupied home.
Step 7: What to Do with Valuables and Pets
Construction activity creates two categories of risk for valuables and pets: physical damage from work activity and theft by individuals who should not have access.
Valuables:
- Remove jewelry, electronics, small art pieces, and other portable high-value items from the construction zone and adjacent areas before work begins
- Lock rooms that are not part of the construction scope and keep them locked during the project
- If any items cannot be removed, photograph and document them before work begins and again after work is complete
Pets:
- Dogs and cats should be confined away from the construction zone during work hours. Construction zones have open doors, unfamiliar workers, hazardous materials (solvents, adhesives, sharp debris), and noise levels that stress animals.
- For projects lasting more than a few days, consider boarding pets for the duration of the most disruptive phases (demolition and framing are the loudest and most disruptive).
- Birds and reptiles are sensitive to airborne particles and solvent fumes -- remove them from the home entirely during drywall and painting phases.
Pro tip: Establish a written communication protocol with your GC for daily issues -- not just emergencies. A daily 5-minute text update or end-of-day email covering what was done, what is planned for tomorrow, and any issues that arose eliminates most of the anxiety associated with living through a renovation.
For home renovation projects in Jacksonville, JK Prestige Construction self-performs drywall, which means dust control is managed by the GC's own crew, not a subcontractor. The principal's direct cell is the communication channel for every project -- no phone trees. New home construction follows the same daily site discipline.
Get a written estimate in 48 hours -- call (904) 944-0278 or request a consultation.
No call center. No coordinator. A JK principal reviews every inquiry and replies with a real number, not a range, not a follow-up form.
Request Free Estimate →