This guide is for homeowners with existing solid hardwood floors (3/4-inch minimum thickness) that have surface scratches, worn finish, or mild staining. If your floors are engineered hardwood thinner than 3/8 inch, skip the drum sander — you may not have enough wear layer left to sand.
Difficulty: Moderate to Hard. The sanding phase requires patience and machine control. One wrong pass leaves visible gouges that take hours to correct.
Time estimate: One room (200-300 sq ft) takes a full weekend. Day 1 is prep and sanding. Day 2 is staining and first coat. Days 3-4 are finish coats with light scuff-sanding between coats.
Total cost range: $200-$600 for one room, depending on finish choice and whether you rent or borrow equipment. A professional refinish in Jacksonville typically runs $3-$5 per square foot.
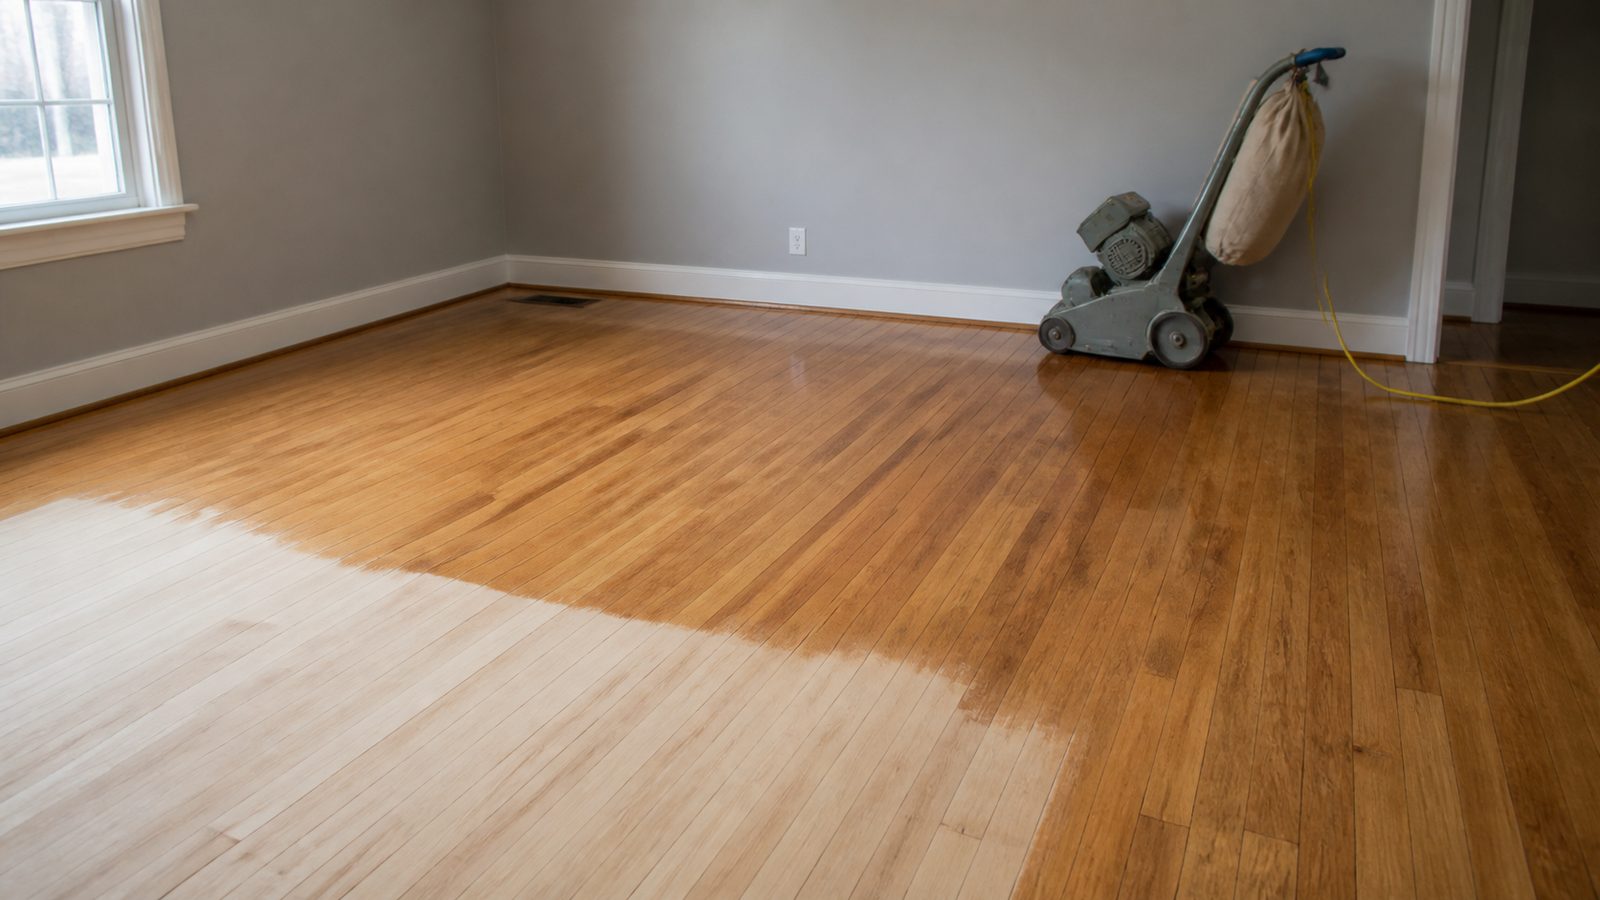
Tools you need
- Drum sander (rental, ~$65/day at Home Depot or Sunbelt Rentals)
- Edge sander (rental, ~$40/day)
- Random orbital sander or hand scraper for corners
- Shop vacuum with fine-dust bag
- Tack cloths (6-12)
- Paint roller with 3/8-inch nap
- Lambswool applicator or quality foam roller for finish coats
- Painter's tape and plastic sheeting
- Knee pads
- Respirator (N95 minimum; P100 preferred during sanding)
- Safety glasses
- Ear protection
Materials you need
- 36-grit, 60-grit, and 80-grit sandpaper for drum sander ($15-$25 per pack; buy more than you think you need)
- 80-grit and 120-grit discs for edge sander
- Wood floor stain, if changing color ($25-$40 per quart; 1 quart covers ~150 sq ft)
- Polyurethane finish, oil-based or water-based (oil-based runs $30-$50/gallon; water-based is $45-$70/gallon)
- Wood filler or color-matched putty for cracks and nail holes ($8-$12 per tube)
- Mineral spirits for oil-based cleanup ($10)
- Plastic sheeting for doorways and HVAC vents ($10)
Budget tip: Water-based poly dries faster (2-3 hours between coats) but costs more. Oil-based gives a warmer amber tone and is more forgiving, but you need 8 hours between coats and the fumes are serious. In Jacksonville's humidity, water-based also raises grain less.
Step-by-step instructions
Phase 1: Prep the room
Step 1: Clear and inspect the floor. Remove all furniture, area rugs, and floor registers. Walk every square foot and mark problem spots with painter's tape: popped nails, loose boards, deep gouges, and black water stains. Black stains usually mean moisture damage that has reached the subfloor. If you find more than two or three of these, read the "When to hire a pro" section before continuing.
Step 2: Set nails and fill gaps. Any nail head sitting proud of the surface will shred your sandpaper immediately. Use a nail set and hammer to sink every fastener at least 1/8 inch below the surface. Fill the holes and any gaps between boards with wood filler. Let it dry completely per manufacturer instructions — usually 2-4 hours in Jacksonville heat.
Step 3: Seal the room. Tape plastic sheeting over every doorway, HVAC vent, and return. Fine sanding dust travels everywhere. Seal light fixtures if you can. Turn off the HVAC system while sanding to avoid pulling dust through the whole house. Open windows on opposite walls for cross-ventilation.
Phase 2: Sand the floor
Step 4: First pass with the drum sander. Load 36-grit paper. Start at one wall and move in the direction of the wood grain. Keep the sander moving at all times — stopping even for a second with the drum spinning cuts a visible dip. Work the room in parallel strips, overlapping each pass by 2-3 inches. Never sand across the grain on a diagonal unless you are leveling an extremely cupped floor, and only do that on the first cut.
Step 5: Edge sand and corners. The drum sander cannot reach within 4-6 inches of walls. Use the edge sander in the same grit along walls. Use a hand scraper or random orbital sander to get into corners and closets. This is tedious. Do not rush it.
Step 6: Second and third passes. Follow with 60-grit, then 80-grit, using the same pattern for each pass. Vacuum thoroughly between every grit change. The finer the final sand, the smoother the finish. Most professionals end at 80-grit before staining. Going to 100-grit or finer can close the wood grain too much and prevent stain from absorbing evenly.
Step 7: Vacuum and tack. Vacuum the entire floor twice, then wipe down with tack cloths. Hit the baseboards and walls, too — any airborne dust that settles in your finish coat will show. Wait 30-60 minutes after vacuuming before applying anything.
Phase 3: Stain and finish
Step 8: Apply stain (if using). Apply stain with a clean rag or foam applicator, working 3-4 boards at a time in the direction of the grain. Wipe off the excess before it gets tacky — typically within 3-5 minutes. Stain that sits too long looks blotchy. In Jacksonville's summer heat, your working time shortens significantly, so apply early in the morning or use the AC. Let stain dry fully (usually 8-12 hours for oil-based) before any finish coat.
Step 9: First finish coat. Pour finish into a paint tray. Work backward from the farthest corner toward the door so you never step on wet finish. Use long, even strokes in the direction of the grain. Avoid going back over areas that have started to set — it creates drag marks. A thin coat is better than a thick one. Thick coats run, bubble, and take much longer to cure.
Step 10: Scuff-sand between coats. Once the first coat is dry to the touch (2-4 hours for water-based, 8 hours for oil-based), scuff-sand lightly with a 120-grit screen or 220-grit sandpaper on a pole sander. This gives the next coat something to bond to. Vacuum and tack cloth again before the next coat.
Step 11: Second and third finish coats. Repeat the application process. Three coats is the minimum for a floor that will see daily foot traffic. The final coat gets no scuff-sand.
Step 12: Cure time. Water-based poly is ready for foot traffic in about 24 hours but takes 7-10 days to fully cure. Oil-based needs 48-72 hours before furniture goes back. Do not put rugs down for at least two weeks. In Jacksonville's summer humidity, add a day or two to these estimates.
Common mistakes to avoid
- Starting with too fine a grit. If you start at 60 or 80 instead of 36, you will spend twice as long removing old finish and risk burning the wood. Always start coarse.
- Stopping the drum sander in place. The spinning drum will cut a visible dip in your floor in under two seconds. Keep moving.
- Skipping the tack cloth step. Dust in the finish coat is impossible to fix without sanding the coat back down. It is not optional.
- Applying finish in thick coats. Two thin coats outlast one thick coat and look better. Thick coats peel.
- Not testing stain on a hidden area first. Stain color on the can and stain color on your specific wood species can look very different. Pull a floor register and test underneath it before committing to the whole room.
When to hire a pro instead
Some floors look like a refinish job but actually need more work. Call a professional GC or flooring contractor in Jacksonville if:
- You find soft spots or springy sections — this usually means subfloor rot or joist damage that has to be fixed before you lay any finish.
- The floor has been refinished three or more times. Solid 3/4-inch boards can only be sanded so many times. A flooring contractor can measure remaining thickness with a depth gauge.
- More than 15-20 percent of boards have deep black water stains. Surface stains sand out; stains that have penetrated the full thickness of the board mean moisture has been present long-term, and you likely have a hidden source still active.
- The floor is squeaking in multiple locations. This indicates loose fasteners, movement in the subfloor, or gaps between the subfloor and joists. Adding a finish coat over a squeaky floor does not fix the squeak — it just gives you a beautiful squeaky floor.
- You have engineered hardwood with a thin wear layer, parquet, or any exotic species you cannot identify. These all have specific sanding requirements that differ from standard oak or pine.
- The job is more than one room and you have never run a drum sander before. The learning curve on the first 200 square feet is real.
Need a Jacksonville GC for this job? Get a 48-hour free fixed-price estimate from JK Prestige Constructor.
No call center. No coordinator. A JK principal reviews every inquiry and replies with a real number, not a range, not a follow-up form.
Request Free Estimate →