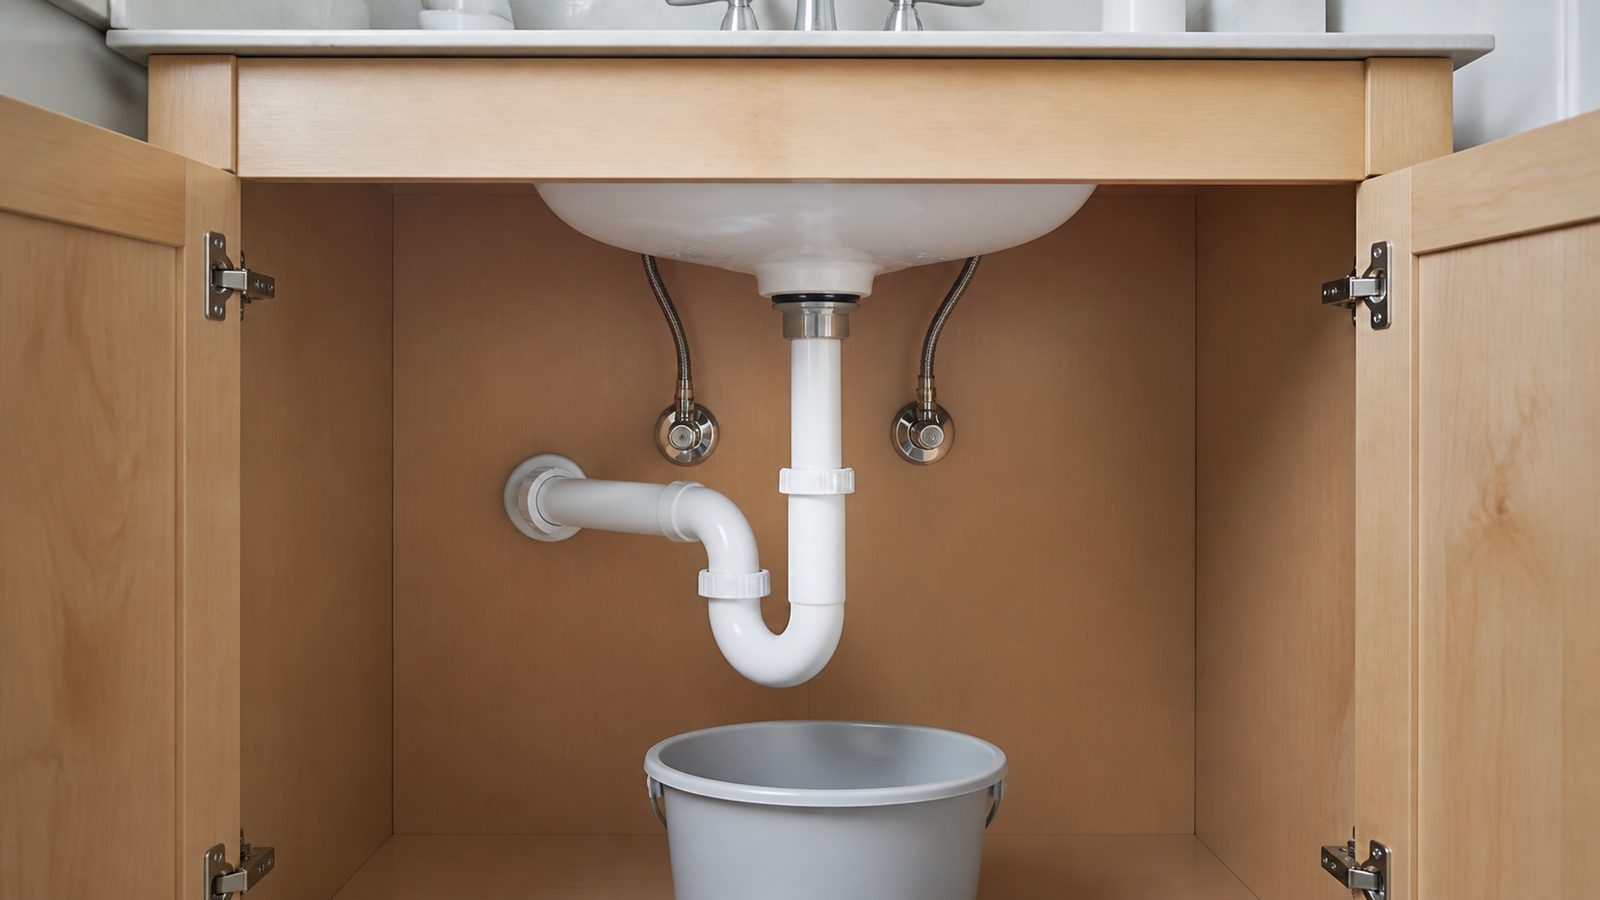
A leaking or corroded P-trap under a bathroom sink is one of the most common repairs we get called about in Jacksonville, and it's also one of the more approachable ones for a homeowner willing to spend an afternoon under the vanity. The parts are cheap and the tools are basic. Here's how to do it correctly, including the details that separate a repair that lasts from one you'll be redoing in six months.
When You Need a Permit in Jacksonville
Swapping a worn P-trap, tailpiece, or pop-up drain assembly for a like-for-like replacement in the same location is generally treated as routine maintenance in Duval County and doesn't require a permit. That's the job this article covers.
The line gets crossed once you go beyond replacing worn parts. Relocating the sink drain, altering the vent connection, cutting into a wall or floor to reach piping, or changing the trap configuration is permitted plumbing work under the City of Jacksonville's plumbing code. If your project touches any of that, call the City of Jacksonville Building Inspection Division before you start.
Tools and Materials
- Adjustable pliers or channel-lock pliers (a strap wrench helps on stuck slip nuts)
- Bucket or shallow pan to catch standing water
- Plumber's putty
- Plumber's grade silicone (for cultured marble or engineered stone sinks)
- Replacement P-trap kit, PVC or chrome tubular, matched to your drain size (typically 1-1/4 inch)
- Replacement tailpiece if the old one is cracked or corroded
- New pop-up drain assembly if the flange, stopper, or pivot rod is worn
- Rag, flashlight, small wire brush
- Utility knife to cut away old putty
Step-by-Step
1. Shut off the water and clear the cabinet. Close both angle stops, open the faucet to relieve pressure, and empty the vanity so you can see what you're doing.
2. Set a bucket under the trap. There's standing water in the trap and whatever sits in the tailpiece. Skip this and you'll be mopping the cabinet floor.
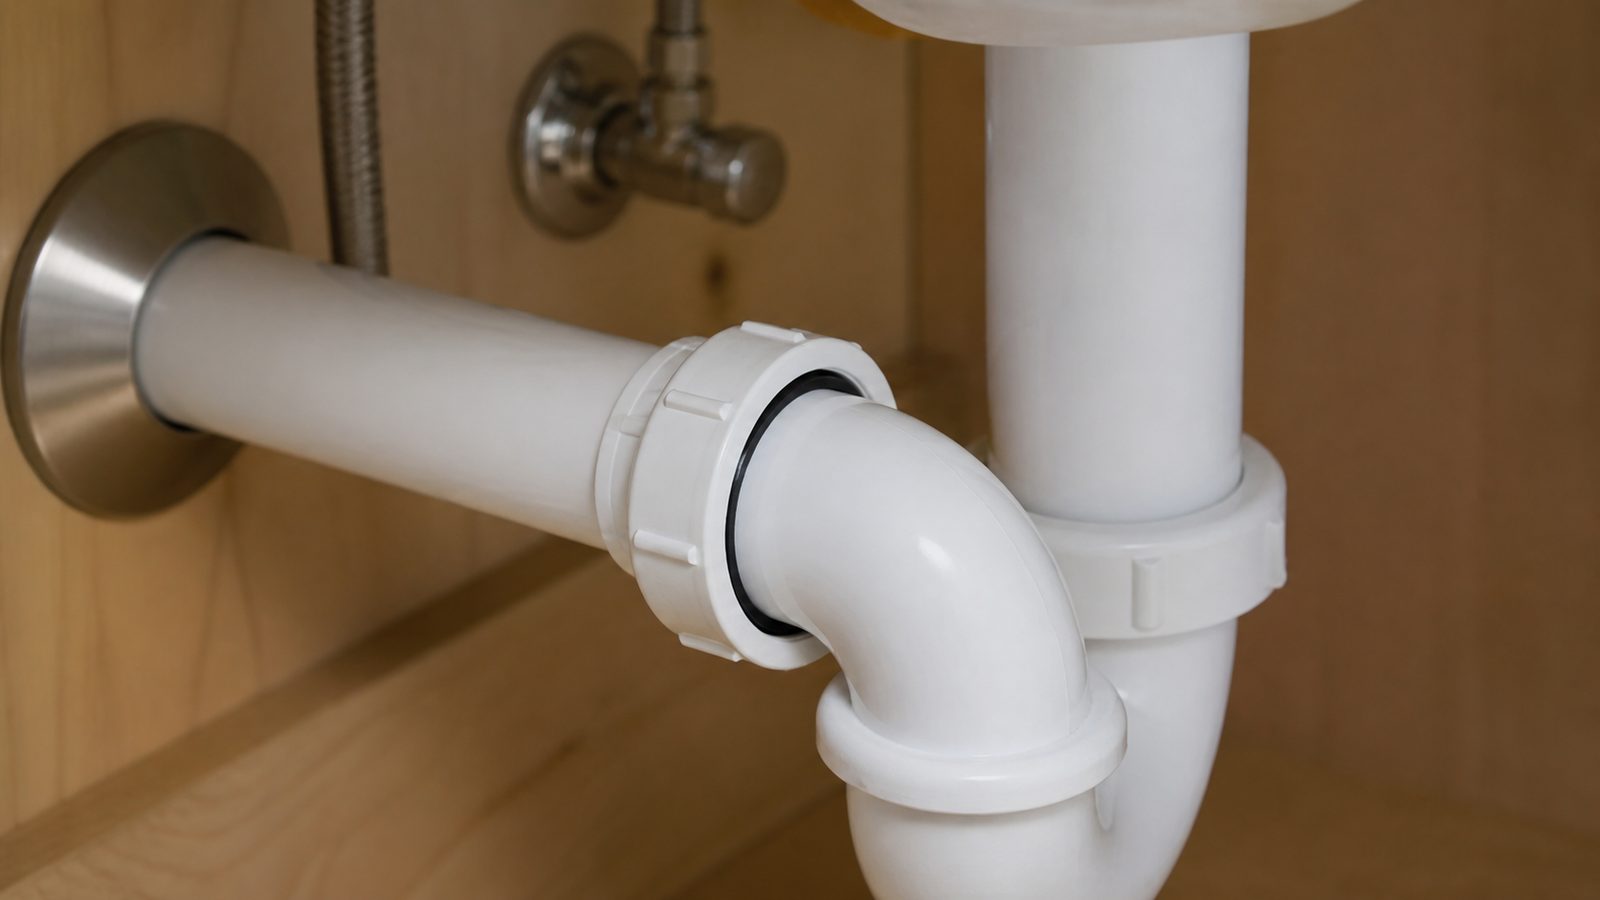
3. Loosen the slip nuts. Back off the nuts at the trap arm, the bottom of the P-trap, and the tailpiece connection. These are hand-tight or close to it, so they usually come off easily. If one is frozen on an older chrome trap, work it gently and avoid twisting the tailpiece, which can break the seal at the sink flange.
4. Remove the old trap and tailpiece, and inspect the pop-up. Let everything drain into the bucket. If the pivot rod is corroded or the stopper won't seat, replace the whole pop-up assembly, not just the trap.
5. Clean the sink opening. If you're replacing the pop-up body, remove the locknut, drop the old flange out from above, and scrape off old putty or silicone with a utility knife down to bare porcelain or stone.
6. Set the new flange. Roll plumber's putty into a rope, press it around the underside of the new flange, and seat it into the drain opening. On cultured marble or engineered stone, use silicone instead, since putty can stain those surfaces. From below, thread the pop-up body and hand-tighten the locknut until the putty squeezes out evenly, then wipe the excess.
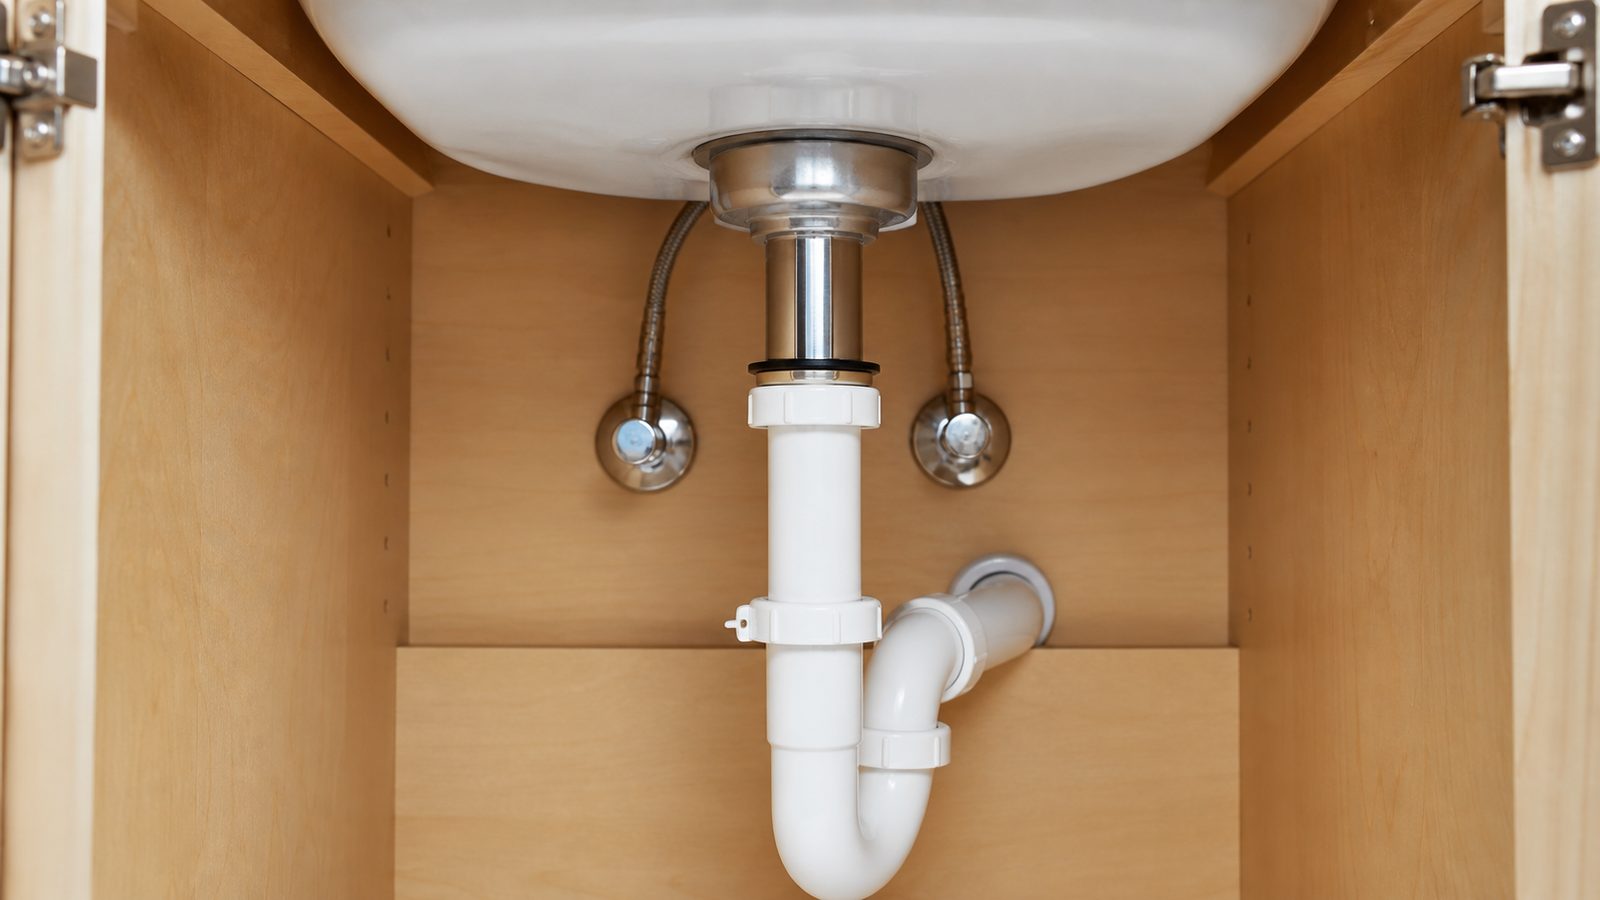
7. Install the tailpiece, sliding it into the pop-up outlet beveled slip washer first.
8. Get the washer orientation right. This is the detail that causes the most repeat leaks. A beveled slip washer always points toward the fitting it's sealing, flat side toward the nut and tapered edge toward the joint. Install one backward and it won't compress into a seal, no matter how hard you tighten the nut, and you'll get a slow drip that's hard to diagnose because everything looks tight.
9. Assemble the P-trap, connecting the bend to the tailpiece and to the trap arm from the wall with slip nuts and washers at each joint. Hand-tighten first, then snug about a quarter turn past hand-tight with pliers. Don't overtighten. PVC nuts crack and even chrome nuts distort and leak under too much torque.
10. Never use thread tape or pipe dope on slip joints. Tape belongs on threaded supply connections. Slip joints seal through compression of the washer against the fitting, not sealant, and tape just makes the nut slide, preventing proper compression.
11. Turn the water back on and test for at least five minutes while it runs and drains, then check again after an hour, since a marginal seal sometimes doesn't show a drip right away.
12. Confirm the trap fills and holds water. A P-trap only does its job when it's holding a standing seal.
Jacksonville Climate Considerations
Jacksonville's humidity works against tubular chrome traps. A vanity cabinet with no ventilation traps moisture, and chrome-plated traps show pitting and corrosion at the joints years before they would in a drier climate. If a chrome trap failed from corrosion rather than a bad washer, switching to PVC below the sink is usually the better long-term move, saving chrome for exposed pedestal sinks where looks matter.
In older Springfield, Riverside, and Murray Hill homes, don't be surprised to find the original galvanized or cast iron stub behind a more modern trap someone installed decades ago. Galvanized fittings corrode from the inside out, so the threads can look fine while the stub is nearly closed with scale. If the new trap won't seat cleanly, or the stub crumbles when touched, that stub needs its own repair, a different job than a straightforward trap swap.
Guest bathrooms have their own problem. In a slab-on-grade Southside or Mandarin ranch with a rarely used guest bath, Florida heat evaporates the water in an unused trap faster than people expect, sometimes within weeks. Once that seal is gone, sewer gas has a clear path into the bathroom, which is usually what people are smelling when they call about a "leak" that's really an empty trap. Running the faucet for thirty seconds every few weeks keeps it sealed.
What It Costs in Jacksonville (DIY vs. Hiring a Pro)
| Scope | DIY Materials | Licensed Plumber, Installed |
|---|---|---|
| P-trap only, PVC | $10 to $25 | $150 to $250 |
| P-trap only, chrome | $20 to $45 | $175 to $275 |
| Full drain assembly (pop-up, tailpiece, trap) | $30 to $70 | $225 to $400 |
| Trap plus stub repair (galvanized or cast iron) | Not recommended as DIY | $350 to $700+ |
Straightforward trap swaps are within reach for most homeowners comfortable with basic tools. Where people get into trouble is the stub repair scenario in older homes, where a simple trap job turns into cutting into a wall, which brings the permit question back into play.
When to Call JK Prestige
If the wall stub is deteriorated, you're dealing with a slab leak, the drain needs to be relocated, or you've replaced the trap and the leak or smell hasn't gone away, that's past a weekend fix. We handle both the diagnosis and the licensed repair, and we'll tell you honestly if what you're facing is a ten-minute job you can do yourself.
No call center. No coordinator. A JK principal reviews every inquiry and replies with a real number, not a range, not a follow-up form.
Request Free Estimate →