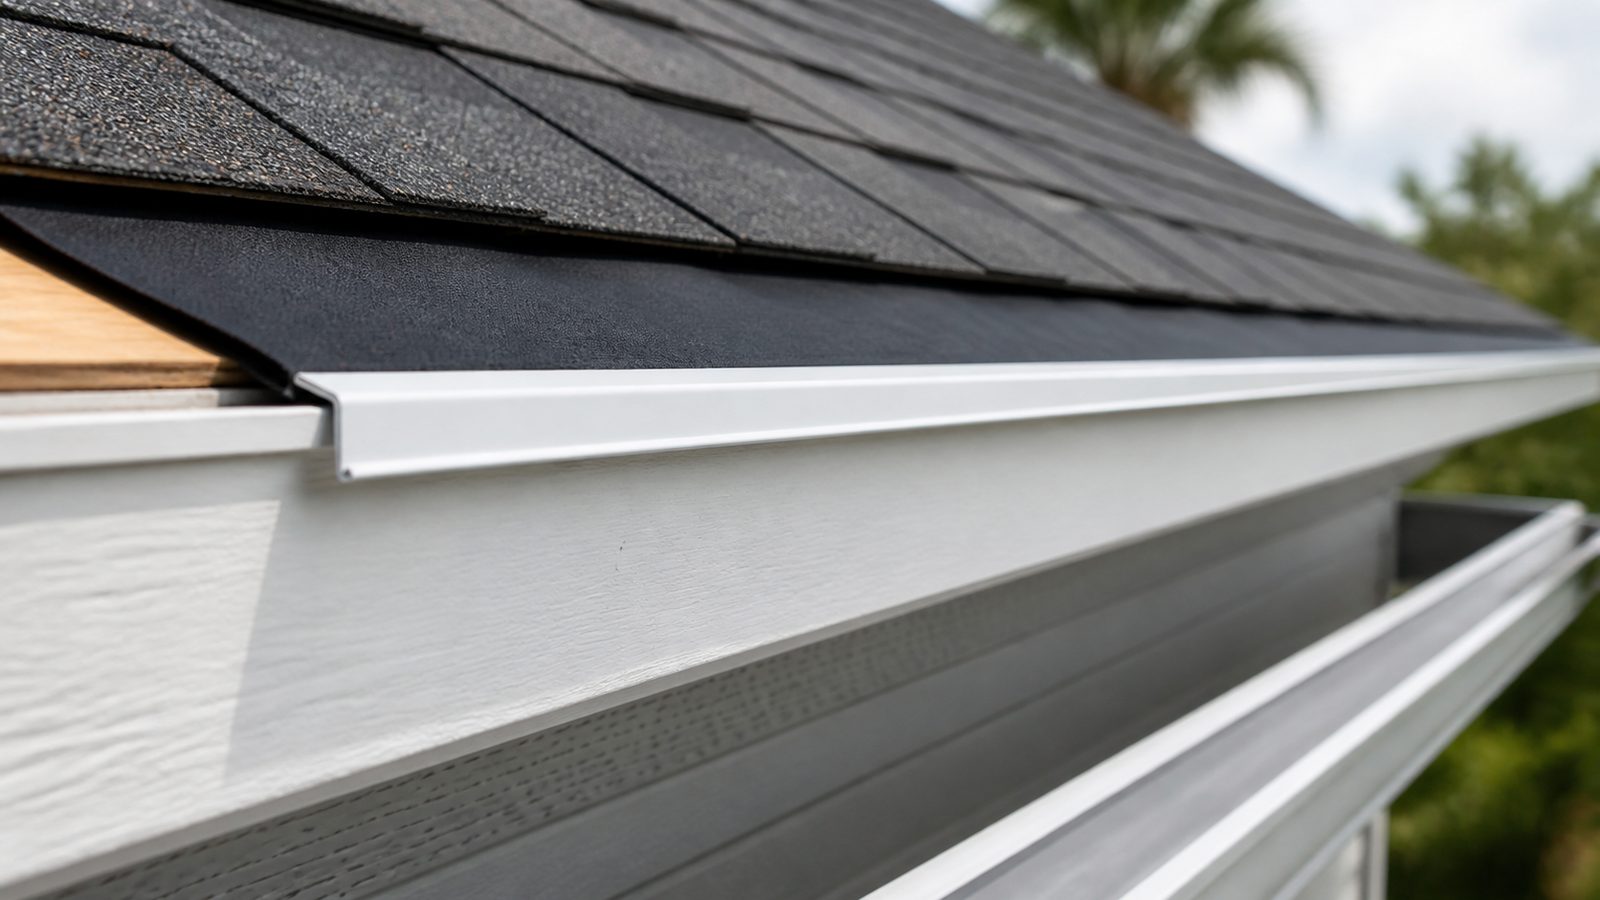
Drip edge is the thin metal flashing that runs along the eaves and rakes of your roof, and it takes more abuse than almost any other piece of metal on the house. In Jacksonville, salt air near the coast and Intracoastal, constant humidity, and driving summer rain go after it every year. When it rusts through or gets bent from a ladder, a falling limb, or a pressure washer nozzle held too close, water starts working its way behind the fascia and into the roof deck instead of running off into the gutter. Replacing a short run of drip edge along an eave is a job a reasonably handy homeowner can do on a single-story house with a stable ladder and a dry weekend. This guide walks through when the city wants a permit, what to buy, how to do the work correctly, what Jacksonville's climate does to this detail specifically, and what it costs whether you do it yourself or call a contractor.
When You Need a Permit in Jacksonville
For most homeowners, replacing a short section of rusted or bent drip edge along an eave, without disturbing the shingles beyond the first course needed to slide the new flashing underneath, falls into the category the City of Jacksonville treats as routine maintenance and repair, similar to patching a small area of shingles. Small like-for-like metal flashing repairs that do not involve re-roofing, do not touch structural sheathing, and are limited in scope are typically the kind of work that does not trigger a separate roofing permit under the Florida Building Code as adopted locally.
That said, the line moves quickly. If your drip edge repair turns into pulling and replacing shingles across a wider section of roof, if you are re-roofing the eave line as part of a larger reroof, or if the work is being done because the fascia or deck underneath is rotted and needs to be replaced, you are now doing roofing work that the Building Inspection Division does require a permit and inspection for. Florida Building Code requires drip edge on new roof installations and full reroofs, and inspectors check for it. Cost thresholds, definitions of "repair" versus "reroof," and what counts as minor maintenance can change and are read narrowly by inspectors who see a lot of homeowners try to squeeze reroofs through as repairs. Before you start, call or check with the City of Jacksonville Building Inspection Division directly with the specific scope of what you're doing. It's a short phone call and it protects you at resale and with your insurer if a claim ever touches the roof.
Tools and Materials
- New drip edge stock, aluminum or galvanized steel, matched in style (Type C or Type D profile) to what's on the roof now
- Tin snips or aviation snips
- Pry bar or flat bar for lifting shingle tabs and pulling old nails
- Hammer or a roofing nailer if you have one
- Corrosion-resistant roofing nails (galvanized or stainless, 1 to 1.25 inch, hot-dip galvanized preferred for coastal exposure)
- Roofing sealant or polyurethane roof cement in a caulk gun
- Chalk line
- Stable extension ladder rated for the height, with a stand-off if working near gutters
- Work gloves and eye protection, the cut edges of metal drip edge are sharp
- A helper to foot the ladder and hand up material
Step-by-Step
- Inspect the full run before you start. Walk the eave and identify every section that's rusted through, bent, or pulling away from the fascia. Rust that's just surface staining can sometimes be wire-brushed and treated, but any drip edge with holes, flaking scale, or a bent lip that no longer directs water into the gutter needs to come out.
- Set up the ladder safely. Footing on a firm, level surface, tied off or footed by a helper, angled properly. This is the step most people rush and it's where injuries happen. If the eave is two stories up or the roof pitch is steep enough that you'd need to get onto the roof surface itself to work, this is a job to hand to a professional rather than push through on a ladder.
- Lift the first course of shingles. Roofing shingles overlap the top edge of drip edge, so you need to gently pry up the tabs of the first row above the section you're replacing. Warm shingles (afternoon sun helps) flex more easily and are less likely to crack. In cooler weather, work slowly.
- Remove the old nails and drip edge. Pull nails with a flat bar rather than yanking the metal, which tears the fascia and roofing felt or underlayment. Slide the damaged section out from under the shingle edge.
- Cut and fit the new piece. Measure the run, cut new drip edge to length with tin snips leaving a couple inches of overlap where two pieces meet, and dry-fit it before nailing. The drip edge should extend past the fascia so water drips clear of it into the gutter, not run down the face of the fascia board.
- Nail it in place. Drive nails through the top flange of the drip edge into the roof deck, spaced roughly every 12 inches, staying high enough that the nail heads will sit under the shingle once it's laid back down. Do not nail through the face of the drip edge where it will be exposed.
- Seal every nail head and overlap joint. This is the step people skip and it's the one that determines whether the repair lasts. Dab roofing sealant over each nail head and run a bead along any overlap seam between pieces of drip edge. Jacksonville's rain volume finds any pinhole left unsealed.
- Lay the shingle tab back down and re-nail or reseal it with a dab of roofing cement under the tab if the adhesive strip lost its bond when you lifted it.
Jacksonville Climate Considerations
Jacksonville sits in a wind-borne debris region under the Florida Building Code, particularly the closer you get to the beaches, so any exposed metal edge on the roof needs to be properly fastened and sealed to hold up in high wind events, not just look tidy on a calm day. Salt-laden air off the coast and the Intracoastal accelerates corrosion on plain steel drip edge, which is why aluminum or hot-dip galvanized steel with a factory coating holds up longer here than bargain uncoated steel. Intense UV exposure through most of the year breaks down cheap sealants faster than in milder climates, so use a quality roofing-grade sealant rather than general-purpose caulk. Heavy, sudden summer downpours put real volume through the eave and gutter system fast, which is exactly why a drip edge that's bent or rusted through causes fascia rot quickly once it starts letting water track behind the board instead of off the roof edge.
What It Costs in Jacksonville (DIY vs. Hiring a Pro)
These are rough, unofficial estimates based on typical Jacksonville-area material and labor pricing. Get an actual quote for your specific run length and roof condition.
| Approach | Typical Cost Range | Notes |
|---|---|---|
| DIY, materials only (per 20-30 ft run) | $60 - $150 | Aluminum drip edge, nails, sealant, basic tools |
| Contractor, single-story eave repair | $300 - $700 | Includes labor, disposal of old metal, sealant |
| Contractor, whole-house drip edge replacement | $1,200 - $3,500+ | Depends on linear footage, roof height, and fascia condition |
| Add-on if fascia is rotted and needs replacement | $8 - $18 per linear foot | Carpentry work beyond the flashing itself |
When to Call JK Prestige
If the drip edge damage is limited to a short, easily reached section of a single-story eave and you're comfortable on a ladder, this is a manageable weekend project. Call a professional if the run is long, the roof is steep or two stories, you find rot in the fascia or roof deck once the old drip edge comes off, or the damage is spread across multiple sections of the roofline, which usually points to a bigger issue than one bad piece of metal. JK Prestige Constructor Corp works on eave, fascia, and roofing repairs across Jacksonville and can assess whether what you're looking at is a simple flashing swap or a sign of a larger roof edge problem worth addressing before it spreads.
No call center. No coordinator. A JK principal reviews every inquiry and replies with a real number, not a range, not a follow-up form.
Request Free Estimate →