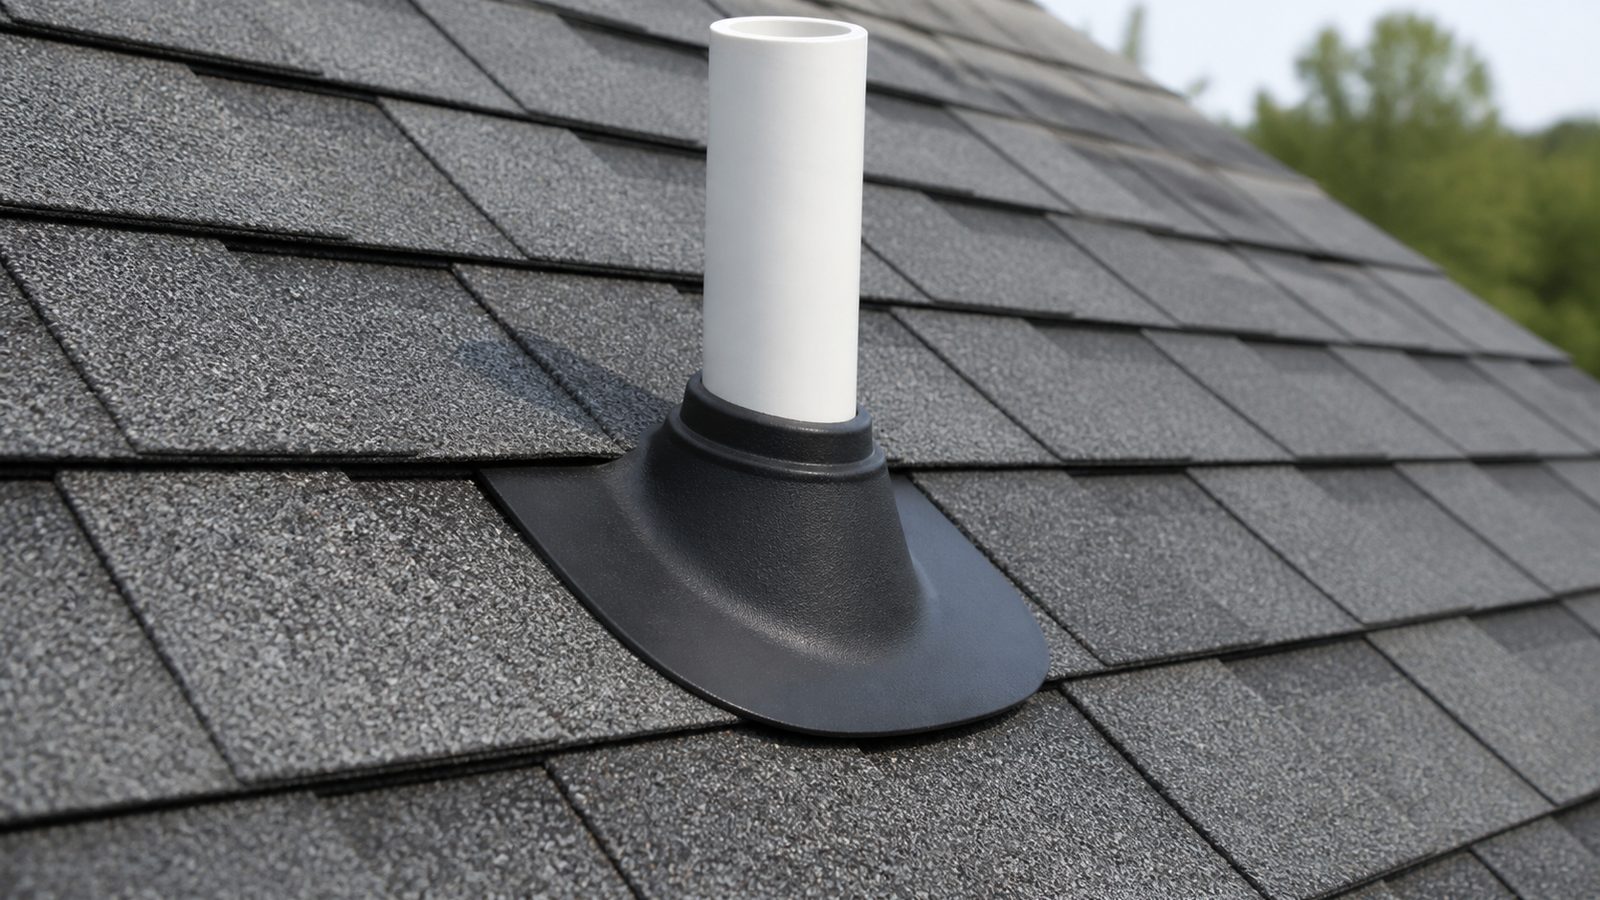
If you have a water stain spreading across a ceiling near a bathroom or kitchen wall, and there is no obvious plumbing leak inside the house, the culprit is often a cracked or dried-out pipe boot on the roof. A pipe boot, sometimes called plumbing vent flashing, is the rubber or plastic collar that seals around the pipe sticking up through your roof deck. In Jacksonville, our combination of intense UV exposure and long, humid summers is hard on these rubber seals, and they tend to fail well before the shingles around them do. Replacing one is a manageable weekend project for a homeowner who is comfortable on a ladder and on a roof, but it is also one of the most common small repairs we get called out for, usually after someone tried it once and the new boot still leaked.
When You Need a Permit in Jacksonville
For a straightforward, like-for-like pipe boot swap, in most cases you are looking at a minor repair rather than a reroofing project, and minor repairs of this kind generally fall outside what the City of Jacksonville and Duval County Building Inspection Division require a permit for. The work does not touch structural framing, does not expand the roof's footprint, and typically involves removing a small section of shingles around the pipe, swapping the boot, and reinstalling or replacing those shingles.
That said, do not treat this as a blanket rule for your specific situation. Permit requirements can hinge on the scope of work, the age and condition of the surrounding roofing, and whether the repair is being done as a standalone fix or bundled into other roof work. Before you start, it is worth a quick call to the City of Jacksonville Building Inspection Division to confirm that your specific repair qualifies as exempt.
What clearly does trigger a permit under the Florida Building Code is any reroofing work, meaning replacement of the underlayment and roof covering across a full slope, section, or the entire roof, along with most work that involves altering roof sheathing or decking. If your roofer finds rot in the decking around the pipe boot and needs to cut out and replace plywood, that pushes the job into permit territory even if it started as a simple boot replacement. If you are already planning a full or partial reroof, the pipe boots should be replaced as part of that permitted project rather than patched separately.
Tools and Materials
- New pipe boot flashing sized to match your vent pipe diameter (2 inch, 3 inch, and 4 inch are the common sizes)
- Roofing nails or coil nails rated for exterior use
- Roofing cement or a compatible sealant
- Flat pry bar or shingle removal tool
- Hammer or roofing nailer
- Utility knife
- Caulk gun
- Replacement shingles matching your existing roof (keep spares on hand after any past roof work for exactly this purpose)
- Fall protection: harness and roof anchor, or at minimum a sturdy extension ladder with someone spotting
- Work gloves and non-slip roofing shoes
Step-by-Step
- Inspect the boot from the attic first if you can access it, looking for daylight or water staining around the pipe penetration, then confirm the failure from the roof surface. Cracked rubber, gaps between the boot and pipe, or lifted nail heads are the usual signs.
- Set up safe roof access. Jacksonville roofs are often steeper than people expect from the ground, and summer afternoon rain can make shingles slick with almost no warning, so check the forecast before you climb up.
- Carefully pry up the shingles surrounding the old boot using a flat bar, working from the top down so you do not tear shingles you plan to reuse.
- Remove the nails holding the old boot flange in place and lift the failed boot off the pipe.
- Clean the area of old roofing cement and debris so the new boot will seat flat against the deck.
- Slide the new boot down over the pipe until the flange sits flush on the roof deck.
- Nail the flange down at each pre-punched hole, using roofing nails long enough to bite into solid decking.
- Seal every nail head and the top edge of the flange with roofing cement.
- Reinstall the shingles you lifted, working from the bottom row up, nailing each course and sealing the cut edges with roofing cement.
- Check the boot collar itself for a tight seal against the pipe. On older style boots, a bead of sealant around the pipe collar adds insurance against UV cracking down the road.
- Run water inside from a nearby fixture or hose down the area from above and check the attic for any sign of intrusion before you consider the job done.
Jacksonville Climate Considerations
Northeast Florida's UV index runs high most of the year, and that sun exposure is the number one reason pipe boots fail here faster than the shingles around them. Standard rubber boots often break down in five to eight years under our sun, so if your roof is older than that, check every boot on it while you are up there, not just the one that is currently leaking. Salt-laden air near the coast and the river can also accelerate corrosion on exposed roofing nails and metal flashing components, so galvanized or stainless fasteners hold up better than bare steel. Because we sit in a hurricane-exposed wind zone, make sure the shingles you reinstall around the repair are properly nailed and sealed, since a poorly resealed patch is a common place for wind to get a foothold during a tropical system. If you are doing this work between June and November, keep a close eye on the radar, since Jacksonville's summer storm pattern can turn a 20 minute repair into a rushed, unsafe scramble to close up the roof.
What It Costs in Jacksonville (DIY vs. Hiring a Pro)
| Approach | Estimated Cost Range | Notes |
|---|---|---|
| DIY materials only | $15 to $50 | Boot, nails, cement, and shingle patch materials for one penetration |
| Professional single boot replacement | $150 to $400 | Includes trip charge, labor, and materials for one boot |
| Professional, multiple boots on one visit | $300 to $700 | Common when a roofer replaces all boots preventively during a service call |
| Related decking repair, if rot is found | $200 to $600+ | Adds material and labor for cutting out and replacing damaged plywood |
These are rough planning ranges for the Jacksonville market, not quotes. Actual pricing depends on roof pitch, pipe size and count, shingle matching, and access difficulty.
When to Call JK Prestige
If you are not comfortable on a roof, if the leak has already caused ceiling or attic damage, or if you pull back the shingles and find soft or discolored decking, that is the point to call in a professional rather than push through it yourself. We can also tell you quickly whether what looks like a small boot leak is actually a sign of broader roof age that is worth planning for now rather than patching repeatedly. As a principal-led local contractor, we look at the whole roof while we are up there, not just the one spot you called about.
No call center. No coordinator. A JK principal reviews every inquiry and replies with a real number, not a range, not a follow-up form.
Request Free Estimate →