A standing seam metal roof is one of the most durable roofing systems available for residential construction in Florida. Installed correctly, it lasts 40–60 years, carries wind resistance ratings above 130 mph, and requires virtually no maintenance beyond periodic inspection. The problem is that "installed correctly" involves a specific sequence of steps — many of which homeowners have no visibility into until something goes wrong.
This post walks through the full installation process: permit pull, tear-off, deck inspection, underlayment, clip installation, panel rollforming, seaming, trim work, ridge cap, and final inspection. Timeline on a residential installation: 3–5 days for most homes up to 3,000 sqft.
JK Prestige self-performs roofing installations in Jacksonville and surrounding areas. Our own crews handle every phase of this sequence — there is no handoff to a roofing-only subcontractor mid-project.
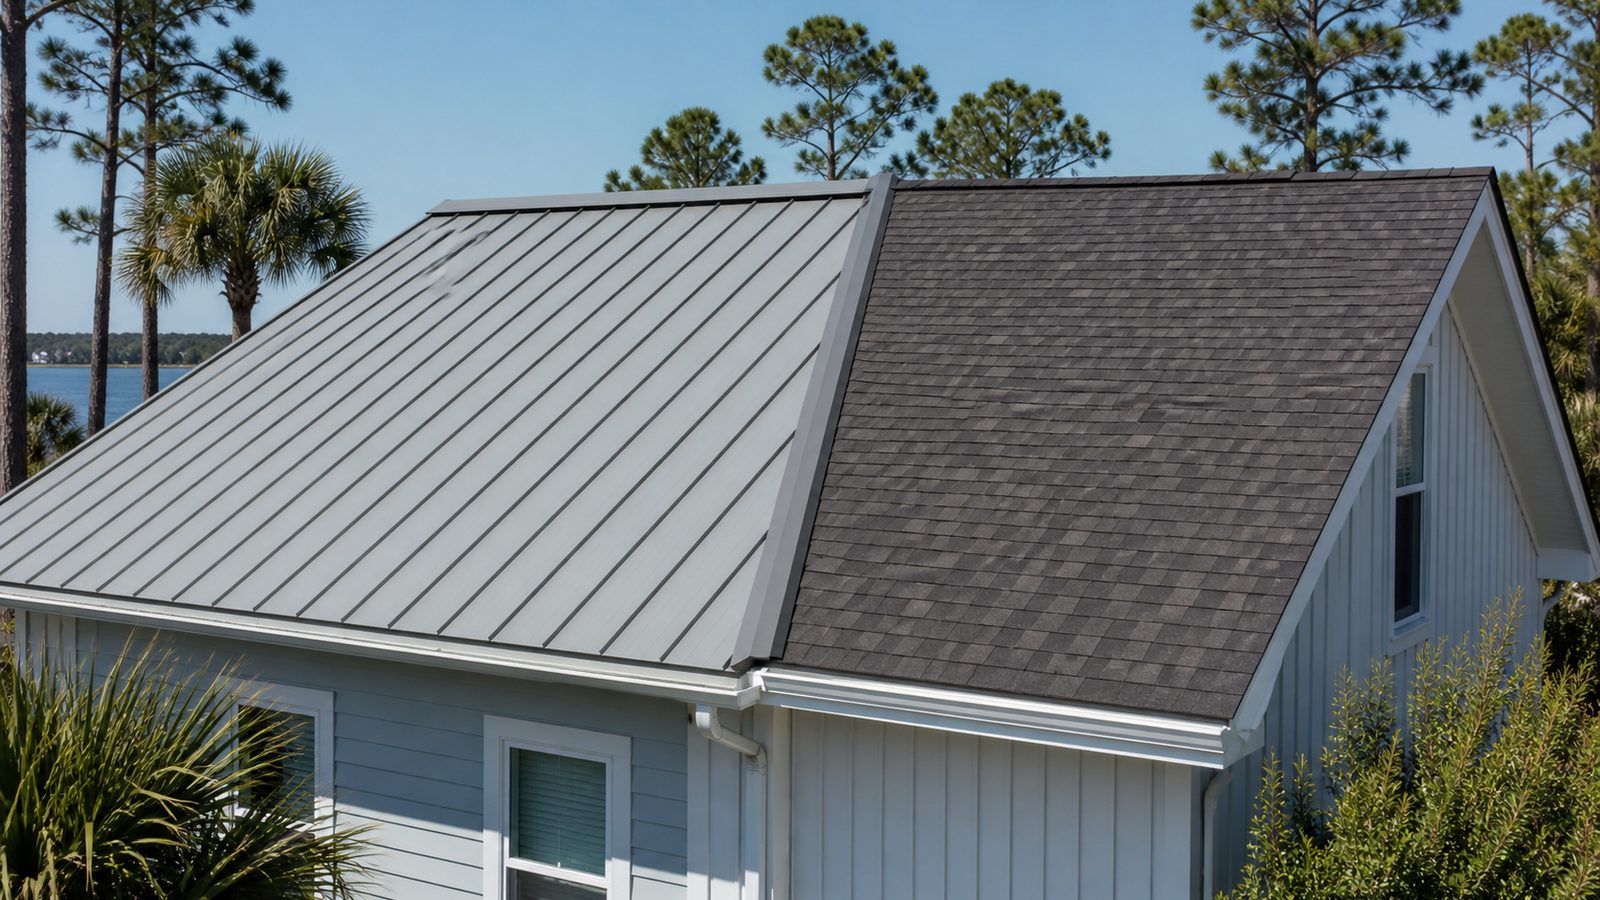
Step 1: Permit Pull and FBC Requirements
No legitimate standing seam installation in Jacksonville begins without a permit. Duval County requires a roofing permit for any full replacement, and inspectors verify:
- FBC wind uplift compliance: Jacksonville sits in a 130–140 mph design wind zone. Standing seam clip spacing must match the engineer's uplift calculations for the specific panel profile and panel width.
- Underlayment specification: Florida Building Code requires a secondary water barrier (SWB) on steep-slope roofs. The SWB must meet ASTM D4869 or be a self-adhering membrane — not a standard felt.
- Contractor licensing: The permit application requires the contractor's license number. If your roofing contractor can't pull a permit in their own name, that's a problem.
JK Prestige pulls every permit before mobilizing. The permit number goes into the job file, and we schedule inspections at the correct phase gates. No exceptions.
Permit review in Duval County typically takes 3–7 business days for residential roofing. Factor this into your scheduling window before any tear-off begins.
Step 2: Tear-Off and Deck Exposure
Tear-off is the first day of active work on a standing seam installation. The sequence:
- Remove all existing roofing material down to the roof deck — shingles, felt, drip edge, flashing, and any existing metal panels if this is a replacement.
- Inspect and photograph the exposed deck. Plywood or OSB sheathing must be dry, fastened securely, and free of soft spots. We walk every square foot.
- Mark and repair damaged sections. Rotted or delaminated sheathing gets replaced. This is not optional — installing a 40-year roof over a compromised deck wastes the investment. Typical deck repairs add $2–$5 per sqft of damaged area.
- Install new drip edge along eaves before underlayment goes down.
The deck inspection step is where JK crews document what we find in writing and photograph every repair. If additional deck damage is found during tear-off, we notify the owner with photos and a written cost before proceeding. The price doesn't change if the scope doesn't change — but scope changes from hidden deck damage are disclosed and documented in real time.
Step 3: Underlayment — FBC Requirements for Standing Seam
Florida Building Code for steep-slope roofing (above 2:12 pitch) requires a secondary water barrier (SWB). For standing seam installations, there are two common approaches:
- Self-adhering modified bitumen underlayment (SAM): Applied directly to the deck before panels go on. The most common choice for standing seam in Florida because it creates a true secondary water barrier without fasteners that could compromise the deck in a hurricane event. Products like Grace Ice & Water Shield or Carlisle WIP 300HT are specified.
- Two-layer felt system: #30 felt mechanically fastened, then a cap sheet. Meets code but provides less water resistance than SAM at laps and penetrations.
JK Prestige specifies self-adhering underlayment on all standing seam installations by default. The cost difference over a felt system is modest — typically $0.30–$0.50/sqft — and the waterproofing performance difference is substantial in Florida's wet season.
Underlayment goes on in a specific direction: start at the eave, work toward the ridge, lap each course minimum 6 inches. Valley underlayment and penetrations get an additional layer of SAM flashing before panel installation.
Step 4: Clip Installation Pattern
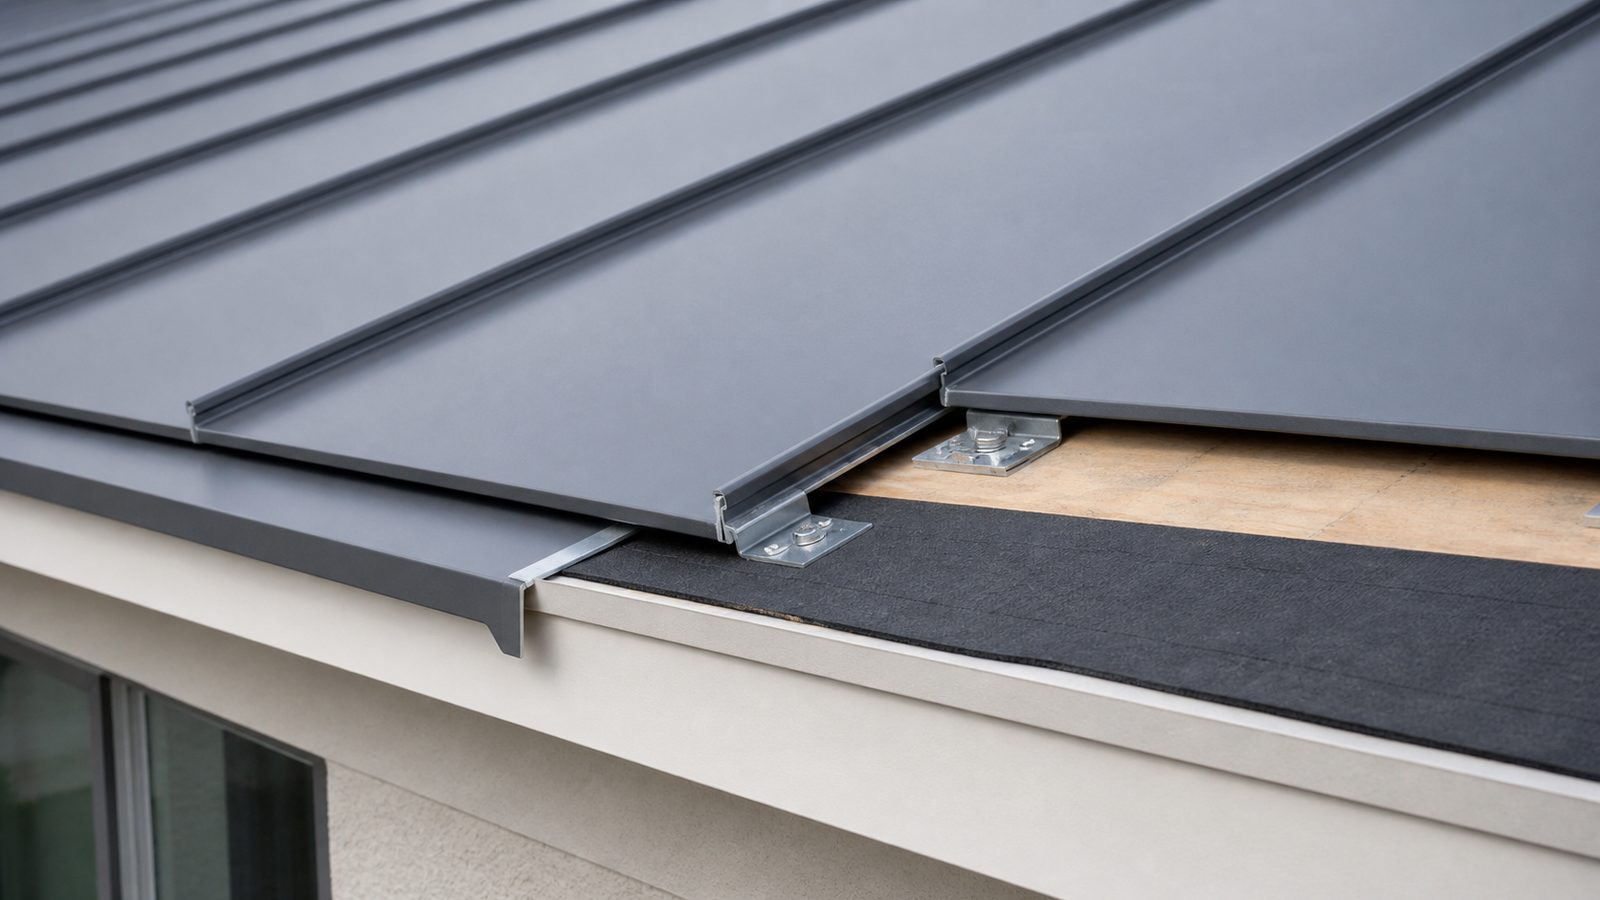
Clips are the hidden fasteners that secure standing seam panels to the deck. They are the structural connection between the roof and the building — and clip spacing drives whether the system passes wind uplift testing.
On a typical residential standing seam installation in Jacksonville:
- Clip spacing: 12–24 inches on center, depending on the panel profile, panel width, roof zone (field vs. perimeter vs. corner), and the wind uplift requirements from the engineer's calculations. Corner zones require tighter clip spacing — sometimes 6–8 inches — because that's where wind uplift loads are highest.
- Clip type: Fixed clips vs. floating clips. Floating clips allow thermal expansion and contraction of metal panels, which is critical in Florida's climate where panel surface temperatures can swing 80–100°F between summer and winter. Fixed clips on long panel runs cause oil-canning (visible waviness) and, in extreme cases, fastener pull-out from thermal stress.
- Fastener specification: Screws must be approved for the specific deck material. OSB vs. plywood vs. structural steel deck all require different fastener specifications.
Clip installation is documented row by row. The inspector verifies clip spacing against the engineer's uplift schedule during the rough inspection phase.
Step 5: Panel Rollforming — On-Site vs. Pre-Fab
Standing seam panels are formed from coil stock — either on-site using a portable rollformer, or pre-fabricated at a shop and delivered in cut lengths.
On-site rollforming:
- Panels are cut to exact length on the roof or on the ground adjacent to the building.
- Eliminates transport damage on long panels.
- Reduces waste — each panel is cut to the precise run length, accounting for roof irregularities.
- JK Prestige uses on-site rollforming on most residential installations where panel runs exceed 20 feet.
Pre-fabricated panels:
- Ordered in cut lengths from a metal supplier.
- Required for Kynar-coated or special-alloy panels (copper, zinc, Cor-Ten) that can't be formed on a portable machine.
- May have longer lead times (3–10 days) that affect scheduling.
Panel material choices: Galvalume steel is the standard specification for most Jacksonville residential work — corrosion-resistant, paintable, typically 24 or 26 gauge. Aluminum costs more but is preferred within two miles of saltwater due to better corrosion resistance. Paint system is typically Kynar 500 or equivalent PVDF fluoropolymer coating for color retention.
Step 6: Seaming
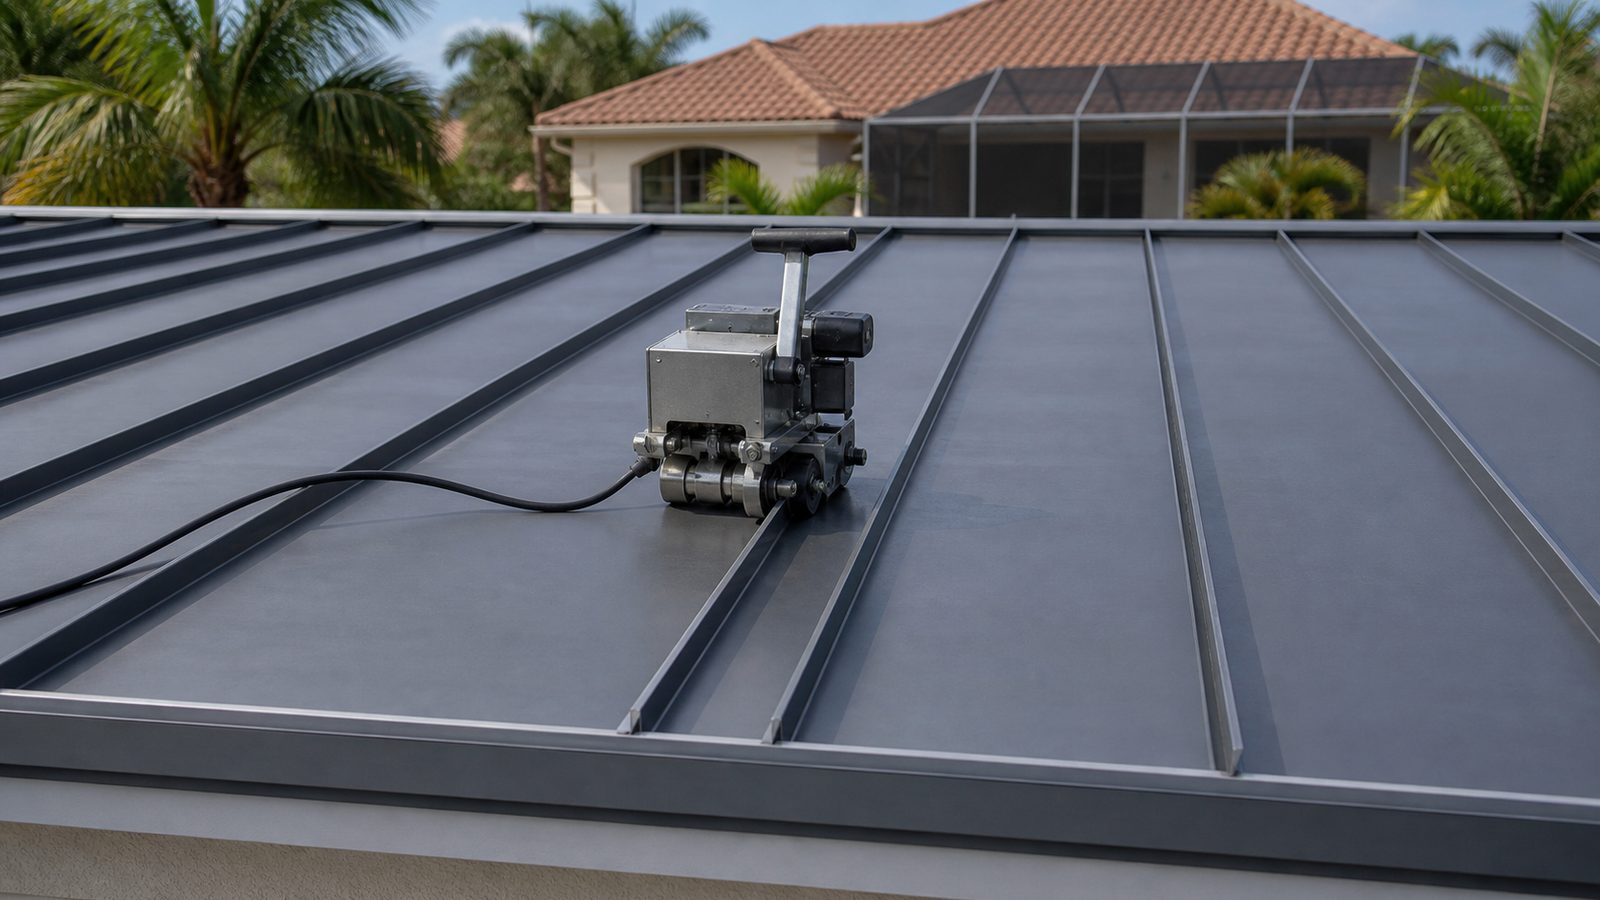
Panels interlock at the seam — the raised leg of one panel folds over and locks to the adjacent panel. Seaming is done by machine (mechanical seamer) or by hand depending on the panel profile.
Snap-lock panels: Panels snap together by hand. Faster installation. The seam height is typically 1.5–1.75 inches. Appropriate for most residential pitches above 3:12.
Mechanical-lock panels: A power seamer rolls along the seam and folds the metal into a locked profile. Used on lower pitches (2:12 to 3:12) and on commercial applications where wind uplift requirements demand a tighter seam. More labor-intensive but produces a stronger seam.
Seaming is done continuously from eave to ridge on each panel run before moving to the next. Skipping ahead and going back creates alignment problems at transverse seams.
Step 7: Trim, Flashing, and Ridge Cap
Trim and flashing details are where most metal roof failures originate — not in the field panels. Every penetration (plumbing vents, HVAC curbs, skylights, chimneys) requires field-fabricated flashing that integrates with the standing seam panel.
Chimney flashing on a standing seam installation is not the same as asphalt shingle flashing. Step flashing and counter-flashing must be fabricated to match the panel rib height. A roofer who uses the same flashing detail for standing seam as for shingles is doing it wrong.
Ridge cap: Installed last. The ridge cap covers the top of all panel runs and is typically mechanically fastened through a cleat into the ridge board. Sealant is used at the cap ends, not along the full length — metal needs to move with thermal expansion.
Step 8: Final Inspection and Wind Uplift Testing
Duval County requires a final roofing inspection before the permit closes. The inspector verifies:
- Clip spacing matches the engineer's uplift schedule
- Underlayment installation meets FBC requirements
- Penetration flashing is properly installed
- Ridge cap and trim are correctly fastened
Wind uplift testing (ASTM E1592 or FM 4474) is not always required for residential work but may be specified by the owner's insurance carrier or required on commercial projects. JK Prestige documents the clip schedule and material specifications in a format that supports insurance carrier review.
Once the final inspection passes, the permit closes and the manufacturer's warranty can be registered.
Warranty Coverage on Standing Seam Metal Roofing
A properly installed standing seam roof carries two layers of warranty coverage:
- Manufacturer material warranty: Typically 40 years on painted Galvalume steel; lifetime on premium Kynar-coated systems from manufacturers like MBCI, Drexel Metals, or McElroy Metal.
- Contractor workmanship warranty: JK Prestige provides a written workmanship warranty. A named principal handles all warranty claims in the first year post-installation — not a warranty department.
See how JK Prestige structures warranties and post-project accountability before you sign any roofing contract.
Book a Free Roof Inspection
If you're evaluating standing seam for a Jacksonville home or commercial building, start with a site walk. JK Prestige provides a free 24-point roof inspection with a written report — existing condition, deck assessment, material recommendation, and a fixed-price estimate in 48 hours.
Book your free inspection or call (904) 944-0278. A principal answers.
No call center. No coordinator. A JK principal reviews every inquiry and replies with a real number, not a range, not a follow-up form.
Request Free Estimate →